
Extruder Clicking/Slipping? Here Are 6 Common Causes and Their Fixes
At 3DSourced we’ve covered everything 3D printing and 3D since 2017. Our team has interviewed the most innovative 3D printing experts, tested and reviewed more than 20 of the most popular 3D printers and 3D scanners to give our honest recommendations, and written more than 500 3D printing guides over the last 5 years.
An extruder is supposed to release filament as smoothly as possible. But when it starts clicking/slipping, it’s a clear red flag that there’s something wrong. Extruder clicking usually indicates that a motor is overloaded, but why does it happen in the first place?

What Causes Extruder Clicking or Slipping?
An extruder will click or slip if the nozzle is too close to the print bed or if you’re printing at a fast speed and low temperature. A tight extruder, blocked nozzle, and friction in the Bowden tube will also get your extruder motor clicking. All these scenarios force the extruder motor to do more work than it can, leading to a clicking noise.
This article goes into the details of why you’re having a clicking or slipping problem in your extruder and, more importantly, how to fix it.
Why Your Extruder Is Clicking/Slipping and How To Fix It
1. Incorrect Distance Between Nozzle And Build Platform
If your nozzle is too close to the print bed, the filament will not flow out smoothly. This causes a pressure increase in the printer, particularly in the extruder’s stepper motor.
The extruder’s stepper motor regulates the movement of filament into the hot end for melting, so if there’s a blockage ahead of it, it will have to do more work to push the filament out. The overload can cause the motor to make a clicking sound.

To know whether your nozzle is too close to the bed, notice how it extrudes filament for the first few layers of the print. If no filament comes out until the bed lowers, it’s time to increase the distance between the nozzle and the print bed surface.
How To Fix
The first remedy is to level your print bed. We want to make sure that it’s even at all points. When the print bed is uneven, the nozzle will be too close to the bed’s surface in some areas, and too far from it in others.
Leveling your build platform is something you can do either manually or automatically.
If you’re doing it manually:
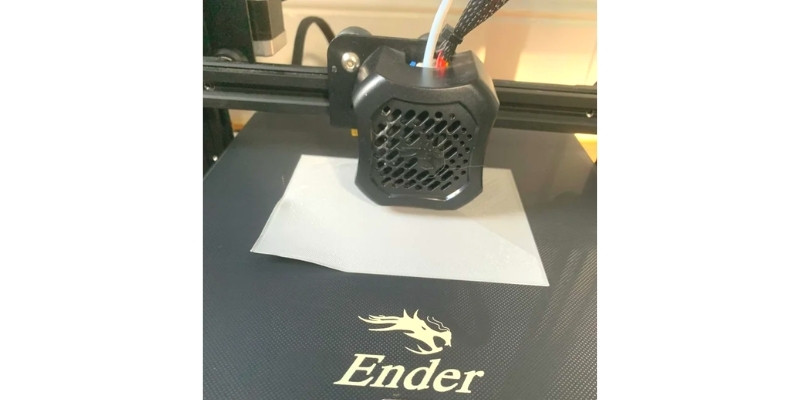
- Simply place a piece of A4 paper between the nozzle and the print bed.
- Try to slide the piece of paper along the bed and notice how it moves. If there’s no resistance, it means the nozzle is too far away from the bed. But if the paper remains firmly in place when you try to slide it away, it means the nozzle is too close to the bed. The ideal distance should be one where the paper can slide along the bed’s surface with some resistance.
- Try to look for the right nozzle-to-bed distance by tweaking the bed leveling knobs on your printer at different points along the print bed. Do this at all four corners and the center of the print bed. When you’re done, this should give you a relatively more even build platform.
If doing things manually is not your cup of tea, there’s another option. Today, many FDM printers come with an auto bed leveling feature. It uses a sensor, called a Z-probe, that measures how flat the print bed is along different points. Alternatively, you can buy an auto-leveling kit such as CRTouch or BLTouch.
Interestingly, auto bed leveling does not physically change the flatness of the print bed. In other words, it’s not going to manually change the shape of the print bed and make it even at all points.
Instead, it instructs the printing head to adjust its movements depending on where there’s a contour, dent, or any form of unevenness across the bed. That way, it compensates for any deformities that could have formed due to areas on the bed that aren’t leveled.
Another way of making sure your nozzle is not too close to the build plate is by reconfiguring the Z-offset value on your printer.
This setting shifts the height of the print bed by bringing it either above or below its default position.
Changing this setting comes in handy sometimes. For example, if you’re printing on a PEI sheet, you may lower the print bed position to compensate for the extra thickness of the sheet.
In some situations, you might need to change your Z-offset value because of the filament you’re using. Changing your bed positions according to your filament is something you have to experiment with over time.
For example, PLA gets better adhesion when the nozzle is closer to the print bed. PETG, on the other hand, prints better at a slightly higher position.
To change this value:
- Go to your slicer settings and find the Z-offset parameter.
- Add a positive value of about 0.05 millimeters.
- Next, run a print test. If you don’t notice any more clicking, you’ve successfully adjusted your nozzle position to the correct level.
Sometimes, your print bed will still be uneven even after attempting to level it. This is common when a bed has warped. In that case, consider using a glass build plate on top of your build platform during your printing session.
2. Fast Printing Speed
Printing speed represents how fast the motors in your printer move. Ultimately, this is what determines how quickly the nozzle moves over the build plate.
Sometimes we want a fast printing speed to get things done quickly. However, getting a print done quickly can come at the expense of quality. At high printing speeds, you’re more likely to see artifacts in your final print.
Moreover, if you’re printing at high speed, chances are that the filament is not getting enough time to heat up and melt.
When this happens, the extruder pushes out filament that is only partially melted. The semi-solid filament eventually clogs up the nozzle and prevents a smooth flow of the molten filament.
The blockage then creates pressure on the extruder, making it click as it tries to do more work to push out the filament.
How To Fix
To fix this problem, slow the printing speed to allow the filament to heat up and melt properly.
Remember that printing speed is never a one-size-fits-all setting.
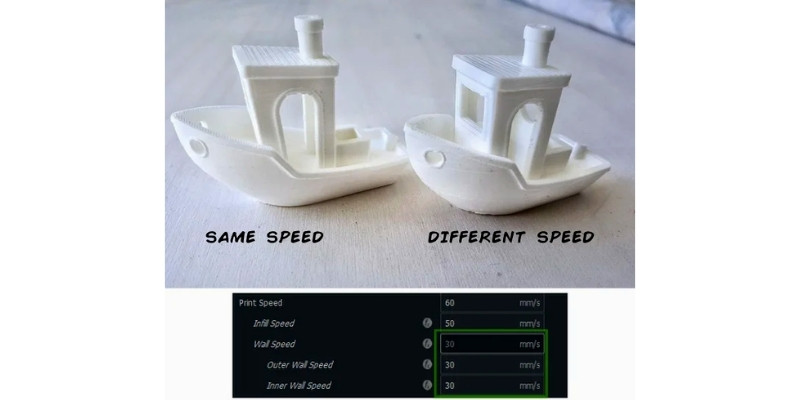
Most 3D printing happens between printing 40mm/s to 100 mm/s, with the optimum being around 60 mm/s.
A rule of thumb is to lower the speed to about 35 mm/s and gradually increase it by 5 mm/s until you get a decent print quality with no clicking in your extruder.
A reasonable printing speed depends on many factors, including the type of printer and the filament you’re using. For example, if you’re printing with tough filaments or flexibles, you’ll want to print slower, at around 30mm/s.
High-quality printers can withstand fast printing speeds without compromising quality, yet the same speed setting on a low-grade printer could create a poor-quality print. So, refer to your printer manual to know its range.
Also, the type of filament you use affects your print speed settings. For example:
- ABS and PLA print at a recommended speed of 40 mm/s to 60 mm/s
- PETG prints well at 50 to 60 mm/s
- TPU at 15 mm/s to 30 mm/s
Adjusting your printing speed is an iterative process that requires a couple of tries before nailing the speed that works for you. To sum it up, you want a printing speed that delivers a consistent flow of filament without any clicking.
3. Low Printing Temperature
Just like print speed, printing at a low temperature can affect how the filament comes out of the nozzle.
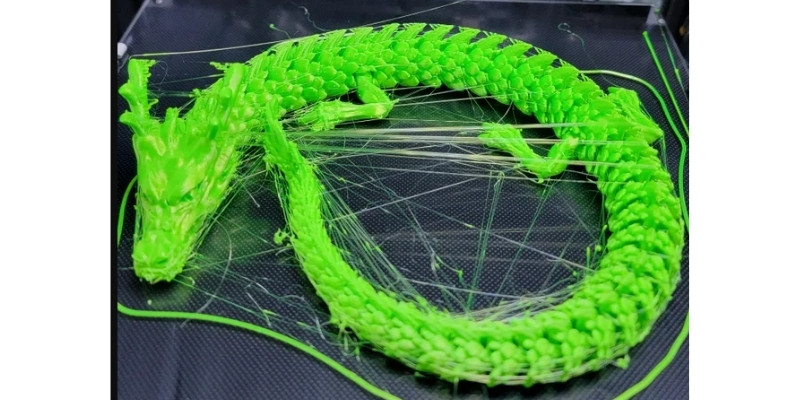
At a low extrusion temperature, the filament will not melt fully, causing the extruder to extrude lumpy material – and you may get models with blobs and zits on them.
This may end up clogging the nozzle and forcing the extruder to work harder than it should. The result is the extruder skipping steps and some noticeable clicking noises.
How To Fix
The best fix is to raise the extrusion temperature to an appropriate level. Each manufacturer has unique specs, so be sure to check out the recommended temperature for the filament you’re using.
Besides that, printing temperature can depend on the type of printer you’re using and other slicer settings.
After you identify the manufacturer’s printing temperature of your filament, feel free to fine-tune that value until the filament flows out uniformly from the nozzle.
4. Blocked Nozzle
If something is blocking your nozzle, you might hear your 3D printer extruder clicking due to a build-up of pressure inside it. You’ll notice that the nozzle releases little or no filament and does not move along the spool.
As previously explained, printing at a low temperature and high speed can block the nozzle.
Other reasons why your nozzle could get blocked include:
- Leaving a printer with a heated nozzle idle
- Impurities in the filament
- Dust and debris collecting at the nozzle
- Printing at different temperatures after switching to a new filament
- Not cleaning the nozzle regularly
How To Fix
For starters, the best way to prevent a stuffed nozzle is frequently using cleaning filament. But if your nozzle is wholly or partially blocked, you can use a few tricks to clear it.
You can start with the cold pull method. It involves using a cold filament to pull any stuck material out of the nozzle. The best filament for unclogging the nozzle is the same exact filament you used during your last printing session.
To perform a cold pull:
- Reverse feed the filament from the printer.
- If your printer has a Bowden tube, disconnect it from the print head.
- Heat the print head to the printing temperature of the last filament you used.
- Insert the cold filament down the print head and apply pressure as the nozzle extrudes material.
- Lower the temperature of the print head to 145°C for nylon, 90°C for PLA, and 110°C for ABS.
- Pull the filament out.
5. Friction In The Bowden Tube
Some extruders consist of a Bowden tube, which lets filament pass from the feeder to the hot end. Over time, the tube can accumulate debris from several sources, including:
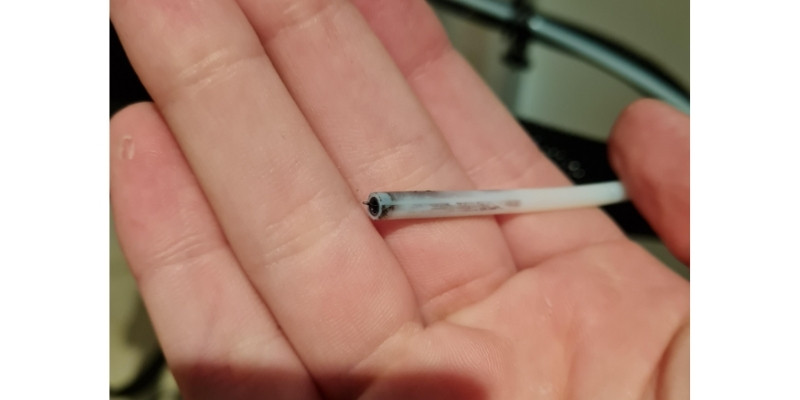
- Particles from grinding of a filament due to high tension in the feeder.
- Filaments becoming brittle and breaking inside the tube.
The collection of these particles can slow down the movement of the filament in the Bowden tube. As a result, the stepper motor will have difficulty trying to move the filament further, and you’ll hear some clicking.
How To Fix
You can reduce the resistance in the Bowden tube by detaching it from the hot end and clearing it. A quick way of doing this is using a fresh filament or a thin rod, such as a guitar string, to push debris out of the tube.
Some filaments, such as PLA, quickly become brittle after exposure to moisture. Therefore, remember to keep your filament in air-tight containers to prevent it from picking up too much moisture.
6. Tight Extruder
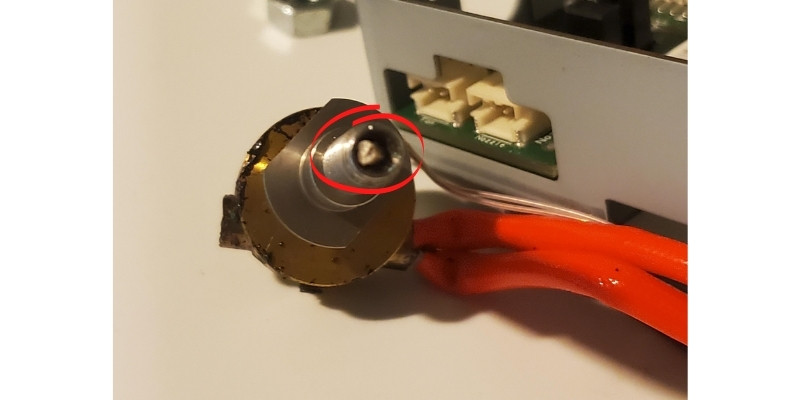
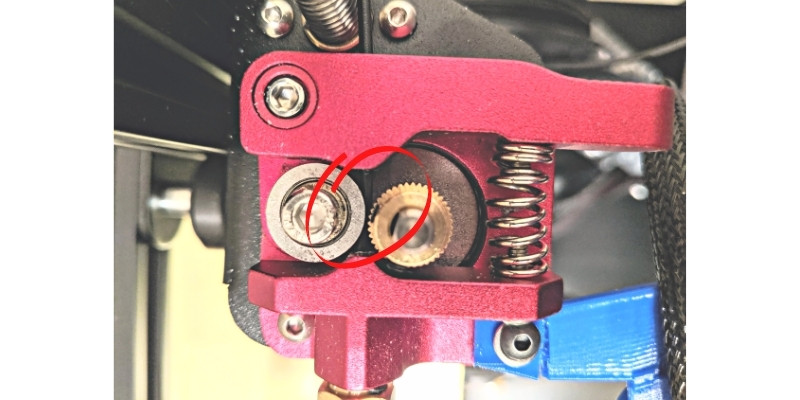
Inside the extruder, you’ll find at least one small gear and spring that move the filament to the print head. If these two components have any mechanical damage, you will hear your extruder motor clicking and slipping. This is how it happens.
The teeth of the gear are particularly prone to wear and tear over prolonged use. When they start to diminish, the gear won’t be able to hold the filament firmly, and it will slip.
It will also slip over the filament instead of rolling it forward. As it does this continuously, it grinds away bits and bits of the filament.
Secondly, the extruder spring is responsible for creating the tension that helps the gears grip into the filament. If this spring holds the filament too tightly, the filament won’t move, and you’ll notice your filament feeder clicking.
So how do you know if your extruder is too tight?
If your extruder is too tight, you’ll notice artifacts and holes in your print due to the extruder grinding up the filament. In some cases, the melted filament comes out thinner than usual.
How To Fix
If you suspect that your extruder tension is high, loosen the idler screw on your printer and feed some filament through. Then, gradually tighten the screw until the filament starts coming out without any deformities.
If the gears are totally worn out, replacing them should do the trick. Also, consider using a steel extruder gear if you use your printer on a daily basis – it’s less prone to wear.
You may also want to use a dual drive system in your extruder. A one-sided gear system uses a single rotating gear on one side and an idler on the opposite side to push the filament in between them. But a dual drive system has a gear on both sides of the filament. This combined effort grips the filament better and reduces filament grinding.
Final Thoughts
A clicking/slipping extruder is not only irritating but also slows down your printing project. It’s caused by a blockage in the printer’s system, leaving the motor overloaded.
It can be fixed by not printing so close to the build plate, changing printing temperature and speed, unblocking the nozzle and Bowden tube, and adjusting printing tension. Hopefully, this article will wipe away your clicking/slipping issues once and for all.
Related posts:


