3D Printing Blobs and Zits: EVERY Issue Fixed
At 3DSourced we’ve covered everything 3D printing and 3D since 2017. Our team has interviewed the most innovative 3D printing experts, tested and reviewed more than 20 of the most popular 3D printers and 3D scanners to give our honest recommendations, and written more than 500 3D printing guides over the last 5 years.
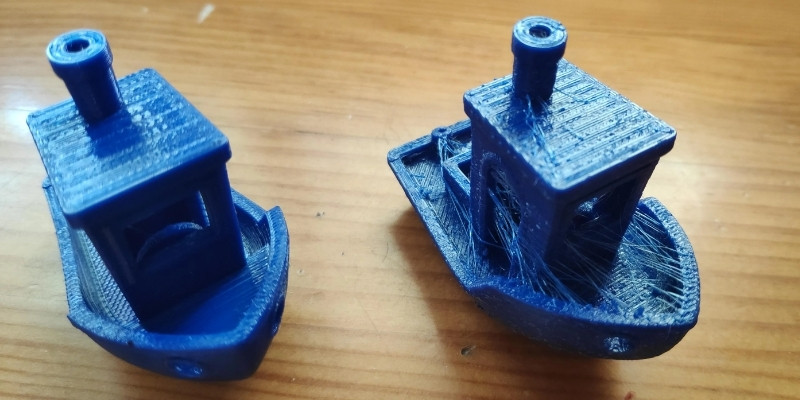
Of all the common problems in 3D printing, blobs and zits are some of the ugliest and most frustrating.
Blobs and zits are to 3D printing enthusiasts what bubbles are to painters, or uncaught typos are to writers. They’re unsightly, annoying, and can ruin entire models. Extra blobs ruin what should be a smooth or even surface.
This article first explains what blobs and zits in 3D printing are, why they’re bad, and then runs through every common cause, and exactly how to fix them.
We’ve written the article to be a kind of checklist, with the most likely causes first – so read through chronologically if you’re not sure what the cause is!

Table Of Contents
3D Print Blobs and Zits
Causes and How to Fix
- Too Much Filament – Feed Rate and Print Speed
- Retraction Issues
- Coasting Issues
- Too Much Pressure
- Damaged Filament
Tips To Reduce 3D Printing Blobs and Zits
What Are 3D Print Blobs and Zits and Why Are They Bad?
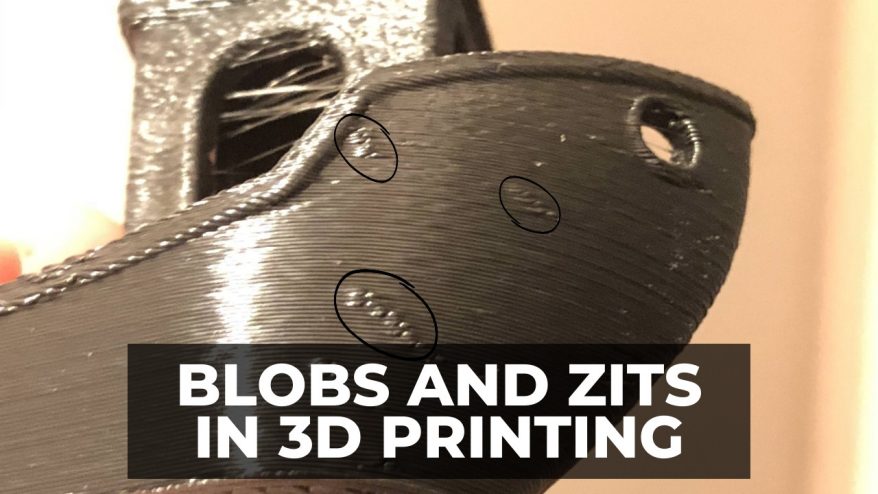
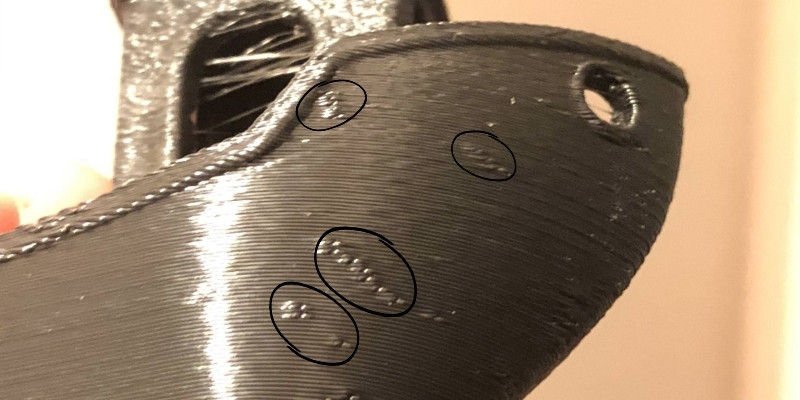
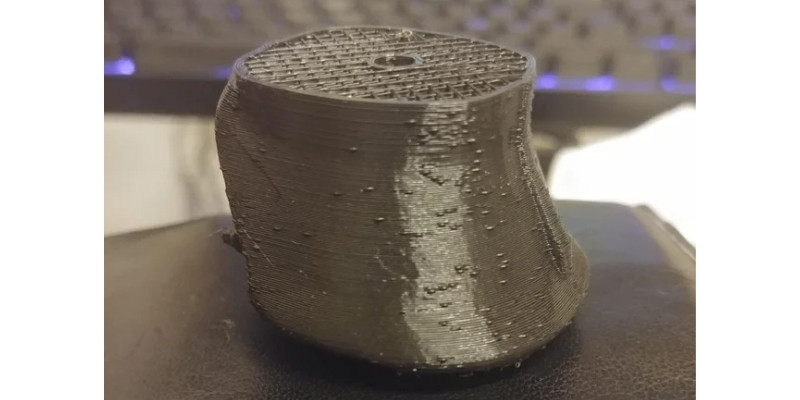
Blobs and zits in 3D printing are unwanted bubbles of over-extruded filament on a 3D printed model’s shell that should otherwise look smooth and clean, ruining surface finish.

3D printing zits are bad because they ruin your model’s aesthetic, and also block movement in prints like gears or articulated joints. A blob in the wrong place renders a gear unusable and even dangerous depending on the project.
FDM printers use extruders that stop and start repeatedly during printing. As this happens, additional filament that doesn’t get extruded when it should have will pile onto the new layer as the extruder starts again, adding too much filament and creating blobs or zits.
This blob on a layer change is often known as a Z-scar or ‘Zipper’.
Think of it as needing to lift the pen from the page between letters when writing in non-cursive. In the same way, you may notice that the beginning of some letters has an ink blotch. FDM printers work in a similar way.
3D Printing Blobs and Zits: Common Causes and How to Fix Them
Here we’ll look at what causes unsightly 3D printer blobs and how to go about fixing them.
Too Much Filament – Feed Rate and Print Speed
3D printers only do as instructed, and so if there’s too much filament being used in any given print, it’ll use as much as it’s programmed to.
Much like how too much paint on a brush will likely result in overexaggerated layers, too much filament being fed causes unwanted blobs in your 3D print.
How to Fix
By simply controlling the amount of filament your extruder uses, you can avoid blobs and zits altogether. If you’re a seasoned 3D printing enthusiast, you’ll probably have a keen sense of this already.
But if you’re generally new to 3D printing, you might find that you’re allowing your printer to use too much material, resulting in these zits. Lowering the feed rate or print speed is a good way to monitor and even halt filament overuse.
Retraction Issues
Retraction in 3D printing refers to the stopping point of an extruder between layers so no unwanted filament is distributed between these layers, preventing over-extrusion.
Retraction settings are useful for getting smooth, well-shaped prints and help avoid stringing, but can also cause unwanted blobs and zits in seemingly random places if miscalibrated.
If your printer is set to retract too often, too much filament will build without enough time to evenly distribute it, leading to blobs on your model.
How to Fix
Changing your retraction settings to happen less frequently is the most reliable to fix blobs and zits.
If this doesn’t work, you can try changing retraction speed instead, as problems with 3D printer zits may still occur if it’s too fast or too slow.
This will require some trial and error to find the best setting for your printer or project, so try to work it out on test models first to avoid using too much filament.
Generally speaking, ideal retraction speed is usually between 20-100mm/s.
Coasting Issues
Coasting dictates when and for how long the extruder stops between a model’s various parameters. If this doesn’t happen for long enough, then too much filament will release to any given seam and create an ugly bubble.
Coasting settings in 3D printing help distribute retracted filament evenly, lowering the chance of stringing and making for a more seamless print. Inefficient coasting settings can cause not only stringing, but 3D print blobs and zits as well.
How to Fix
If you’re not using coasting, then simply activate it in your preferred slicer software.
If you’re already using coasting and this doesn’t prevent blobs during 3D printing, try gradually increasing the coasting value to change the timing of extrusion between model layers and parameters.
Higher coasting settings and times will slow down your print, but help create smoother, more reliable print surfaces. Finding the best settings requires some trial and error, so once again we recommend using a test model.
Too Much Pressure
High pressure on your printer and nozzle creates too much force during extrusion. Much like hitting a ketchup bottle too hard, this force leads to too material filament extruding, causing blobs and zits.
How to Fix
The most common cause of this pressure is printing speed. If it’s too fast, then it could lead to filament build-up that’s released in the form of these blobs and zits.
Generally speaking, lowering your print speed is a good solution for more issues than just blobs and zits, as well as helping with incorrect retraction settings.
If you’re having issues with gaps, stringing, zits, or even your prints sticking too well to the bed plate, lowering your print speed is a good first step as speed is quite often a likely cause.
If the problem persists, then lowering your extruder temperature may help. The ideal temperature depends on your filament, but reducing it incrementally is the best way to find the best temperature settings.
Read more: the complete 3D printer filament buyer’s guide
Damaged Filament
Most FDM filaments are hygroscopic, meaning they absorb airborne moisture over time and become bubbly, brittle, and unreliable. Each kind of filament also has a shelf life, and will deteriorate naturally over time.
Wet, aged, or otherwise damaged filament will print unreliably, causing stringing, warping, and unwanted blobs. Wet or dirty filament in particular is likely to clog in the nozzle, leading to uneven extruding and random zits around your print.
Wet filament will also ‘pop’ at random times, which over-extrudes the filament in bursts, creating blobs, zits, and scars on your print.
How to Fix
Keeping your filament in good condition is the best way to avoid this problem entirely. While generally speaking it’s a good idea to keep your filament in an airtight container or dry box out of the sun, different filaments have different methods to improve their shelf life.
A good rule to follow is to only have your filament out when in use. Storing your filament as soon as you’re done printing is a very good habit to get in to.
Wet filament will bubble and string as it prints, so if you’re worried your filament has absorbed too much moisture, the best way to fix this is to use a filament dry box, oven, or food dehydrator to dry it out.
How to Reduce 3D Printing Blobs and Zits
If you still find the above fixes haven’t solved the issue with your 3D print blobs and zits, here are a few other general changes you can make to reduce the problem or hide unwanted scars.
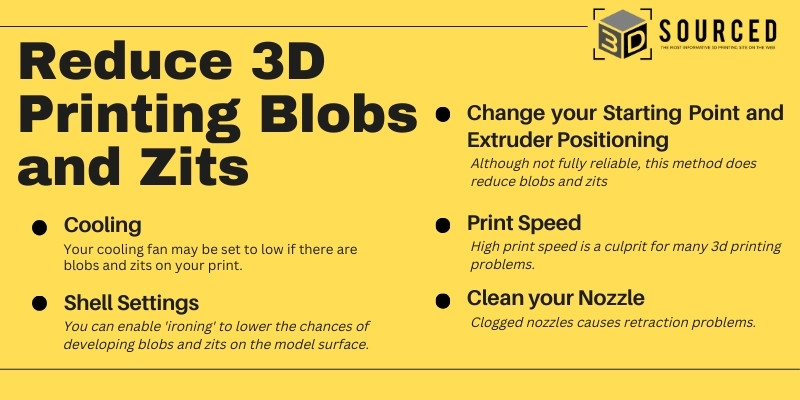
Cooling
Using a cooling system speeds up the hardening of your filament, making for a faster and more even print. If you’re finding blobs and zits in seemingly random places, your cooling fan may be set too low.
If your filament cools too slowly, then it will stay in a semi-liquid state longer than it should, and this excess will dribble and drip, causing blobs both between layers, and on new layers.
Increasing your cooling system’s power helps reduce the likelihood of these blobs.
Shell Settings
The shell is the outer layer of your print, and controls how your model looks on the surface.
There are a few ways to change how your printer handles this shell – to either reduce or remove the likelihood of blobs and zits, or simply hide them from the surface of your model.
Changing the shell wall ordering to the inside setting changes it so the elements likely to cause zits and blobs occur on the interior wall of the model, helping to hide any imperfections from view and resulting in an outwardly great-looking print!
You can also enable what’s called ‘ironing’, which changes how long the extruder switches off between layers and helps promote the coasting we mentioned earlier, lowering the chance of unwanted blobs and making for a smoother surface overall.
Change your Starting Point and Extruder Positioning
While most FDM printers will have an automatic starting point to determine the model’s best pathing, this setting can be changed manually to change where the extruder begins printing and affects how models are layered.
This is another way of ‘hiding’ zits and blobs on your 3D prints if you set the extruder to focus printing on the back of any given model. While it won’t solve the problem, it will make purely aesthetic models like statues appear smoother.
A more involved method is to precisely set where and how your extruder moves between layers or parts. Selecting a slower retraction speed and altering the path to better hide any blobs will make your model look better.
Be advised that neither of these methods is reliable in fully removing any 3D printer blobs or zits, though they may reduce them, and so they aren’t ideal if you’re printing parts intended for mechanical use.
Print Speed
High print speed is a common reason for many 3D printer issues.
If you’re finding blobs and zits are a persistent problem, then lowering your print speed to the low-medium range of your filament or manufacturer’s guidelines could solve your issue.
Clean your Nozzle
Clogged nozzles are hazards to 3D prints and can even be dangerous. Retraction problems not solved by setting changes may be instead caused by built-up filament in a blocked extruder.
Using a guitar string or similarly thin object and a brush, you can clean out a cold nozzle like you would when flossing your teeth. You can also use special cleaning filament designed specifically to help clean nozzles.
Cold pulling, which involves manually pulling filament through a cooled nozzle, helps remove excess and leftover filament and reduces the likelihood of poor-retraction or high-pressure-caused blobs and zits.
For more information on how to unclog your 3D printer nozzle or help avoid blockages in the future, you can check out our guide on nozzle maintenance.
Related posts:


