
For all its affordable DIY appeal, the Ender 3 is far from perfect, not least the lackluster print bed.
It’s one of the more upgrade-friendly budget 3D printers out there, though, so tinkering it’s sticking points out of the equation is relatively easy.
Upgrading to an Ender 3 glass bed for 3D printing lets you benefit from consistent bed leveling, a smooth first layer, even heat distribution, easy print removal, and easier cleaning.
For most users, I’d recommend the Official Creality Tempered Ender 3 Glass Bed. As an in-house pick, it fits the Ender 3 perfectly, with easy print removal and impressive first layer adhesion.

Although it is priced slightly higher than some of the other options, the overall quality makes it a worthwhile investment for most users.
In this guide, I’ll walk you through all the Ender 3 glass bed upgrades I’ve tested, and compare them across key metrics like price, print quality, and ease of use.
I’ll share my top tips and tricks for choosing the glass bed that’s right for your projects – so you can make your choice with confidence!
Which Ender 3 3D Printers Have A Glass Bed?
The Ender 3 and Ender 3 Pro don’t ship with a glass bed. Instead, they rely on a magnetic build plate. However, the Ender 3 V2 ships with a carborundum glass bed.
This article focuses on Ender 3 and Ender 3 Pro owners therefore who want to upgrade to a glass bed.
Read more: our Creality Ender 3 vs Pro vs V2 compared
My Top Ender 3 Glass Bed Upgrades
Official Creality Tempered Ender 3 Glass Bed
Dcreate Borosilicate Glass Bed
Best Ender 3 Glass Beds
Official Creality Tempered Ender 3 Glass Bed
- Price: $18.00-$20.00
- Where To Buy: Amazon, Creality Store
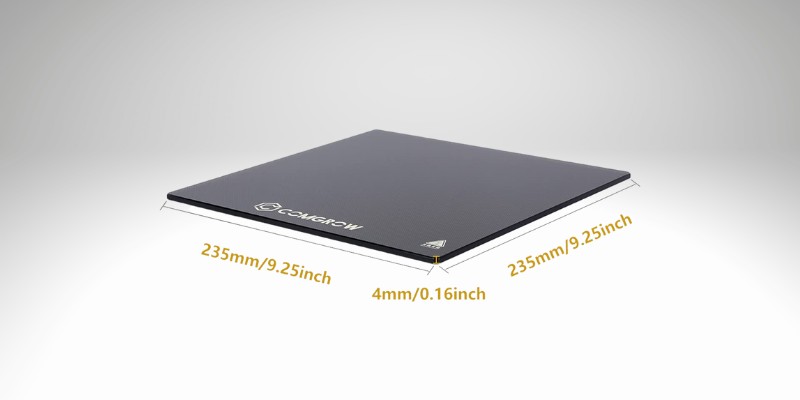
Manufactured and recommended by Creality, the official Creality tempered Ender 3 glass bed fits perfectly atop the Ender 3’s build plate.
As such, you won’t have to worry about the glass bed being too small or too large. You’ll need four clips to secure the bed. Creality doesn’t provide these on its official store, but there are kits available through Amazon that bundle them alongside the bed.
It can withstand temperatures up to 400°C and has a hardness of 8 Mohs, guaranteeing durability that outclasses acrylic, plastic, and metal beds.
It also features a nano-molecular coating for better adhesion.
Creality guarantees a flat and true surface with 4 mm thickness that delivers a sleek and smooth base. Official documentation notes that adhesive isn’t required for most prints, given how well the bed nails first-layer adhesion.
The official Creality tempered Ender 3 glass bed is wear and scratch-resistant while also offering easy print removal once the bed has cooled to room temperature.
As for cleaning, Creality says the glass bed is easy to clean with a soft cloth and isopropyl alcohol.
Dcreate Borosilicate Glass Bed
- Price: $13.00-$15.00
- Where To Buy: Amazon
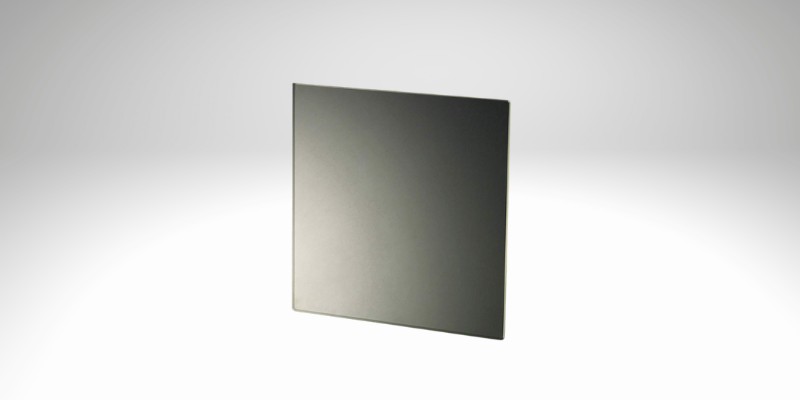
The Dcreate borosilicate Ender 3 glass bed measures 235 x 235 mm, or the exact size of the Ender 3 build plate. It features smooth, rounded edges to ward off injuries when handling the glass bed.
In our experience, borosilicate performs better than tempered glass when it comes to resistance, adding longevity to its advantages.
Dcreate manufactures the glass bed with a true, flat, and smooth finish, with a 3.8 mm thickness, which should see it heat up slightly faster than chunkier alternatives. It can withstand temperatures up to 520°C.
The Dcreate borosilicate Ender 3 glass bed mounts to the Ender 3’s build plate via a set of binder clips provided alongside the glass bed.
Dcreate recommends using an adhesive like glue or hairspray for the best results and only using water to wipe clean the surface. However, using the classic isopropyl alcohol method is an option, too.
Sovol Borosilicate Ender 3 Glass Bed
- Price: $10.00-$13.00
- Where To Buy: Amazon
Another borosilicate option, the Sovol borosilicate Ender 3 glass bed, costs less than our other recommendations, which is ideal if you want a thrifty way to test drive a glass bed.
Its dimensions – 235 x 235 mm – line up perfectly with the Ender 3’s existing stock magnetic plate for easy alignment and installation using the clip method.
Thickness tallies up to 3.8 mm for reasonably fast heating and a strong, stiff surface that won’t warp or deform under high temperatures.
Thanks to the borosilicate glass, the Sovol Ender glass bed has excellent thermal expansion properties along with heat and temperature shock resistance.
Some form of adhesive is recommended, which you can easily wipe clean with alcohol, according to the manufacturer Sovol.
Wisamic Borosilicate Glass Bed
- Price: $20.00
- Where To Buy: Amazon
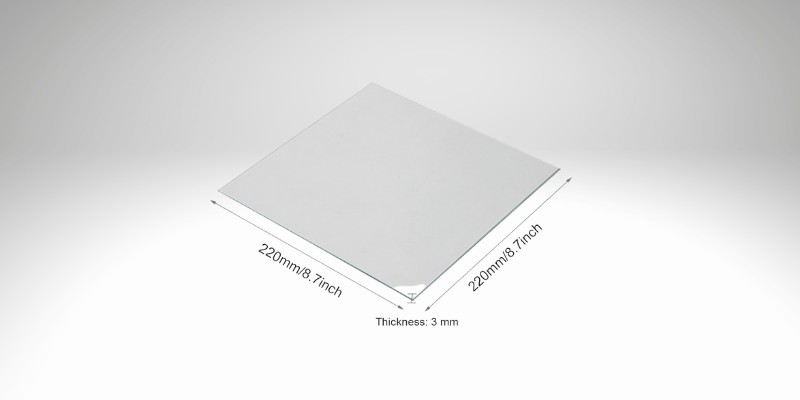
One of the pricier third-party options, the Wisamic borosilicate Ender 3 glass bed is cut to align snuggly with the Ender 3’s build plate.
It measures a matching 235 x 235 mm and has a 4 mm thickness. You’ll want to double-check the specifications before buying, as Wisamic sells several other configurations with different dimensions that won’t work with the Ender 3.
It’s made of 100% borosilicate glass to support higher temperatures and fluctuations than traditional build plates.
Its low thermal expansion properties also ensure it doesn’t warp, staying flat even after prolonged use at high temperatures. The borosilicate glass also provides solid binding properties when heated but allows for effortless print removal when cooled down.
You’ll need to source your own clips to fit the Wisamic borosilicate Ender 3 glass bed, as these aren’t included with the bed.
We recommend at least 21 mm clips or higher for the best fit.
Advantages of Using a Glass Bed on Your Ender 3
Flat – Due to being less sensitive to thermal expansion and the manufacturing process involved in producing it, glass remains flat and true even at high temperatures. Uniform flatness ensures consistent bed leveling, which means fewer failed prints.
Smooth First Layer – Unlike rough texture build plates, which generally cake the underside of prints with uneven grooves and bumps, glass is smooth and produces a clean, smooth base.
Heat Distribution – Although glass doesn’t match the conductivity of metal build plates, it provides more even heat distribution across its surface. Uniform heat distribution reduces warping caused by hot spot areas.
Print Removal – Glass beds make easy work of removing easy prints, requiring far less force, often without the need for a scraper, to snap off cleanly than other bed types.
Cleaning – Due to their smooth, flat surface, glass beds are a doddle to clean compared to rough beds where grime, filament, and adhesive embed into the grainy texture. You can safely plunge it into a sink filled with water and wipe it clean with soap with no risk of damage.
Longevity and Cost-Saving – Glass beds have a longer lifespan than other bed material types. Although you’ll likely pay more for a glass bed, you won’t need to replace it as frequently, saving costs in the long run.
Read more: the best Creality Ender 3 Dual Extruders
Ender 3 Glass Bed Tips and Tricks
Cleaning – Finger grease, filament residue, adhesive leftovers, dust – these stray accumulations, often imperceptible to the naked eye, can wreak havoc on first-layer adhesion and the overall success of your prints.
Regular and thorough cleaning is, therefore, a must. A freshly-laundered piece of cloth allied to a squirt of isopropyl alcohol works best, although there’s no harm in bolstering this with the occasional dunk into a tub of soapy water for a deep clean.
Align and Secure the Glass Bed – Make sure the glass bed sits flush and is secured tightly to the build plate before bed leveling.
Binder clips are a popular option, with no more than four needed to keep the glass bed in place (slide the build plate backward and forward to ensure the clips don’t knock any part of the printer).
Be sure to set the printable area in your slicing software according to the positioning of the clips.
Bed Leveling – Tedious and time-consuming, correctly leveling the Ender 3, Pro, and V2’s bed before firing off a print is the most important step you can take to make the most of your factory-fresh glass bed.
Make sure your Z offset compensates for the added thickness of the glass; too close, and it will scratch up the glossy surface. Don’t hesitate to do multiple leveling runs for the best results.
If you have an Ender 3 S1, you’re in luck. The printer’s automatic bed leveling takes care of calibrating the bed for you.
Bed Temperature – If filament cools too quickly, it won’t adhere to the glass bed. Check your filament manufacturer’s recommended heated bed temperature.
Take that figure, add a few degrees, and dial the temperature into your slicing software. If you still encounter adhesion issues, raise the temperature in small increments until you hone in on the best settings.
By extension, ensure the bed reaches the proper temperature before printing.
Brims and Rafts – Although not necessary for all prints, brims and rafts are excellent solutions for more temperamental prints where first-layer adhesion causes all manner of headaches.
They involve more post-printing clean-up, longer print times, and use more filament, but they do wonders to improve first-layer adhesion by boosting the surface of contact between the filament and bed.
A brim is a series of small layers running around the perimeter of a part or model to boost the size and adhesion of the first layer. On the other hand, a raft is printed below the print itself and formed of a flat, thick lattice of filament.
In other words, a foundation atop which the print sits.
Adhesive – Glue, hairspray, dual-sided painter’s tape – these are all viable and popular options to increase first-layer adhesion, especially when printing with heat-sensitive filament like ABS.
These adhesives fare best for small, intricate prints with a limited contact surface or those with tight corners as they reduce warping, curling, and the print detaching from the bed.
Things to Consider Before Upgrading Your Glass Bed
Match Build Plate Size – When browsing for a glass bed, be sure its dimensions match those of the Ender 3’s 235 x 235 mm build plate.
Doing so ensures a snug fit, removing the need to cut and shave down the bed yourself or key in software settings to cater to a smaller glass bed than the stock Ender 3 magnetic bed.
No Too Thin, Not Too Thick – The thickness of the glass bed is a crucial feature to keep in mind, or run the risk of cracking the glass or, on the flip side, having to wait inordinately long periods for the bed to reach print-ready temperatures.
As a rule of thumb, 3-4 mm thickness represents a good middle ground between the two, a standard of sorts you’ll find on most third-party options.
Thermal Shock – A glass bed is subject to reasonably dramatic temperature fluctuations, so consider a bed’s thermal shock resistance.
A quality glass bed can confidently jump between temperatures without cracking or shattering up to as high as 400°C. Borosilicate and tempered glass beds tend to showcase the best thermal shock resistance.
FAQs
Can I use any glass for the Ender 3?
Technically yes, but variations in thickness and the quality of the manufacturing process can lead to the glass shattering, cracking, and other similar issues.
Even cut to size, your average local hardware store-bought glass won’t be up to the task.
To avoid problems, we recommend glass beds made specifically for 3D printing, especially tempered and borosilicate glass beds, both resistant to thermal shock and thermal expansion.
Does Ender 3 come with a glass bed?
The vanilla Ender 3 doesn’t ship with a glass bed, nor does the successor Ender 3 Pro. Creality did opt to upgrade the texture magnetic bed to a carborundum glass bed for the Ender 3 V2.
What size is the glass bed on Ender 3 Pro?
To upgrade the Ender 3 Pro with a glass bed, you’ll need a bed that matches the printer’s build plate, specifically 235 x 235 mm, ideally with a 3-4 mm thickness.
Articles we recommend:


