How To Calibrate E-Steps on Your Extruder for Perfect 3D Printing
At 3DSourced we’ve covered everything 3D printing and 3D since 2017. Our team has interviewed the most innovative 3D printing experts, tested and reviewed more than 20 of the most popular 3D printers and 3D scanners to give our honest recommendations, and written more than 500 3D printing guides over the last 5 years.
A correct e-step setting on your 3D printer ensures your prints get the right amount of filament. Doing a quick e-step calibration doesn’t take too much time, and it can vastly improve your print quality and remove problems associated with under and over-extrusion.
In this guide, you’ll find step-by-step directions to calibrate e-steps on your extruder, regardless of what 3D printer you’re using.
How To Calibrate Your Extruder E-Steps:
- Step 1: Find Your Current E-Step Setting
- Step 2: Heat Up the Hotend
- Step 3: Empty the Current Filament
- Step 4: Load New Filament
- Step 5: Make Your Starting Mark
- Step 6: Set it Up in Your Computer
- Step 7: Run 100mm of Filament
- Step 8: Measure the Result
- Step 9: Calculate the Right E-Step
- Step 10: Save the New E-Step
What Are E-Steps?
An e-step stands for “extruder step”. 3D printers use stepper motors to push filament through the extruder and out of the nozzle. The e-step will tell your 3D printer how many steps the motor performs before the filament moves 1mm out of the nozzle — that way, the printer can track filament motion at the nozzle.
When you adjust your printer’s e-step, you are not changing how many steps the motor is doing. Rather, you’re telling your 3D printer how many steps equate to 1mm of filament.

A stepper motor has a gear that clicks for each preset amount of motion. Each click is a “step”. This type of motor is used as a low-cost way to track motion and give specific results without additional sensors. It lets you feed a certain amount of filament by only moving the motor a certain number of steps.
For example, let’s say you want to rotate a motor one full rotation. The software will tell the motor to move 200 clicks around the gear, or 200 steps. Now the machine knows exactly where the motor is, and how much it just moved.
Out of the box, a 3D printer doesn’t know how the true conversion between motor steps and filament length. It has a pre-set value, but it could be wrong.
Since there’s no sensor tracking how much filament is coming out of the nozzle, it all revolves around the e-step setting. By inputting the e-step figure, you’re giving your printer a conversion between extruded filament length and stepper motor action. Now, the printer can know what’s going on at the nozzle during extrusion.
Why Is E-Step Calibration Important?
Calibrating e-steps is important because it results in depositing the perfect amount of filament for each layer. An improper e-step figure leads to too much or too little filament in your print.
Not enough filament results in gaps between layers, weak final parts, warping, and poor adhesion. Too much filament will lead to parts with blobbing, stringing, and drooping. You might also experience clogged nozzles more often and parts might fail more frequently.
Imagine trying to pipe icing onto a cake, but you’re blindfolded. You have no idea how much icing is coming out and you can’t ensure that you’re laying a perfect, uniform layer. This is effectively what’s happening when a 3D printer doesn’t have the right e-step value, but with less-delicious filament instead of icing.
Like any other machine, this calibration step will help you get the best results. The process is relatively simple, and the results should be immediately noticeable.
The Tools You’ll Need

The tools required for e-step calibration are the same, regardless of what FDM printer you have:
- A 3D printer. The calibration needs to be specific to your 3D printer. If you have a number of 3D printers, you’ll need to repeat the process for each one and input the specific results.
- Access to a computer and simple slicer. The computer just needs to run a single line of G-code. It’s best to use a simple slicer like Octoprint or Simplify3D, so you can use a Raspberry Pi, Mac, or Windows computer.
- A spool of filament. The type of filament is less critical since the e-step depends on the 3D printer, not the filament. You’ll want to use a non-flexible option, so standard ABS or PLA will work best.
- Calipers. Calipers are critical. Using a tape measure won’t give you the accuracy that you need. Calipers will give you a precise length measurement that leads to the most precise e-step calculation.
- A marker. Any type of marker will work. This is used to mark the length of filament extruded, so you need to make sure the color of the marker is legible against the color of your filament (such as black Sharpie on white PLA).
How To Calibrate Your Extruder E-Steps
How do you do an e-step calibration? The process is easier than you might think. Grab the tools we just mentioned, sit by your 3D printer, follow these steps, and you should be done within 15 minutes.
Step 1: Find Your Current E-Step Setting
Before anything else, you need to find your current e-step setting. How do you calculate current e-step? It can be done through your slicer software or on your 3D printer machine through the settings menus.
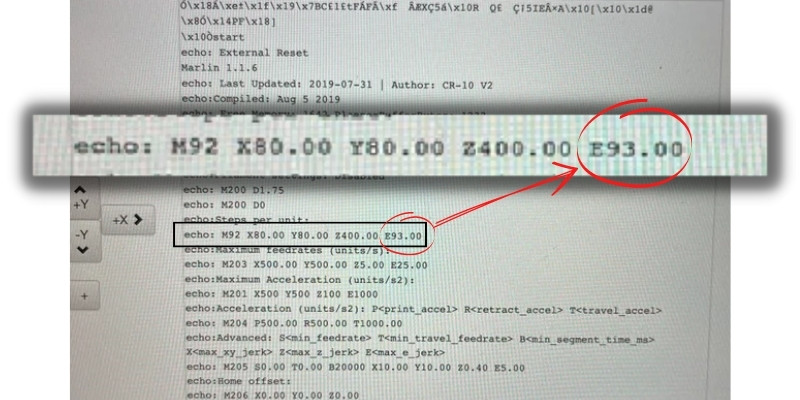
If you can’t find it, look at the generated G-code from a recent print. Find the line that says “echo: M92” and go to the end of that line. There will be a two or three-digit number that is close to 100. This is your current e-step value.
Write down the current e-step setting and don’t change it.
Also, grab all your tools and make your way to your 3D printer to get started.
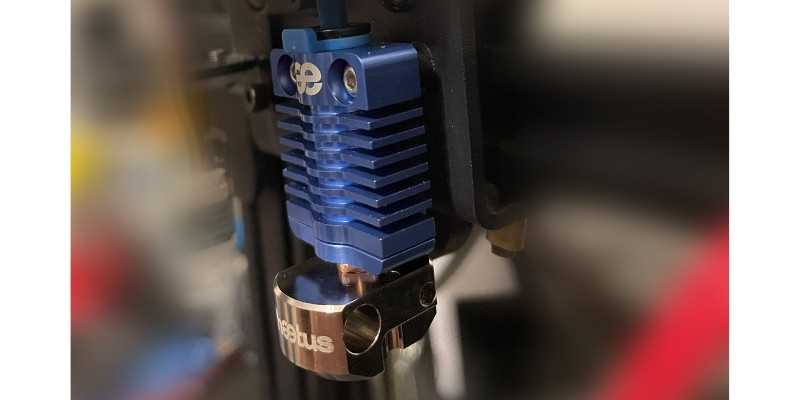
Step 2: Heat Up the Hotend
For the entirety of this process, you’ll want the hotend to be heated up and ready. This ensures that the filament will be flowing and won’t get jammed and hurt your results.
We suggest using a simple PLA for this test — or whatever non-flexible filament you have handy that you frequently use.
If you’re running PLA for this e-step calibration, set the head to 210°C and wait a few minutes.
It’s best if you manually set the temperature on your machine, rather than send through G-code from a 3D printing slicer. This can be done through the screen on your printer. Navigate to the “maintenance” or equivalent screen, and tell the hotend to get up to 210°C.
You don’t need to worry about the bed temperature or any other printer settings during this process.
Just a warning, be mindful of the hotend during these steps. Accidentally touching it can burn your hand or arm. Most of the process happens outside of the build area of your printer, so it’s easy to avoid the hotend.
Step 3: Empty the Current Filament
If you already have filament loaded in your 3D printer, you have two options: You can either keep it loaded and prep it for this e-step calibration, or you can remove it and load in an easier material like PLA.
You should opt for the first option if PLA is already loaded in your printer. To prep it, wait for the hotend to get up to temperature, then manually feed the PLA through the hotend until you get an uninterrupted and consistent diameter on the filament.
This can be done through the same “maintenance” screen on your printer. Don’t physically push the filament through the extruder because that can damage the stepper motor. Instead, use the appropriate dial or screen to push through filament.
Doing this quick process ensures the filament is butting up against the hotend and it’s correctly seated in the extruder. It shouldn’t take more than 10mm of filament to load it.
If you want to remove the filament and load in a PLA, then retract the filament and remove the full spool from the machine.
Step 4: Load New Filament
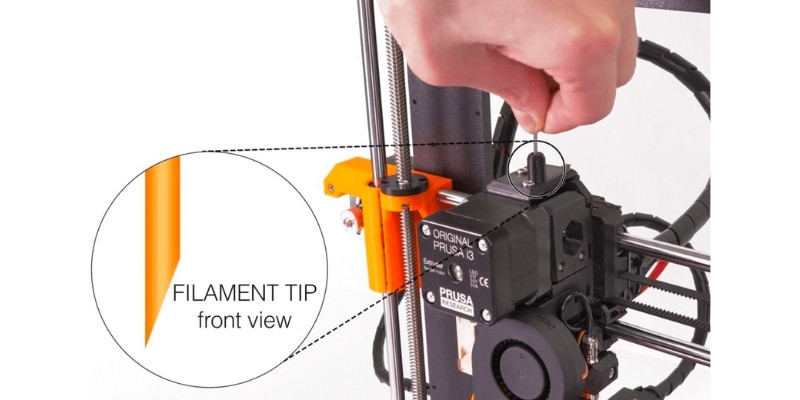
If you removed the filament in step 3, you should load in the new filament now. Load it as if you were about to start a new print — attach the spool to its holder, cut the leading tip of the filament so it’s flat, and insert it into the Bowden tube or extruder of your 3D printer.
With the new filament loaded, have your printer push it through until you get an even diameter of filament coming out of the nozzle. Your hotend should still be up to temperature from step 2.
Step 5: Make Your Starting Mark
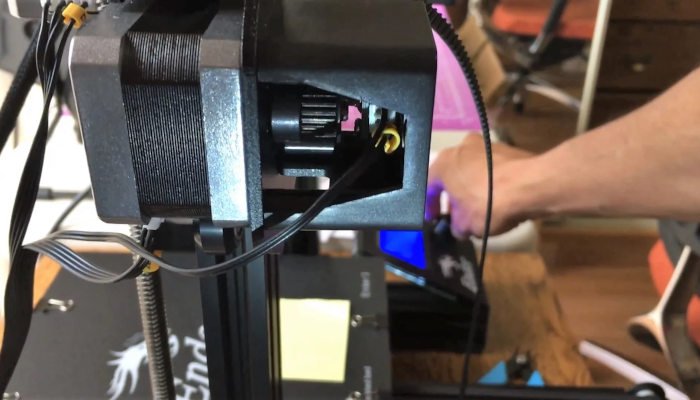
Grab your marker and go to the filament spool of your 3D printer. This could be mounted on the top, rear, side, or on the table near your 3D printer. Trace the line of filament until it gets to a Bowden tube that goes to the extruder assembly.
Find the last part of the filament that you can access as it goes into the Bowden tube. In other words, where the filament first enters the tube and you can’t touch the material anymore. Mark this part of the filament with a line all the way around.
Use your calipers and open them until the readout says 150mm. Hold your calipers against the filament and measure from the marked part of the filament. 150mm away from the mark, you want to make another mark all the way around the material with your marker. This is 150mm from the Bowden back towards the filament spool.
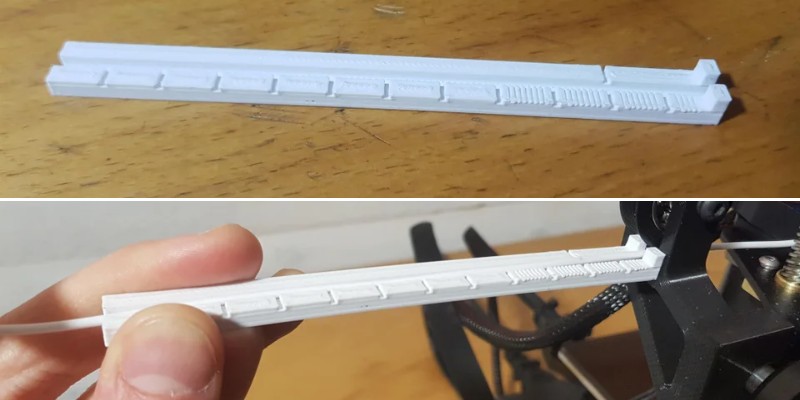
This 150mm measured area is your reference point for the rest of this calibration. You’re going to tell the printer to extrude 100mm of material, so you should be left with exactly 50mm between the Bowden tube’s entrance and the second line you just marked.
Step 6: Set it Up in Your Computer
Now it’s time to connect the computer to your 3D printer. This can be done through a USB cable connecting the two.
If your printer only has an SD card, then load an SD into your computer.
With your computer connected or your SD card loaded into the computer, open up the simple slicer software like Simplify3D or Octoprint.
For this exercise, you’ll be sending 100.0mm of filament through the extruder. Or at least, you’ll send what your 3D printer thinks 100.0mm looks like.
If you’re using a slicer, set up a “move extruder 100mm” command and push it through to your 3D printer.
If you’re working directly with G-code, you can use the command “G1 E100 F100” which contains all the information your printer needs. Send that to your 3D printer for execution.
Step 7: Run 100mm of Filament
You have to wait for your printer to send 100mm of filament through the extruder and finish this operation. It shouldn’t take very long.
It’s important that you let the printer finish the operation without touching the filament spool at all. If you hear a clicking noise, the filament might be slipping as it goes into the Bowden tube which is a different issue.
The best idea is to watch the filament spool and make sure the filament is moving at a steady pace.
Step 8: Measure the Result
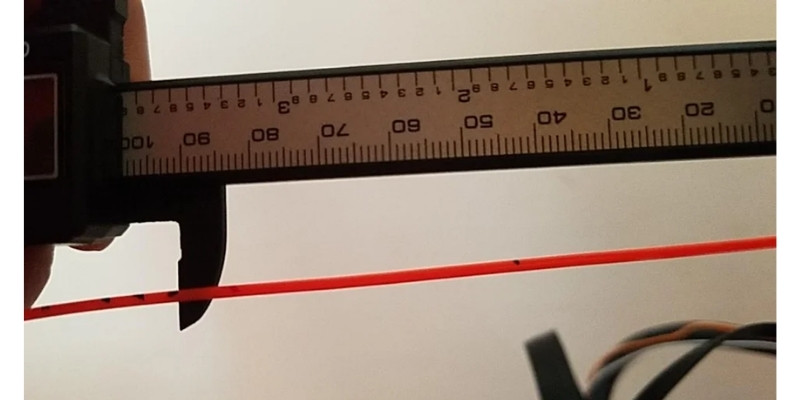
Once the machine is done feeding 100mm of filament, you should grab your calipers and go back to your marked line.
Since it just fed 100mm of filament, your first line will have disappeared. You’ll just be left with the second line that should be exactly 50mm away from the Bowden tube.
Measure the distance from the Bowden tube entrance (where your first mark was) to the second mark. Record this measurement. If it’s anything other than 50mm, the e-step setting in your printer is incorrect.
If it is 50mm exactly, you’re all done and can skip the rest of these steps: your current e-step value is correct.
Step 9: Calculate the Right E-Step
Start by taking the measured length in the trial and subtracting it from 150. This will tell you how much filament was actually extruded. If you get a number under 70, something is mechanically wrong with your 3D printer like a clogged nozzle or feeding gear that’s too tight.
Let’s say you measured 51 mm in step 8. 150 minus 51 is 99mm — the actual amount of filament extruded.
The e-step value is presented as a “step per mm” value. The printer knows that X steps from the stepper motor equate to 1mm of travel. Our starting e-step value is 97, which means 97 steps in the motor should equate to 1mm of travel.
Remember: In step 1, you found your current e-step setting.
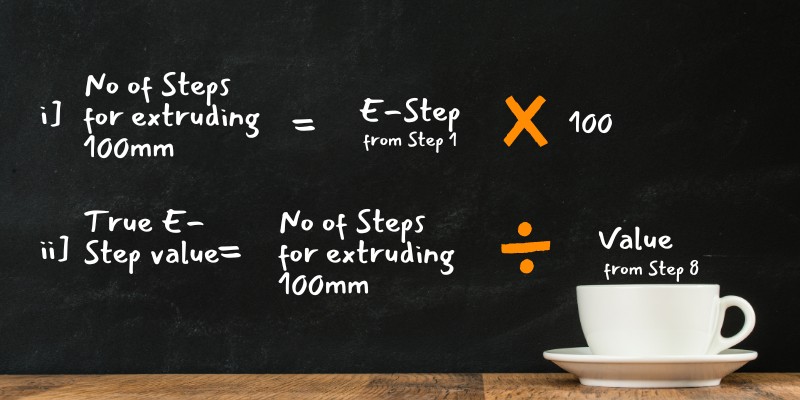
To find the true e-step value, here’s what you do: Take the current e-step and multiply it by 100. If our original e-step value is 97, we would multiply that by 100 and get 9,700. This is how many steps should have been taken to extrude 100mm of filament.
Now, take this value and divide it by the measured length you calculated a second ago. In our case, it was 99mm. So, we take 9,700 divided by 99 and get 98.
What did we just do? We just calculated what the true e-step value should be for your printer. This is the accurate steps/mm e-step value.
From now on, we’ll always use 98 steps/mm on our 3D printer, thanks to the results of this calibration process. For you, you would use whatever value you just calculated.
Step 10: Save the New E-Step
Input the new e-step value into your machine. Write down the value, memorize it, and always have it handy moving forward. After saving the value on your printer, restart it and see what the default value is. Redo steps 4 through 9 to confirm that the new e-step value is perfect.
How to Calibrate E-Steps on Popular 3D Printers
If you have an Ender 3D printer, a Creality, or an Anet, the process is exactly the same as we described previously. The popular modern FDM printers use Bowden tubes leading into their extruders, so the process is very easy.
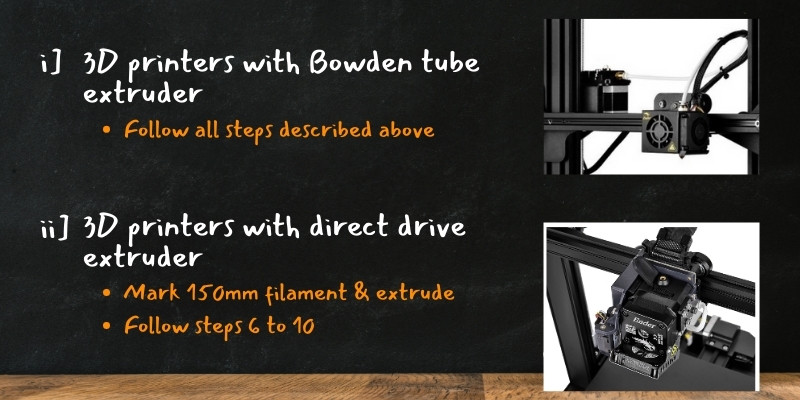
This is true for popular printers like the older Ender 3 series, Ender 5 series, Creality CR-10, Anet A8, and many more. But, newer Ender 3’s and the Prusa i3 MK3S+ both use direct drive extruders, so there’s no Bowden tube.
Instead, load your filament and mark a line somewhere along your filament that’s 150mm long. Extrude the filament from your hotend until the first line is at the extruder, then stop. Now, follow steps 6 through 10 in the above section (run 100mm of filament, measure the result, calculate the e-step, and save it).
The process is identical, but you don’t have a Bowden tube to use for reference, so you need to slowly feed material in until the first marked line is at the extruder, instead.
What to Do Next
With the correct e-step value, your prints will have a higher success rating and a better finished quality. You’ll avoid blobbing, gaps, and squished parts. Remember to calibrate your e-step value whenever you get a new printer, and revisit it if you notice over-extrusion or under-extrusion on your parts.
Related articles:
- How To Fix: 3D Printer Extruder Not Extruding/Filament Not Feeding?
- How To Fix: Extruder Clicking/Slipping? Common Causes and Their Fixes
- Full Guide: The Best Dual Extruder 3D Printers & Upgrades Today!
- Buyer Guide: Comparing Direct Drive vs Bowden Extruder
- Causes of Extruder Nozzle Clogs, Tips to Avoid It, and Ways to Troubleshoot It
- Creality Ender 3 Dual Extruder – All The Best Options (Includes Tips For Pro/V2)
- All About 3D Printer Extruder – A Full Buyer’s Guide


