Poor Quality Bridging in 3D Printing: 5 Ways To Fix
At 3DSourced we’ve covered everything 3D printing and 3D since 2017. Our team has interviewed the most innovative 3D printing experts, tested and reviewed more than 20 of the most popular 3D printers and 3D scanners to give our honest recommendations, and written more than 500 3D printing guides over the last 5 years.
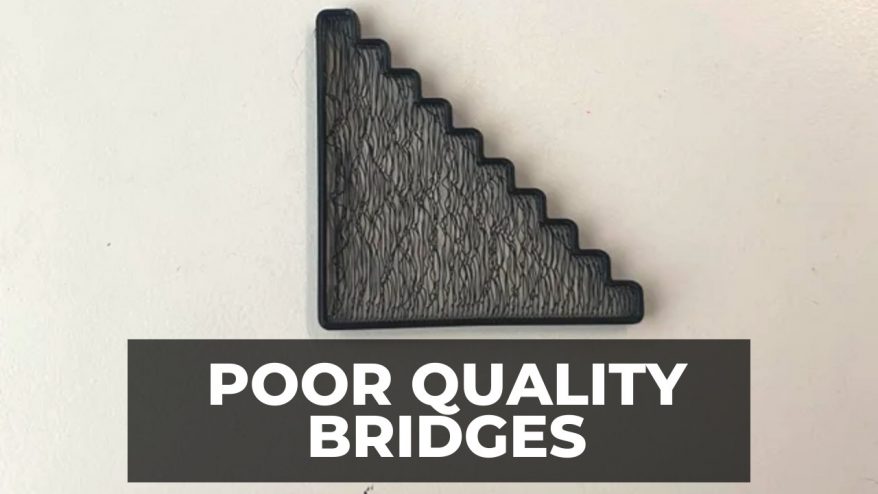
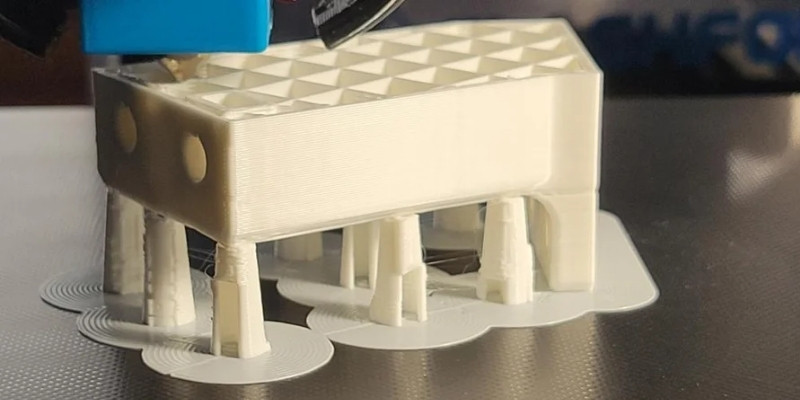
Bridging in 3D printing is when you print two connecting points of a model that don’t have many, if any, supports below them. If designed well, these supports are unnecessary, but poor-quality bridging will cause your model to droop or even fall due to insufficient strength or supporting structures.
Like a normal bridge, the connecting section is held up by tension, and a failure in this tension leads to it collapsing. The wider the distance, the greater the tension needs to be, and there are a few ways to improve your 3D printed bridges for optimum results.
This article will explain how to spot poor-quality bridging, what could be causing it, and also how to fix any issue that could be to blame.
Note: this article is about 3D printing bridges with filament. For the structural type of bridge, we also have an article on some of the coolest 3D printed bridges.

Poor Quality Bridging in 3D Printing
Common Causes and How to Fix Poor Bridging
- Unused Bridging Settings
- Filament Setting Too Slowly
- Wrong Extrusion Settings
- Poor Quality Supports
- Overreliance on Bridges
Improving Your Bridging Quality
Table Of Contents
- Poor Quality Bridging in 3D Printing
- Poor Quality Bridges in 3D Printing: How to Spot Them
- How do You Fix Poor Bridging in 3D Printing? Common Issues and Fixes
- Unused Bridging Settings
- Filament Setting Too Slowly
- Wrong Extrusion Settings
- Poor Quality Supports
- Overreliance on Bridges
- How Can I Improve My 3D Printed Bridges?
Poor Quality Bridges in 3D Printing: How to Spot Them
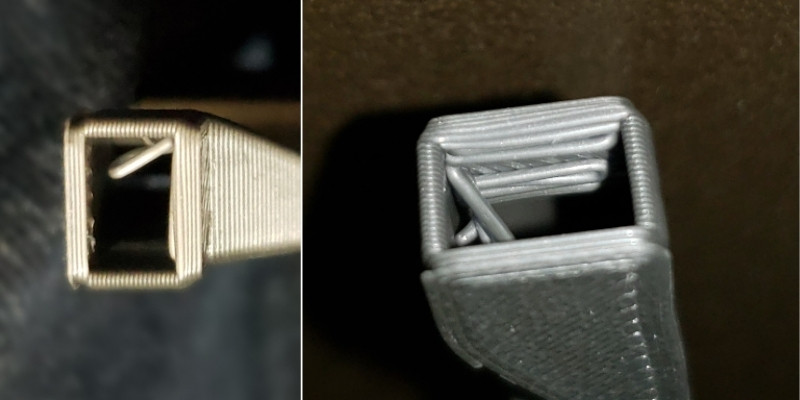
There are a few reasons why bridges in 3D printing may fail, but the most common sign is that they droop or hang instead of being straight lines.
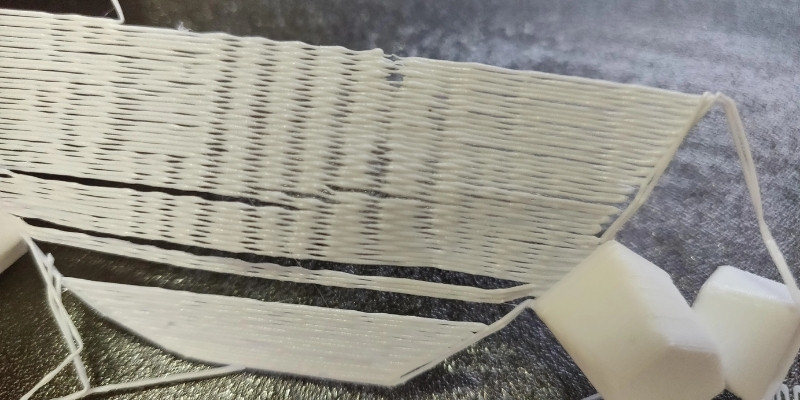
You may also notice stringing on the underside of your bridges, or buckling supports if you’re using them.
These bridging problems can come from setting errors, insufficient supports, or even be due to poor quality or incorrect filament.
Here we’ll look at what issues can cause your bridges to fail and how to fix them.
How do You Fix Poor Bridging in 3D Printing? Common Issues and Fixes
There are a number of reasons why you find your bridging turns out poorly. Fortunately, there’s a fix for each potential cause, which we’ll explore here.
Unused Bridging Settings
It may sound simple, but a common issue with bridging is a lack of applied bridging settings.
Forgetting to apply these settings is a common mistake, especially for beginners, but it’s a simple error that almost anyone can fall victim to.
How to Fix
Checking and double-checking your settings is always a good idea when 3D printing. If you’re having trouble with poor-quality bridges, the answer may simply be to turn on – or adjust – your bridging settings in your slicer.
If your slicer doesn’t include bridging settings, or you find them too complex, you could try moving to a different software to help ease the issue. Cura has bridging settings available.
Depending on your 3D slicer software, you may have more detailed bridging options that you can tinker with for better results, like automatically adjusting cooling speed and feed rate while a bridge is being printed.
Some bridging settings may involve strict calculations, but getting your head around them will greatly help with your current and future 3D printed bridging projects.
Filament Setting Too Slowly
For a bridge to 3D print well, it needs to set quickly.
If your filament sets too slowly, it will stay in its semi-liquid state too long and succumb to gravity. This will cause the bridge to droop and set in a downward rather than straight position.
If you find your bridge dips too much during printing, then this could very likely be the cause. Unsupported filament needs to set faster to keep its desired shape.
How to Fix
Filament sets as it cools. By increasing the strength of your cooling fan, your filament will set faster and be less likely to droop as the bridge prints.
However, it’s best to only increase your fan speed as the bridge is being printed. If you have it set too high from the beginning, your initial layers will set too quickly and risk not properly adhering to the print bed.
When in doubt, increase the speed incrementally until you find the best setting for your print.
Wrong Extrusion Settings
Just as a regular bridge requires an immense amount of infrastructure to stay upright, 3D printed bridges require the correct amount of filament to maintain the tension.
Low extrusion will lead to limp, drooping bridges because there isn’t enough tension to supporting the material, causing a collapse.
In the same vein, over-extrusion provides too much filament, making the bridge too heavy to stay upright.
How to Fix
Increasing your feed rate incrementally to find the sweet spot ensures the right amount of filament wis extruded to keep your bridge stable – without over-feeding the nozzle and making your bridge too heavy.
Poor Quality Supports
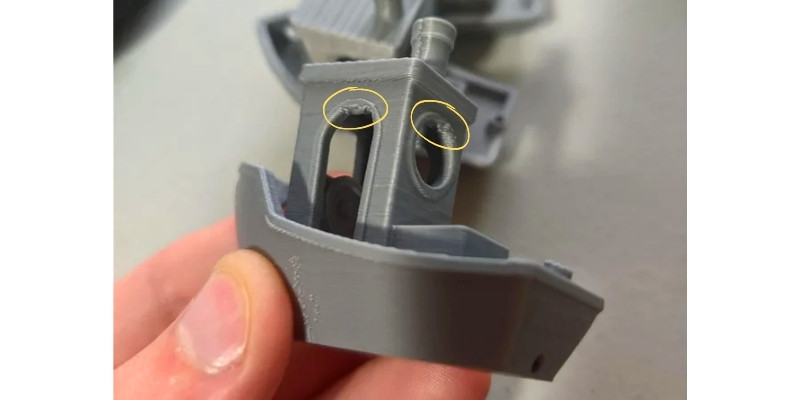
Poor quality bridges can be the result of poor-quality supports. Supports in 3D printing act as scaffolding that hold protruding parts of a print upright and steady during printing.
If these supports are too weak, they will fail to hold up your bridge as intended and allow it to droop.
Normally, these supports are only needed for more complex overhangs or long bridges, so this problem mostly applies to larger, more complicated bridging projects.
How to Fix
Shoring up your supports with strengthened infill or a higher feed rate will make them sturdier. Be wary, though, as overly strong supports are difficult to remove and will ruin or otherwise scar the surface of your model if they’re too well-stuck.
If you have a dual extruder, printing these supports with a more fragile or water-soluble filament is the best way to avoid overly attached supports.
Overreliance on Bridges
Of course, complex 3D prints require more complex settings, and the more complicated your design, the more likely it is to fail.
An overreliance on bridges will increase the likelihood of a failed print. While you can use supports to enforce your model, these also become a problem if overused.
How to Fix
Sometimes the best solution to a problem is to circumvent the problem altogether.
By revising and tweaking your design to include fewer bridges, or at least decrease the design’s overall reliance on them, you help prevent poor-quality bridging.
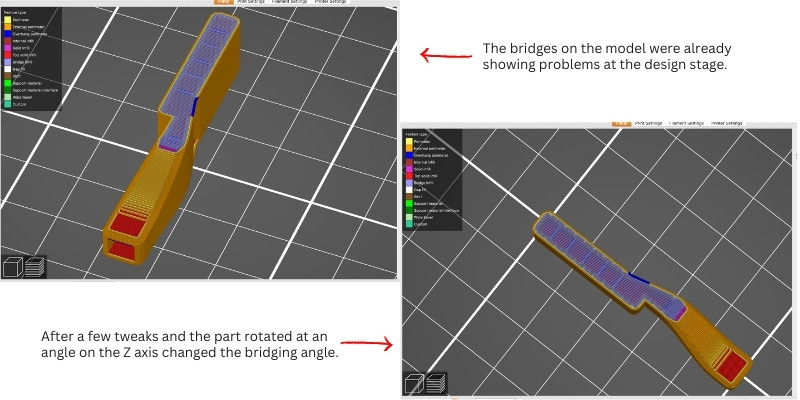
Before you make any rash changes, however, it’s worth double-checking your model’s alignment. You may find that some parts, or even the whole model, are simply not optimized for bridging. If this is the case, try making small changes to shore up the design without completely altering its shape.
How Can I Improve My 3D Printed Bridges?
The above advice is mainly for detecting and fixing problems with poor quality 3D printed bridges.
However, you may still find you’re simply not satisfied with your bridges, or are getting inconsistent results.
If this is the case, there are a few ways you can improve your chances of a successful bridge without relying on supports or complicated slicer settings.
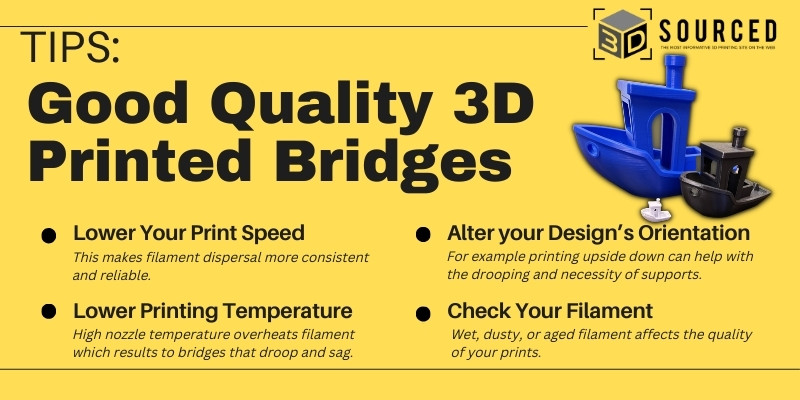
- Lower Your Print Speed
A good way to increase the reliability of your bridging is to lower print speed. Lower print speeds effectively make filament dispersal more consistent and reliable.
A good rule of thumb is to use the speed settings recommended by your filament’s manufacturer, and lower it gradually if you find you’re running into problems that overly fast printing speeds can cause like poor bridges, blobs, and zits, or bad bed adhesion.
- Lower Printing Temperature
We’ve already talked about helping bridging parts to cool faster so the filament sets, and another great way to help with this is to ensure your nozzle temperature isn’t so high that it overheats your filament.
This will further increase the time it takes to cool and set, and bridging filament that doesn’t set fast enough will droop and sag.
Like the print speed settings, you should follow the advice of your manufacturer and lower the settings gradually until you find the setting that works for you. The ideal temperature will differ depending on your choice of filament, so always double-check the recommended settings before printing.
Read more: the best PLA filament brands
- Alter your Design’s Orientation
Depending on the kind of model you’re printing, simply changing the orientation of your model may help.
If you’ve ever built a flatpack table before, you’ll know that the best way to attach the legs is to flip the tabletop upside down first. This makes a lot more sense than finding a way to hold the table upright and attaching them from underneath, and 3D printing bridges follow the same principle.
If you’re printing a simple bridge structure that isn’t placed in the center of the model, then changing the orientation to print it upside down removes the possibility of drooping – and completely removes the need for supports.
Even if the bridge isn’t the only part of the model or if it goes elsewhere within it, then you may want to consider printing the bridge upside-down separately and attaching it to the rest of the model later.
- Check Your Filament
Bridges need to be level and stable, and wet, dusty, or aged filament can produce a stringing effect, amongst other things, that will affect your print’s aesthetic and stability.
Keeping your filament well protected and dry will increase its shelf life, reducing the likelihood of problems such as stringing, under-extrusion, and warping that all lead to low-quality supports and bridges.
Read more: the best 3D printer filament dryers and dry boxes
Related posts:


