
3D Print Salmon Skin: 6 Common Causes & Easy Fixes
At 3DSourced we’ve covered everything 3D printing and 3D since 2017. Our team has interviewed the most innovative 3D printing experts, tested and reviewed more than 20 of the most popular 3D printers and 3D scanners to give our honest recommendations, and written more than 500 3D printing guides over the last 5 years.
You’re not alone if you’re getting salmon skin on your 3D prints. It’s one of the most common issues experienced by makers, but fortunately for you, it’s one of the easiest 3D printing problems to fix.
But, before I get into all the causes and fixes, here’s how you can tell if you’re dealing with salmon skin on your 3D prints:
Table Of Contents
- How to Recognize Salmon Skin on 3D Prints
- What Causes Salmon Skin on 3D Prints?
- How to Fix Salmon Skin on 3D Prints
How to Recognize Salmon Skin on 3D Prints
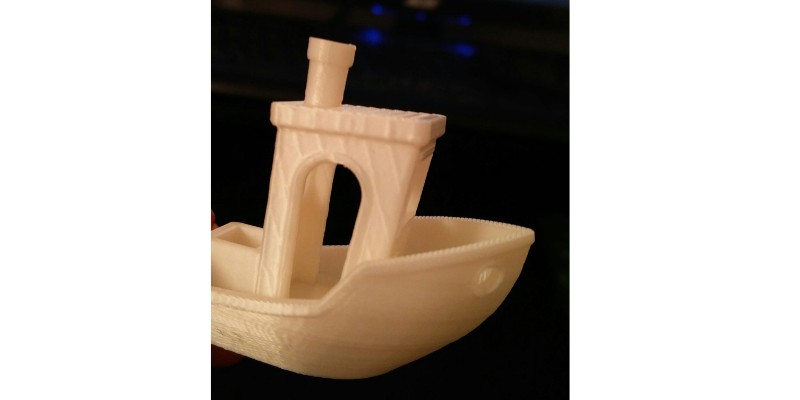
When your 3D print has salmon skin, its surface finish has lines that give it the look of fresh salmon meat. The lines may also look like zebra stripes or a series of waves that flow uniformly over the print surface. Sometimes, salmon skin might feel rough to the touch.
What Causes Salmon Skin on 3D Prints?
Salmon skin happens due to abnormal vibrations within your 3D printer. These vibrations originate mainly from mechanical issues in the 3D printer. But they can also occur due to low-quality filament, poor bed adhesion, and high printing speeds.

How to Fix Salmon Skin on 3D Prints
To fix salmon skin on 3D prints, stabilize current flow using TL smoothers and upgrade your stepper motor drivers where necessary. You should also print on a stable, flat surface, reduce your printing speed, replace and tighten up your printer belt, and tighten up any loose parts in the printer.
Let’s get into the details of all these causes of salmon skin, and exactly how to fix each issue.
1. Outdated Stepper Motor Drivers
Your stepper motor driver’s quality determines not just how quiet a 3D printer is, but also the likelihood of artifacts occurring during printing.
Stepper motors control the moving components in your 3D printer. They are like little engines, and they get their power supply from stepper motor drivers.
Unfortunately, most manufacturers only use basic stepper motor drivers in entry-level printers to make them more affordable.
If your stepper motor drivers are outdated, they’ll give in to heavy usage, and their efficiency will reduce. They’ll eventually lose their ability to maintain a steady current flow, and this will cause unusual, scaly patterns on your prints – salmon skin.
How To Fix: Upgrade Your Stepper Motor Drivers
Remember how stepper motors get their power from stepper motor drivers? While we also recommend a TL smoother (keep reading for more on this), upgrading your stepper motor driver can be a final resort.
Not all stepper motor drivers are equal, with some being more efficient than others. Their accuracy and efficiency largely depends on their microstepping rating.
Upgrading your stepper driver to one with a higher microstepping rating can dramatically improve precision and reduce the vibrations and noise of the stepper motor.
As a rule of thumb, the higher the denominator in the microstepping rating of a driver, the higher its price, and the quieter and more accurate the printer head is.
Here are some common stepper motor drivers that are compatible with most desktop 3D printer firmware:
| Stepper Motor Driver | Micro-stepping Rating |
|---|---|
| A4988 | 1/16 |
| DRV8825 | 1/32 |
| LV8729 | 1/128 |
| TMC2130 | 1/256 |
| TMC2225 | 1/256 |
| TMC2209 | 1/256 |
If you are considering upgrading the drivers, I’d recommend TMC2209 drivers. They are compatible with many brands, have a wide range of micro-stepping resolutions, and suitably handle high current and voltage loads.
2. Worn Out and Loose Belts
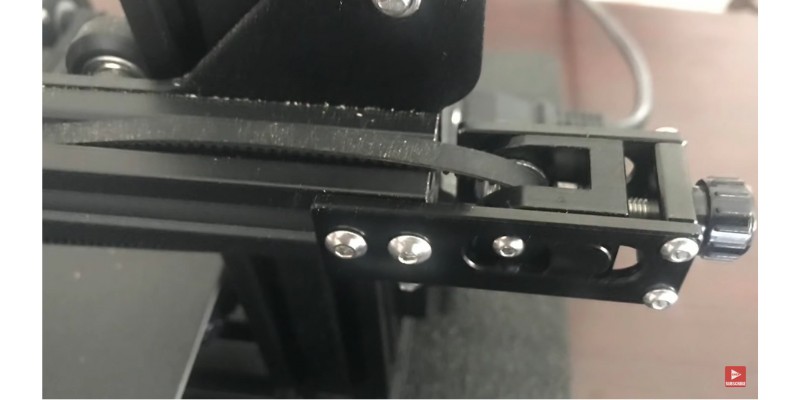
3D printer belts work hand-in-hand with stepper motors. The belts run along the stepper motor driver gears to move the hot end and print bed smoothly and precisely.
Printer belts are usually durable, needing only the occasional tension adjustment.
But, if they wear out (typically after several years) your print head’s movement can become less consistent, resulting in abnormalities and salmon skin effects on your print’s surface. Similarly, if the printer belts are loose, your printer will lose some of its precision, and it will show in your print quality.
How To Fix: Replace the belts
Fortunately, 3D printer belts are cheap, and you can buy them on Amazon for under $15, and they’re also easy to replace on most printers like the Ender 3. There are plenty of guides and videos online that’ll walk you through the proces.
3. Loose Parts
Printer belts are not the only 3D printer component that can get loose over time. Other pieces, like nuts and bolts, can lose their tightness over time. This makes your 3D printer’s frame less steady.
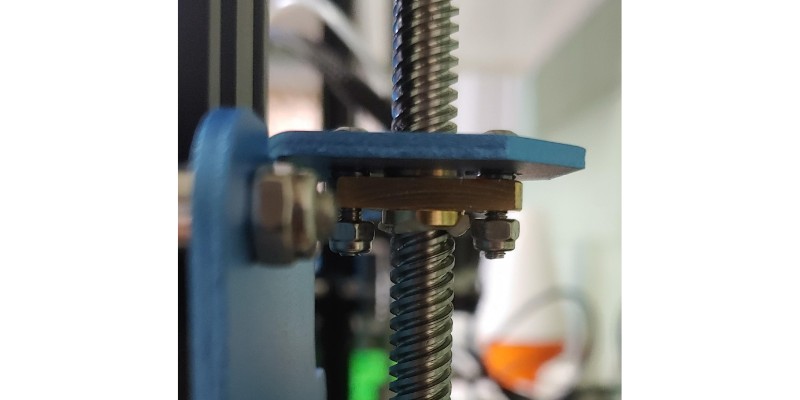
And, if you’ve got a rickety structure, your extruder won’t be able to deposit filament as consistently, and and irregularities will show up in the print.
How To Fix: Tighten Loose 3D Printer Components
Get your wrench and hex screwdriver set. Tighten up every screw, nut, and bolt as if you were assembling your printer for the first time – this should get rid of any mechanical shakiness.
4. Low Wall Thickness
Wall thickness is the distance between the outer shell and infill of a 3D print. If your wall thickness is too small, the infill can become visible on the outside part of your 3D printed object.
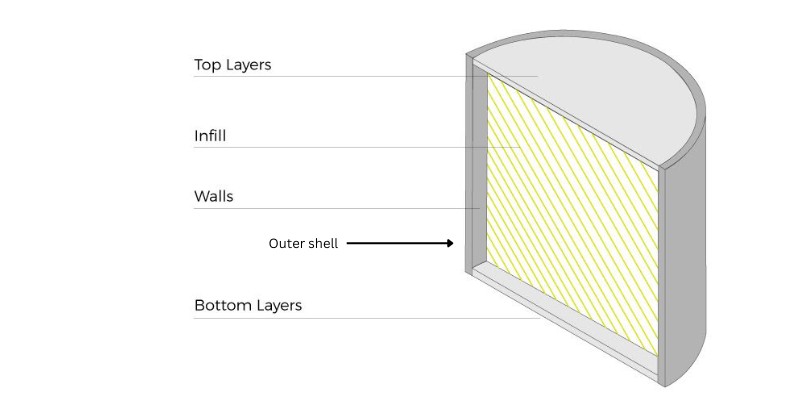
All 3D prints have an infill pattern rather than printing solid (we just usually don’t see it on the outside), to save filament costs and printing time.
With too-low wall thickness, this infill pattern can show up as salmon skin on your print’s outer surface.
How To Fix: Adjust Wall Thickness
Adjusting wall thickness ensures the infill has no chance of being visible on the outside. There are different things you can do when adjusting infill settings, but here are two things you can try first:
- Increase wall thickness. The greater your wall thickness, the more opaque your 3D object will be, and the less chance of noticing your infill. If you’re using a 0.4mm nozzle, try a shell thickness of 0.8-1.2mm and you should be fine.
- Lower infill overlap. This is how much the edges of your infill are printed into the outer walls of your print. In most slicers, the infill overlap percentage is 15%. Slightly lower this percentage to create less overlap between the infill and outer walls.
5. Printing On an Unstable Surface
If you use your 3D printer on an unstable, uneven surface, it’ll wobble as it prints. These movements produce unwanted vibrations that pass through the 3D printer and into the print itself, leaving shaky salmon skin patterns.
But how do you know if your surface is the problem?
When your printer stands on a shaky surface, you’ll see the surface tottering or vibrating. Also, you might see the printer vibrating as it runs if placed on unsteady grounds.
How to Fix: Print On A Stable Surface
Make sure your printer is nice and firm as you’re printing. Ideally, you should place your printer on a hard, flat, and rigid surface like a heavy table or desk, or on a rubber mat to dampen any unwanted vibrations. We have written a full article on the best tables and desks for 3D printers.
Avoid printing on light, plastic tables or soft surfaces like a couch or bed.
6. High Printing Speeds
High printing speeds are notorious for creating print imperfections. If you overwork your printer, naturally you’ll lose precision and quality (especially on a direct drive 3D printer with a heavier extruder).
This reduced accuracy in depositing molten filament causes rippling wavy patterns. Some of these patterns will likely appear as salmon skin on the surface of your 3D prints.
How to Fix: Reduce the Printing Speed
In most slicers, the default printing speed is around 50 mm/s. If you’ve gone way above that mark, reducing the printing speed might fix your salmon skin issues.
However, with printing speed, there is no one-size-fits-all. The correct speed settings really depend on what you’re printing, and the type of filament you’re printing with. For example, you should print TPU and other flexibles at far slower speeds than PLA. There’s always a trade off between speed and quality.
When lowering your printing speed, avoid lowering it by more than 25% of the default print speed. We also have a detailed guide on the best printing speed settings on the Ender 3.
One Final Salmon Skin Fix: Install TL Smoothers
If you’ve tried all the above fixes but still see salmon skin in your prints, it might be time to bring out a TL smoother.
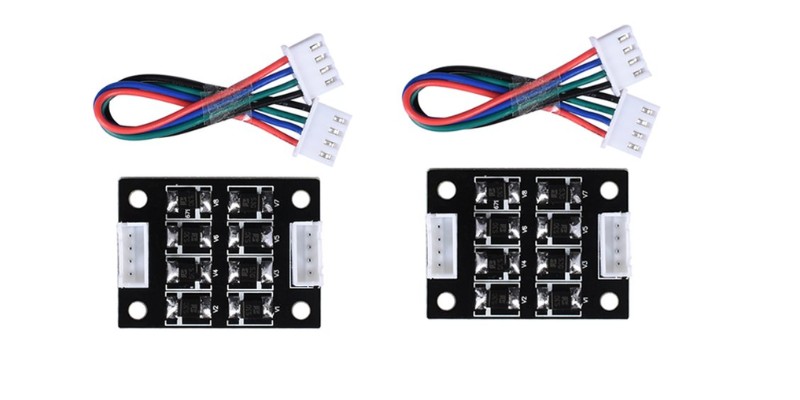
TL smoothers are small printed circuit boards plugged as add-ons between the stepper drivers and the stepper motors. They are low-cost, plug-and-play options that smooth out the torque and movements of the stepper motor while stabilizing the vibrations.
Keep in mind that not all 3D printer drivers require TL smoothers. Newer boards like the 1.1.5 have them built in, and don’t require a TL smoother add-on. This option is suitable for older drivers, such as the DRV8825.
TL smoothers come in either 4-diode or 8-diode packs. The difference between the packs is that the 4-diode pack has a lower smoothing effect than the 8-diode pack.
If you plan on buying one, you can go with this ARQQ TL smoother from Amazon because it has lower vibrations and less noise while providing a smoother result.


