Best Infill Pattern For 3D Printing (For Every Use / Cura)
At 3DSourced we’ve covered everything 3D printing and 3D since 2017. Our team has interviewed the most innovative 3D printing experts, tested and reviewed more than 20 of the most popular 3D printers and 3D scanners to give our honest recommendations, and written more than 500 3D printing guides over the last 5 years.
It’d be easy to pass off infill patterns as yet another setting amid the sea of tweakable options in your favorite slicer. After all, we’re talking about the internal supporting structure of a part, concealed and caged by the solid and smooth outer walls, only visible during the printing process.
Crank up the infill density, and everything will be fine, right?
If only it were that simple.
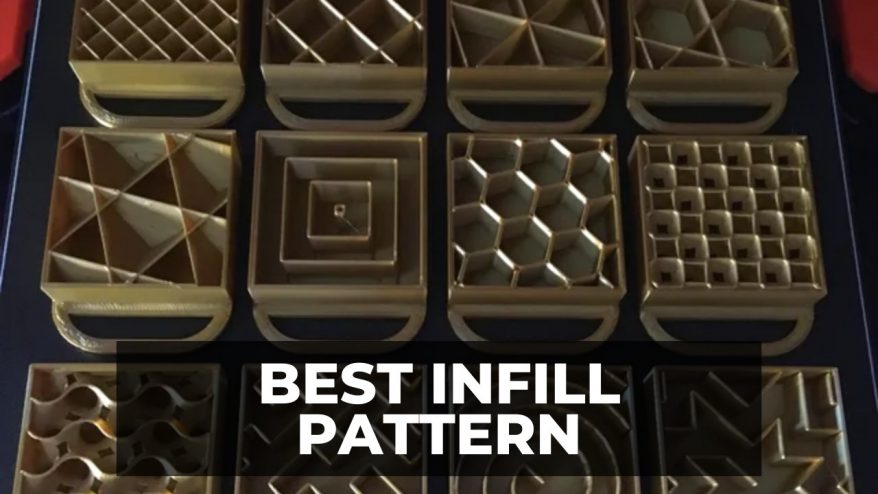
Gyroid, concentric, octet, and tri-hexagonal – these exotically-named and often overlooked patterns shape the printed object’s strength, flexibility, and weight while having a major say in print times and filament costs.
Best Infill Pattern For Each Use
This article will explore the best infill patterns for the most popular FDM 3D printing applications and filaments. We also include Cura infill settings (that work on other slicers, too).
Click each link below to be taken to each section in the article.
- General Printing – Triangles, Grid, Tri-Hexagonal
- Flexible 3D Parts – Concentric, Cross, Gyroid
- Functional 3D Parts – Gyroid, Cubic, Octet, Honeycomb
- Models, Figurines, and Miniatures – Lines, Zig-Zag
- Best Infill Pattern for PLA – Lines, Zig-Zag, Grid, Triangles, Tri-Hexagonal, Gyroid
- Best Infill Pattern for ABS – Lines, Zig-Zag, Grid, Triangles, Tri-Hexagonal, Gyroid
- Best Infill Pattern for PETG – Gyroid
- Best TPU Infill Pattern – Concentric, Cross, Cross 3D, Gyroid
General 3D Printing
- Infill Patterns: Triangles, Grid, Tri-Hexagonal
- Infill Density: 10% – 50%
- Strength: Medium
For general purpose 3D printing, medium strength infill patterns will do the job, offering a balance between decent strength, filament consumption, and print times.
Viable applications include 3D printed upgrades and mods, decorative and household items not subject to wear/tear/stresses, and any other standard 3D printing projects.
Triangles

As the name implies, this infill pattern consists of a connected mesh of triangles deposited in three directions. The benefit of three conjoined lines is overall strength when subjected to vertical and lateral loads. This pattern requires a little more filament but gives your general-purpose prints a bit more durability.
Grid

A low complexity pattern consisting of perpendicular lines intersecting at regular intervals to create a grid of squares. The grid pattern is economical and cuts down on print times at the expense of strength, so it isn’t recommended for parts subject to any degree of force or stress.
Tri-Hexagonal

Very similar to the Triangles pattern, Tri-Hexagonal features a mix of larger intersecting hexagons and smaller triangles peppered throughout to create a star-like pattern. This pattern is the stronger of our three selected general-purpose 3D printing patterns but doesn’t require too much more filament, making it an economical choice for those needing some resistance to force and stress.
Flexible 3D Parts
- Infill Patterns: Concentric, Cross, Gyroid
- Infill Density: 0% – 100%
- Strength: Elasticity and medium strength
For flexible prints, strength isn’t as much of a concern as elasticity and the ability to flex and twist without breaking. Infills suited for flexible parts tend to take longer than basic shapes and require a spot more filament.
Concentric
This infill traces repeating ripples made of single lines matching the shape of the model’s outer walls or perimeter. These circles reduce in size and length as you move towards the common center of the part, very much like ripples in water, hence the concentric naming.
This layout provides plenty of flexibility and decent strength, which, when paired with a flexible filament like TPU, allows a part to be stretched, twisted, and bent without breaking, generally extending the elongation at break properties of the model.
Concentric is also the best infill pattern for transparent filaments as it looks great thanks to uniform patterns – an important consideration when you’ll be able to see into the insides of the part.
Cross
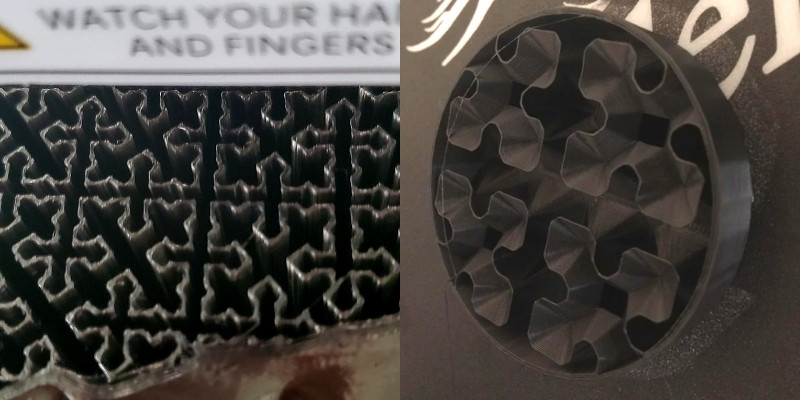
Cross is another infill suited to printing flexible parts. As the name implies, the pattern features a maze of what looks like ornate religious crosses with hollow centers. The arrangement of these allows the print to retain its structural integrity even when subject to stretching, bending, and twisting.
In addition, the Cross pattern lends itself to printing flexibles because the way the infill is deposited requires very little to no retractions removing some of the headaches associated with retracting flexible filament.
There’s also Cross 3D, almost identical to the classic Cross infill except that they’re angled vertically, producing a three-dimensional effect. Parts made using Cross 3D are a little more rigid than those made with the standard Cross infill.
Gyroid
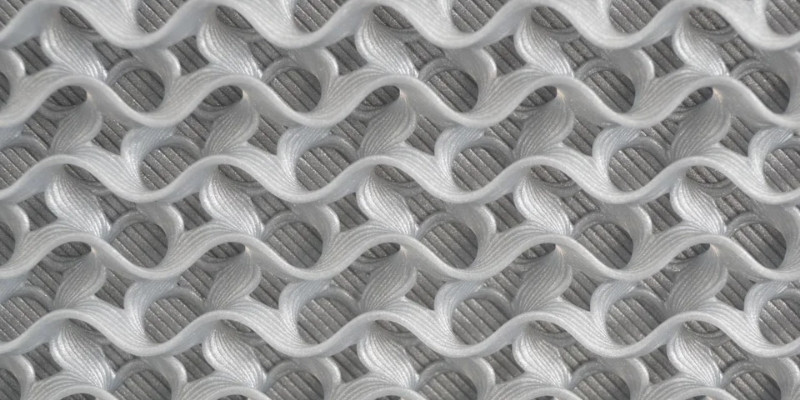
This pattern resembles tightly-packed alternating sets of cresting waves layered on top of and next to each other.
Gyroid provides some of the best overall strength of any infill pattern but also proves beneficial for flexible prints that require a bit more overall rigidity than the squishier properties you’d obtain with patterns like Concentric and Cross.
Note that due to the complexity of the pattern, slicing Gyroid infills takes longer than most other infill patterns.
Functional 3D Parts
- Infill Patterns: Gyroid, Cubic, Octet, Honeycomb
- Infill Density: 20% – 50%
- Strength: High
For functional 3D parts, the focus is on strength and resistance to stresses and forces in all directions at the expense of longer print times and higher filament consumption.
Gyroid
As above, this pattern resembles tightly-packed alternating sets of cresting waves layered on top of and next to each other. The layout makes for strong parts able to sustain pressure thanks to offering support in all directions. The downside is that the Gyroid pattern adds to print times and puts your slicer through its paces when readying a model for printing.
Cubic

This pattern is made of angled cubes that criss-cross each other at every layer to create a stacking effect. This results in solid and reliable overall strength without extending print times and material costs too substantially over, say, more basic infill patterns like Triangles and Grid.
There are also variations on the standard Cubic. Cubic Subdivision is a more economical version of Cubic, where the cubes reduce in size as the printer approaches the perimeters. This ensures the part has a strong shell but also conserves filament and reduces print times with large cubes towards the middle of the print.
There’s also Quarter Cubic, which merges elements of the Cubic and Octet (see below for more on Octet) patterns to create offset pyramidal shapes to ensure more bonds and good overall strength but uses more filament.
Octet
This pattern lays down stacked tetrahedrons constructed from many squares of various sizes to sustain substantial vertical pressure and stress. Like Gyroid, the time and filament demands are higher than more basic infill patterns, but the benefits are worth it for functional applications.
Honeycomb

This pattern consists of hexagons arranged into a grid resembling a honeycomb, hence the name. This arrangement grants parts high strength but also mechanical resistance.
Honeycomb requires quite a bit more filament than most other infill patterns designed for strength, which adds to print times quite substantially, sometimes as much as doubling the length of the printing process.
Models, Figurines, and Miniatures
- Infill Patterns: Lines, Zig-Zag
- Infill Density: 0% – 20%
- Strength: Low
When printing decorative items like models, figurines, and miniatures, there’s no need to waste time or filament on complex, strength-oriented infill patterns for the simple reason that these parts won’t have to survive constant stress, pressure, load, or wear and tear.
Therefore, models, figurines, and miniatures can be printed using the most basic infill patterns. Fast and economical are key here.
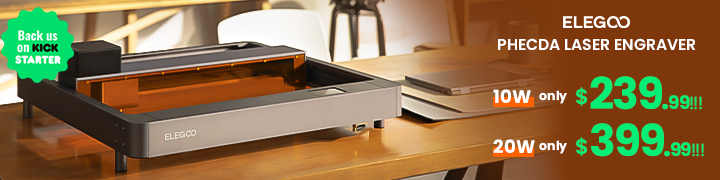
Lines

Lines, also sometimes known as Rectilinear, is a basic pattern that prints a straightforward grid consisting of a single-direction line of filament per axis before shifting 90° to do the next and so on until it completes a layer. Lines prints fast and uses less filament as it doesn’t stack filament at intersecting points. Strength is poor.
Zig-Zag
Another rudimentary infill pattern, Zig-Zag, arguably the best infill pattern for miniatures, deposits a single continuous and uninterrupted line of filament per layer, zig-zagging as it moves forward.
There’s very little difference to Lines in strength, print speed, or filament use, so it’s really down to preference. Both are excellent choices for models, figurines, miniatures, and other print projects destined for display or decoration.
Best Infill Pattern for PLA
- Infill Patterns: Lines, Zig-Zag, Grid, Triangles, Tri-Hexagonal, Gyroid
- Infill Density: 10% – 20%, but up to 50% if extra strength is required
- Strength: Low to High
There’s no best infill pattern for PLA per se; it depends entirely on your project and the properties you need.
As PLA is generally quite brittle, any infill that helps add structural strength and resistance to pressure in as many directions as possible is recommended for anything other than decorative parts and models.
We recommend stronger infill patterns like Gyroid and Octet for the strongest PLA prints.
Best Infill Pattern for ABS
- Infill Patterns: Lines, Zig-Zag, Grid, Triangles, Tri-Hexagonal, Gyroid
- Infill Density: 10% – 20%, but up to 50% if extra strength is required
- Strength: Low to High
Much the same applies to ABS as PLA. Recommend infill pattern options include Lines, Zig-Zag, Grid, Triangles, Tri-Hexagonal, and Gyroid. ABS tends to offer more flexibility than PLA, so it’s worth using patterns like concentric and cross for that extra bit of elasticity.
For functional parts, look to infill patterns like Gyroid, Cubic, and Octet for that extra bit of strength – these patterns are designed to offer solid support in most directions meaning your parts can take a knock and still remain intact.
Best Infill Pattern for PETG
- Infill Patterns: Gyroid
- Infill Density: 10% – 20%
- Strength: High
To make the most PETG properties – strength, durability, and decent flexibility – you’ll want an infill pattern to match. There’s really only one option that fits the bill, and that’s the versatile Gyroid infill pattern.
Gyroid consists of tightly-packed alternating sets of cresting waves layered on top of and next to each other, which makes for great overall strength. Prints made using Gyroid can withstand loads and stress in all directions and are relatively rigid while still offering a decent degree of flexibility.
Best TPU Infill Pattern
- Infill Patterns: Concentric, Cross, Cross 3D, Gyroid
- Infill Density: 10% – 20% is the sweet spot
- Strength: High elasticity
As TPU is a flexible filament, it’s best to use infill patterns that offer elasticity. Top recommendations include Concentric, Gyroid, Cross, and Cross 3D. All these are geared to sustain twists, flexes, and stretches without losing their structural integrity. However, Cross and Gyroid tend to offer better directional strength and offer better flexibility at lower infill densities.
FAQs
Which Infill Pattern Is Strongest?
The best infill pattern for strength depends on a selection of other factors – print size, application, material, layer height, perimeters, and shells – so it’s difficult to single one out as the uncontested strongest. Used and tuned correctly, infill patterns like gyroid, cubic, honeycomb, and even basic shapes like grid and rectilinear can be among the strongest available.
Which Infill Pattern Is the Fastest?
Rectilinear is considered a contender for the best infill pattern for speed because it prints each layer in a single direction, rotating 90°, then doing the same for the next layer. This means the material doesn’t build up when the pattern intersects, and the pathing of the print head and the nozzle is highly efficient, cutting down on filament consumption and print times. Grid is second to Rectilinear for print speed due to the simplicity of the pattern.
What Is the Best Infill Shape?
The best 3D printing infill pattern shape depends on what type of part you are printing and for what application. For general use 3D printing, a basic but reliable pattern that uses little filament like Grid is a solid option, while Concentric is best for flexible parts, and Gyroid rises above the rest if you need strength and support in all directions. There’s no perfect answer, and it’s all about finding the pattern that best suits your needs, acceptable print times, and how much filament you’re comfortable using to create a print.
Is 50% Infill Too Much?
50% infill density is viable if your print requires more strength. Otherwise, the sweet spot for infill density sits around 10% – 20%, balancing material consumption, print times, print strength, and durability. We also recommend exploring other settings linked to strength, notably perimeters and shells, before simply cranking up the infill density.
It’s also worth noting that pushing beyond 50% infill density for most materials results in no tangible mechanical benefits, and you’re effectively increasing print times and filament usage with no advantage. It’s a case of diminishing returns. For example, increasing the infill percentage from 50% to 75% amounts to a 10% increase in overall strength.
Related Articles: