We’ve all been there. You start a print job, and the first layer of your print material isn’t properly adhering to the surface of your print bed.
As a result, it begins to move or slide. Disaster.
In the end, instead of ending up with a cleanly printed object, you’re stuck with a semi-shapeless blob of spaghetti. Not quite what you were envisioning.
Even if your initial layers come out fine, you can still notice that the corners of your object begin to pull up and inward as the print progresses.

If this is a common problem (and you don’t want to upgrade to a heated print bed) I recommend keeping an adhesive solution handy.
Overall, I’d recommend investing in a PEI sheet for most users prioritizing high-performance, consistent adhesion.
Alternatively, kapton tape and blue painter’s tape are effective improvised solutions, and even household items like hairspray and Pritt stick can help if you’re in a pinch (and are very careful!).
Each of the popular adhesive options I’ve tried has its own particular strengths – but they will all help you stop wasting your valuable time on failed prints.
So let’s work out which is right for you.

Which Build Surface is Right for You?
Build Plate Surface Adhesion
Most 3D printers come with a print bed that is made of glass or aluminum. Both of these materials are quite durable and relatively impermeable. Therein lays the problem. Glass and aluminum, by themselves, both have extremely smooth surfaces.
This smooth 3D printer build plate surface offers the print material very little purchase to grab onto. As a result, the material tends to resist adhering to the surface of the print bed. The result is the movement of the initial print layers or warping of the material as it cools.
Heated Bed Advantages
Heated print beds have tended to somewhat reduce this problem, especially for materials with a lower printing temperature like PLA. However, even a heated bed does not eliminate all adhesion problems all the time, especially for materials that need a higher printing temperature, like ABS.

The solution to the problem is to find a build plate surface that will provide greater adhesion for the print material to hand on to as the job progresses. In this article, we’re going to take a look at some of the more common and successful build plate surface solutions out there, so that you can choose one that’s right for you and the print material that you’re working with.
Before we look at the common 3D printer bed surfaces available to you, you may be wondering “What is a 3D printing raft, and when should I print with one?”
A raft is a couple of layers printed before your main print. Some printers (like the Zortrax M200) have a perforated heated bed, requiring you to print with a raft every time. This does work well, because you never have to worry about bed adhesion with a raft on a perforated bed.
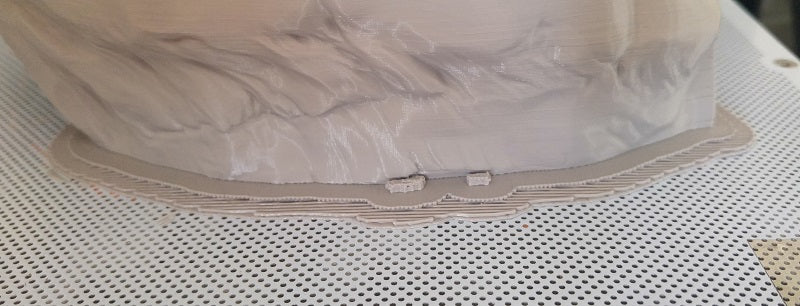
For anyone with a regular solid bed, we think the only times you’ll likely want to print with a raft is when you’re printing objects with a very small contact area on the bed and you’re worried the print might unstick during printing. But for most instances, if you get the right surface for your bed – you shouldn’t need to worry about rafts.
The Best 3D Printer Build Surfaces
Hairspray
Let’s deal with this one right away. Some people swear by hairspray as a great way to ensure 3D printer bed adhesion. We’re not that much of a hairspray fan for a couple of reasons.
First, hairspray was a great solution to adhesion problems back when most printers didn’t have heated beds. Today, not only do most printers have heated beds, but there are also better and more durable solutions available.
Second, let’s face it, hairspray is a mess to use. It gets on your printer, it’s a pain to clean up and you have to reapply it for every new print job. We recommend you go with different adhesion solution, but if you’re set on trying hairspray, make sure you choose one that’s extra hold and contains plenty of vinyl, acetate, and copolymer.
If you spray it outside and leave it to dry, it should provide an acceptable bed surface.
Read more: the best hairspray for 3D print adhesion
Blue Painter’s Tape
Blue painter’s, or blue masking tape, is an easy way to give your build plate surface more adhesion, especially if you’re using a material with a lower print temperature like PLA. This is a commonly used bed, because it’s not too messy, works OK, and is relatively easy to get hold of.
Because it is easy to remove at the end of a job, many people apply it directly to the surface of their print bed. It is easy to apply, mainly because it can be easily placed and replaced, over and over, to ensure that it lies evenly with no bubbles and with tight seams between rows.
One problem with painter’s tape is that no matter how careful you are, the seams between the rows will still be slightly raised. This will, of course, affect the look of the bottom of your printed object.
For some objects, this presents no problem. For other objects, where the look of the bottom is an issue, you can use super wide painter’s tape. Its 6-inch width can give a seam-free print surface to smaller objects and cut the number of visible seams in half for larger objects.
Kapton Tape
Kapton tape is a great solution for bed adhesion if you’re working with a material that has a high printing temperature, like ABS.
Kapton tape was developed by NASA for use in space. It is a super-thin, film-like material that is extremely heat resistant.
Kapton can also be difficult to apply and remove. To solve these problems, many people have a 1.5mm piece of window glass cut to the size of their printer bed. They then apply the Kapton tape to the glass using the “water method” and then attach the Kapton coated glass to the print bed using clamps or adhesive.
Make sure that your build surface is level after attaching it to the bed. Like painter’s tape, Kapton comes in a 6 inch wide roll that makes covering your surface quicker and easier.
Pritt Stick
Pritt stick is another great way to get adhesion on your build surface. It works well with both our PLA and ABS and it’s neat and easy to use to boot.
You simply apply a layer of the Pritt stick to a 1.5mm piece of glass cut to the shape of your print bed (or your print bed itself, if the surface is already glass). Let the glue air dry and then attach the glass to your print bed using clamps or an adhesive. Double-sided tape works well. Heat your bed to the proper temperature as normal, and wait about 30 minutes before beginning your print job.
The key to Pritt Stick and similar, is that you get an even coating, without blobs. If you apply in a too-cold environment, the coating will be too thin. And if you apply with the heated bed too hot, it can get gloopy and leave blobs everywhere.
The good news is once a good layer is applied, it should last a good few prints before it needs re-doing. Voila, near-perfect 3D printing bed adhesion. Essentially though, like the above methods, it’s still some degree of messy and not exactly ‘plug and play’.
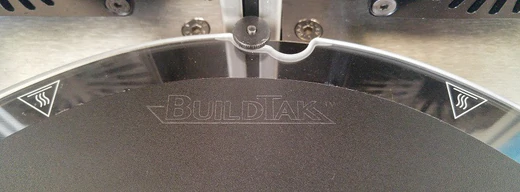
Buildtak
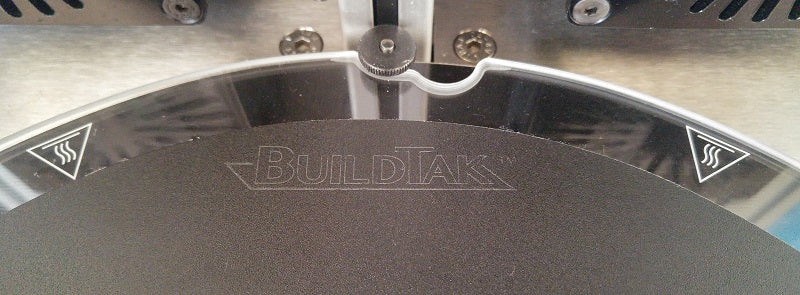
Buildtak is a thin plastic material that self-adheres to the build surface and, according to its manufacturer, “provides an optimal printing surface for 3D objects to adhere to for the duration of a print, while allowing for a clean, easy removal of completed builds.”
Buildtak is manufactured and marketed by the Ideal Jacobs Company who, interestingly enough, developed Buildtak after purchasing a 3D printer and finding that it was difficult to get objects to adhere to the build surface.
Buildtak comes in 13 different sizes, so finding a size that fits your build surface shouldn’t be an issue. It comes with a self-adhesive backing that can be somewhat easily applied to the build surface. As always, make sure that the build surface is leveled after installation. Buildtak works with both PLA and ABS, as well as more exotic materials like HIPS and PETG and users report that you can expect to get about 50 to 100 hours of use out of one Buildtak sheet.
It’s worth noting that with Buildtak and PEI (below) you may need to increase your heated bed temps by a few degrees – as these surfaces can very slightly insulate the heat from your bed.
PEI Sheet
PEI, or polyetherimide, is a thermoplastic that provides a good build plate surface adhesion solution for a wide variety of printing materials, including both PLA, ABS, Nylon and others. It is extremely heat resistant, performing well in temperatures up to 170C.
It is also reusable, relatively inexpensive, and requires almost no maintenance between print jobs, other than a wipe down with an isopropyl alcohol and water solution.
You want to use a sheet of PEI that is between 0.5mm and 1.0mm thick (approx. 0.03”) and around the size of your bed. Common sizes are 200mm x 200mm up to 300 x 300mm (12” x 12”). Thicker sheets will only be harder to apply to your build surface, require more heat, and due to the raw material cost – are more expensive.
Once you’ve got your PEI sheet, you can easily cut it to size with a box cutter or Exacto knife. The sized sheet can then be laminated to one side of a two-sided adhesive transfer sheet like these. Once laminated, the sheet can then be attached to your build surface using the other adhesive side of the transfer sheet. A short video tutorial detailing this process can be found here.
Once you’re finished, remember to re-level your print bed and you’re ready to pretty much kick you surface adhesion problems to the curb.
PEI is our favorite; mess-free, fit & forget print surface that more or less copes well with every material we’ve thrown at it. If it doesn’t work for you, it’s likely it has some grease or is dirty. Just use some alcohol wipes, and very fine grit sandpaper to restore it.

Ultimately if you’re still having issues with bed adhesion, you may want to try using a better quality filament. Cheap and poor-quality filaments can be inconsistent with sticking to the heated bed.
Related articles:


