3D Printing Lesson Plans (Elementary & Middle School)
At 3DSourced we’ve covered everything 3D printing and 3D since 2017. Our team has interviewed the most innovative 3D printing experts, tested and reviewed more than 20 of the most popular 3D printers and 3D scanners to give our honest recommendations, and written more than 500 3D printing guides over the last 5 years.
Because 3D printing is still an emerging technology, it’s often underutilized in schools due to a lack of understanding of its benefits. But that’s a real waste!
3D printing is relevant to virtually all subjects, and it is important to prepare students with a new tool that is likely to become increasingly prevalent in future careers.
In this guide, we’ll discuss how to craft the perfect 3D printing lesson for all ages (elementary, middle school, and beyond) and break down some engaging 3D print ideas relevant to a variety of subjects.
We’ll also cover the budgeting side, helping you work out which prints are feasible and the best 3D printers for education and schools

It is not necessary to have a 3D printer at every desk to teach the benefits of the technology – in fact, you can even start with zero 3D printers of your own
There are also a few considerations you’ll need to make in terms of safety, and the limitations of 3D prints when creating a lesson plan that fits tightly into a 1-hour slot.
So let’s start pulling together a lesson plan for 3D printing that will capture your class’ imagination!
Table Of Contents
- Creating Your 3D Printing Lesson Plan
- 3D Printing in Education: Introduction
- Things to Consider Before Using 3D Printing in Education
- Getting Started & Budgeting
- Why 3D Printing is Great in Classrooms
- Where to Get Files for 3D Prints
- Let Their Imagination Run Free
- 3D Printing Ideas For Schools:
- How To Teach with 3D Printers if You Don’t Have Access
- What About Finishing and Painting?
3D Printing in Education: Introduction
I am assuming that you already have a very basic knowledge of 3D printing as you may have already used one or been researching them by the time you read this article.
Whether you’re a teacher or a parent looking to get your children engaged in learning through 3D printing, you’re in the right place.
Arguably one of the best ways to engage students of any age is to mold their learning around what already interests them. The beauty of using 3D printing in education is that there are relevant applications to virtually all subjects.
Sadly at present, the ‘limitless’ 3D printer is often seen as similar to the school computer from the early ’90s.
It’s still early days for the technology and its hype has preceded its true adoption, leaving many school 3D printers underutilized and awkwardly not fitting into teachers’ lesson plans or even students’ interests.
This isn’t the teachers, students or parents’ fault. The whole sector has been focused mostly on two extremes: high-tech industry applications, and comparatively low-tech home-based makers. This has left the educational sector relatively poorly guided, with teachers struggling to awkwardly shoehorn 3D printers into their school curriculum.
The benefits of 3D printing in education simply haven’t been properly communicated. We’ll cover the varied benefits of 3d printing in education shortly.
I’ll also highlight how 3D printers are highly relevant to learning, in virtually all subjects and provide a wire-frame guide to get the most out them, with maximum student engagement. For those who are still not convinced of their educational benefit in schools or the home, allow me to recap why this is such a valuable technology right now and increasingly in the future.
I’m fortunate enough in my line of work to regularly be genuinely amazed and astounded (nearly every week) by the applications and creations our customers share with us.
From high tech industry creating stronger, lighter & cheaper parts using less material, through to bedroom inventors quickly prototyping design concepts and hobbyists printing functional toys and replacement parts for household items.
One of our customers, OpenBionics, prints highly dexterous prosthetic hands so advanced users can play the piano. A feat thought impossible a few years ago. Another is a renowned professional artist, sculpting fascinating nature inspired works.

Others run niche businesses selling items they’ve designed to solve specific problems. And some just create huge detailed architectural models of development projects in a matter of weeks, instead of what used to take months and often cost tens of thousands of pounds.
In short, this means there will be few sectors not revolutionized in some way by this technology within the next decade. That’s not a lot of time. A significant portion of students today will utilize 3D printing in some way in their future careers and home lives.
Let’s get them to understand the potential now, so they have the reference experience required to tie their inexhaustible creativity to emerging technologies, crafting a better future for themselves and the world around them.
Things to Consider Before Using 3D Printing in Education
We’ve addressed the advantages of 3D printing in education, but what should you be aware of? Frankly, there are few disadvantages of 3D printing in education but it’s worth taking into consideration its limitations. While 3D printers aren’t exactly dangerous, like any tool it’s best to use them with full regard to safety.
The media over-hyped the technology, causing it to be misunderstood and so its practical up-take was perhaps more problematic than it might have been if the correct message had been delivered from the start.
It’s important to explain to students what a printer can and currently cannot do, how its key strengths (to support mass customization of consumer products in comparatively short time-frames) should be utilized effectively performing tasks that other machines would struggle with.
To clarify; mass-producing a part that’s clearly better off injection molded, a 3D printer would never be able to compete. It would take too long to create each part compared to the few seconds injection molding machines can stamp out plastic pieces.
3D Printers are perfect for creating something that’s not been created before, or is a perfect fit (think precisely-sized glasses frames individual to each user), and generally cannot excel at creating traditional mass-produced items.
Getting Started & Budgeting
Should our department get one good 3D printer, or multiple cheap printers? This is a question often posed by teachers looking to budget their 3D printing education programs. You’re right to be confused as there’s conflicting advice around.
Note: In my view, you don’t actually need a 3D printer in the classroom / your school / your home to teach the benefits and adaptable concepts of the technology. A large portion of the learning is done in designing models that solve real-world problems.
While it’s certainly useful to have students with direct access to a 3D printer, if this is prohibitive through cost or other restrictions there’s no need to be delayed in getting started. We’ll discuss your options for getting students’ designs printed if there’s no direct access to a printer later in this article.
One of the issues that have restricted 3D printers from mass adoption is ease of use and reliability. Until recently it’s only really been the early adopter community that has pushed this forward, and usually they’re happy or accommodating enough to spend hours tinkering away fixing the printer and making modifications.
So unless you specifically want to create a class full of 3D printer technicians, using a cheap unreliable printer (multiply the issues for many printers) will only cause grief, frustration and potentially boredom among students.
It’s also worth pointing out that you really want to familiarize yourself with the printer before you show it to students. Start small by printing some simple objects and work your way up. Definitely make sure you’ve printed the exact model you’ll be showing to your students first.
3D printers can take a little bit of tinkering to setup and the last thing you want to do is waste your grand unveiling troubleshooting or it fail mid-print while your class wonders what’s happening.
On the surface it would make sense to have more printers so more students can be engaged in the actual printing side of things, but if you’re not getting the right (reliable) kind of printer you’ll just cause more hassle and work for yourself.
As you’ll learn shortly, the physical printing aspect is only a small part of the learning so even class sizes of ~25 students shouldn’t experience too much of a bottleneck if print queues are managed well around one or two printers.
Now, while you can get good printers like the Monoprice Select for around £300, or Prusa i3 MkIII for a reasonable price at £600, I’d highly suggest getting the best 3D printer you can budget for.
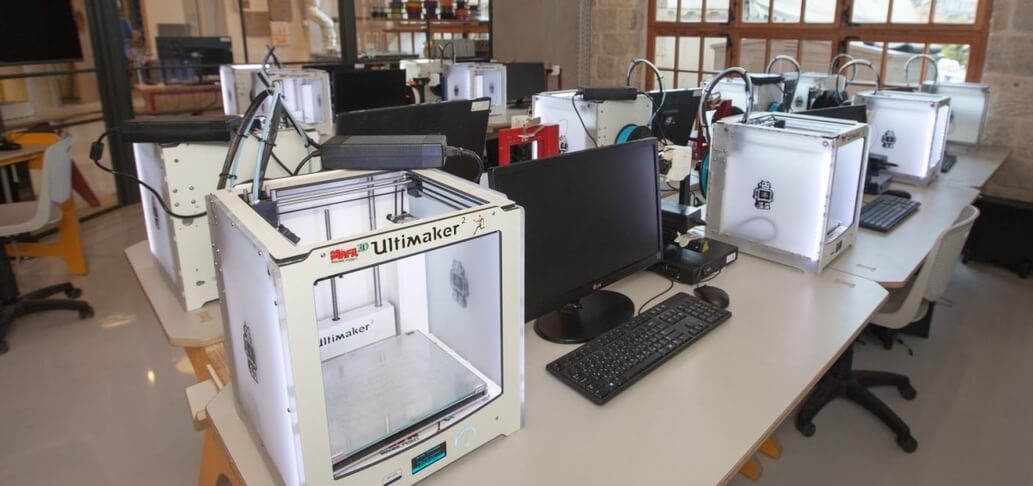
In short, the best 3D printer for schools are often an Ultimaker or a Zortrax machine.
They’re well designed, reliable and as close to ‘plug and play’ as you can reasonably get, starting at just over £2000. It’s no coincidence that Ultimaker are one of the most popular 3D printers used in education.
With good quality filament costing £30-£40 per KG typical prints the size of soda cans will come in around £0.50-£1 each with a full roll often lasting a month or two with semi-regular use.
Or if you’re producing larger-sized prints that take up a lot of material, you’ll use filament faster. Very approximately, a 3D printer making large prints continuously at a normal 20% infill will use a KG in 4-7 days.
In short good quality filament is just as, if not more important than getting a reliable printer. Poor or inconsistent filament can cause a multitude of problems, so don’t fall into the trap of the false economy of buying cheap.
While explaining details of the materials you may choose to print with is beyond the scope of this article, we have a filament material guide available here.
TL:DR? Just use PLA. This is a natural, long-term biodegradable material that is easy to use and still strong enough for a surprising amount of end-use applications.

Why 3D Printing is Great in Classrooms
Here we’re going to cover how to unveil 3D printing to your students in an interesting way, that will get them excited and their minds racing with ideas and creativity. But do this wrong and you’ll condemn 3D printing as a trivial technology with no real purpose other than printing useless trinkets.
So no pressure…
To start, it’s worth being prepared. You want to keep the words brief and just explain that a typical desktop FDM 3D printer creates objects of potentially unlimited complexity by building up a series of flat layers on top of each other. You can ‘print’ almost anything if you have the design for it.
This is the point where you want to show a time-lapse of a 3D print. This is a fantastic way to demo the technology. Regardless of whether you have a 3D printer to show them at this stage, 3D printers take hours to produce a part.
To expect students to have the patience to wait for an object to complete could be asking too much, too soon.
Ideally you’d have both to show them, at the point you unveil the printer it’s already whirring away printing something unknown, and to add context you have the timelapse video set up to show what’s going to happen.
Here’s an excellent time-lapse of a Millennium Falcon being printed. A print this size would normally take a day or two of constant printing, but here you can watch it grow in the space of a few minutes.
Prepare for them to be mesmerized if they’ve not seen the technology before.
Whatever print you have actually printing at the time your students or children see it, you have two options. Set a smaller print with a low infill density so that the print can be completed reasonably quickly, or if you’re printing something bigger, like the Falcon or other high-interest object you could have previously part-printed versions showing different stages in its production.
For example different prints 2 hours in, 4 hours in and 6 -8 hours in or more depending on the length of the print. These would be physically ready to hand out around the class while discussing Q & As.
Make sure you choose a model that suits the age group of your students. If you’re 3D printing projects for high school make sure you’ve got something with a little more to it than if you’re just showing off 3D printing in elementary school, or (in the UK) primary schools.
Remember at this stage it’s not too important what you’re printing or if the model itself is seen to have educational benefit. The key at this point is just to hook the students with the technology, ideally with a model that is interesting to them.
Starting with a static model, like the Falcon you’ve just seen being printed in itself isn’t going to scratch the surface illustrating the usefulness of the technology, but it is fun to watch. Here’s something a little more tangible; a heart-warming video explaining how a dog that lost its leg got a custom prosthetic to allow it to walk normally again.
Where to Get Files for 3D Prints
The relevance of 3D printing in the classroom doesn’t start with the printer. It starts with creativity, with a problem to solve, or a question to answer. Now many 3D printer lesson plans currently available start with an existing file available to download from one of the fantastic 3D printable model sharing sites such as Thingiverse or MyMiniFactory.
These sites are great to just visit and download an existing model easily. This could be a great next step from your initial unveiling. Browse the site as a group, and decide on a simple print quickly. Here are some examples: an adjustable spanner, a model Pokémon, popular film characters or fashion hairbands.
Perhaps if there’s a latest craze like fidget spinners, Yoyos (OK, so that’s old) or Popsockets so you can pique students’ interest. These items are quick and easy to print, so the students can quickly grasp the basic concept of choosing a 3D file, downloading it, and 3D printing to see how the whole process works.
There’s nothing like building up the momentum of interest like the fast feedback of instant gratification. While these kinds of projects on their own can be limiting in educational benefit, they serve a valuable purpose just to spark that initial interest, often taking only an hour or two to print.
Think of this as a natural progression from the video demo above.
Making the first project relevant doesn’t have to mean overcomplicating things and expecting to complete a mammoth project where all the students learn Computer Aided Design (CAD) to a university standard. You can start with small lesson plan ideas and still keep it interesting.
Read more: the best CAD software
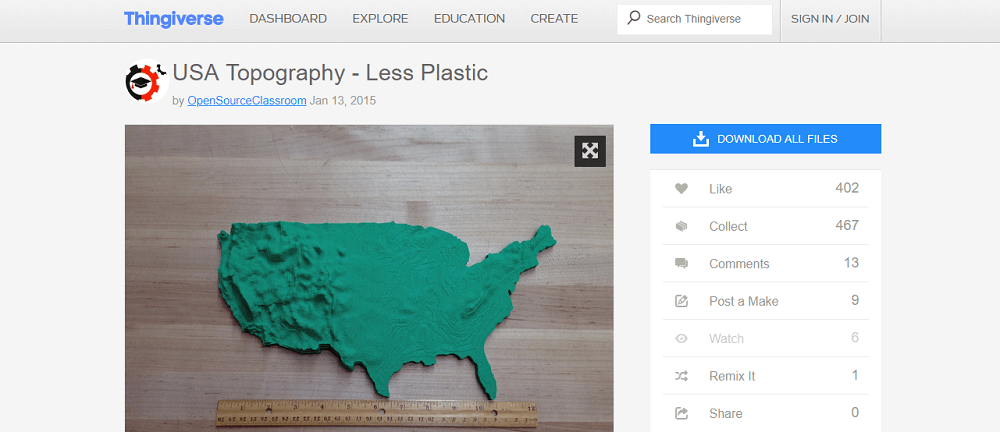
The next phase is to introduce a slightly bigger group project or subject related example. Such as recreating a well-known artistic sculpture, impressive prehistoric T-Rex skeleton, or a fully 3D modeled topographical map. Balancing the topic of the print between a high-interest model and something fitting to your core subject is the aim here.
Later when the students design their own models, it’s important to keep briefs flexible to play to individual students’ strengths. Creating a highly practical custom desk organizer for one student might not be another’s cup of tea, they might prefer to push the limits of their imagination with an abstract art sculpture.
Naturally, the complexity of the model chosen can be proportional to the aptitude or age of the students. You can simplify the models you print when considering 3D printing in primary schools and then build up from there.
To maximize interest, it may be best to have a selection of 2-4 suitable models that the students can chose from or suggest – rather than choosing for them.
Using pictures of the finished model while it’s printing can open the debate, asking the students questions of why this particular item has importance & what you can learn from it. All the while experiencing the benefit of delayed gratification while watching but patiently anticipating the print to finish.
It’s worth noting I believe it’s important not to cover a project like this in too much detail from a forced structure. The purpose again of this larger group project is only to build relevance of the technology within your core subject.
Exhausting all possible angles of educational benefit from a single project / model can ruin the wonderful intrigue and organic fascination that drives and originates from play-based learning.
I remember subjects and projects in school I was originally interested in and then having all the enthusiasm systematically stamped out through an overly detailed dissection, instead of varying the different points through multiple topics to keep it interesting. Maybe this is an extreme example, but the point is no less true.
Let Their Imagination Run Free
It may be that your students gain a lot of benefit from the above projects in your core subject, but arguably the far most impactful way 3D printing can revolutionize the way students imagine, work and create by giving them the ability to design their own simple models from scratch.
Not only will your students learn obvious educational benefits such as applying comprehension of measurement, volume, area, perimeter, conversion, planes, angles, flips, and other geometric concepts. They’ll also benefit immensely from conceptualizing solutions to problems to materialize these into tangible objects of practical purpose.
This has vast benefits in many subjects, not limited to technology, design or maths-based topics. Just imagine the possibilities when every student is enabled to be an innovator, not just those who studied product & design.
But this next stage is I imagine where the most daunting aspect of incorporating 3D printing school projects for educators lies, but is the point at which the most value can be delivered to the student.
This is where each student can immerse themselves on a mini project from start to finish by imagining, designing and creating (printing) their own solution to a problem. For younger kids simply sketching out a toy or figure that they can then design and print would be equally as engaging.
Granted, this might sound like an impossible task given a large class size, but stay with me.
The assumed complexities of teaching students to use CAD programs and conducting an entire class to individually design something that can actually be 3D printed may justifiably intimidate most teachers.

Luckily there are a lot of tools and help available to simplify this process. Teaching CAD does not have to be complicated.
Using very simple beginner-friendly CAD software or tablet apps will truly allow the students interest and participation in 3D printing to explode. Here they are in control and they can create whatever they can think of. Get this stage right and their enthusiasm will be unstoppable.
The balance here is to let them choose what they want to design, within the limits of their current ability and the design software they’ll be using. Most objects that they might want to design can usually be distilled down into a handful of basic shapes. Rule of thumb, if they can sketch it and you can easily see what it is, it’s likely they’ll be able to learn the skill to design that in software.
3D Printing Ideas For Schools:
Here are just some examples of 3D printer classroom projects they could sketch out and actually design. Older students can add complexity as required: copy an existing object in the classroom, Pet accessories, dolls & house items, fashion accessories, aeroplanes, race cars, aliens, custom lego mods, comic book characters, dolphin cookie cutters, wind chimes, engines, Warhammer or Minecraft figurines, musical instruments, insects, Harry Potter, foreign objects from holiday, bedroom door signs, planets, puzzles, robots or design a simple gear / sliding mechanisms.
The list could be endless.
But before we get your students sketching up their prized designs, you’ll need to introduce them to the software they’ll be using to do it. There are many design programs available, but I’m just going to give a quick overview on two here as a guide.
The first software we’ll look at is for any age, but ideally suitable for younger children as it’s an easy to use tablet app from an Estonian startup called 3DC. Their app is simple to learn and comes with excellent support focused towards educators looking to integrate the technology in their curriculum. They also offer discounts for schools.
Once you’ve learnt the basics you can get printable designs ready in 10-20 minutes for simple objects.
They even have example lessons to download from their site, state all designs are 3D printable and claim you can get started modelling in as little as 30 seconds.

A slightly more powerful software that is an excellent choice for education is a program called TinkerCAD. Again this is a simple software and nowhere near the complexities of more advanced programs, but it allows students to get designing quickly yet is still powerful enough to create wonderfully varied designs.
TinkerCAD has the backing of a much larger company and has plenty of support for educators.
It’s best for you to try both as you’ll likely have a much better idea as to where your students are at and which will be the most suitable app to learn.
Covering how to use each of these design tools is beyond the scope of this article, but each have well-documented step-by-step guides and manuals. What I will cover below are some ways to make the most of the whole process without coming unstuck.
You definitely want to start with some very basic product design theory if you’re allowing the students to create their own designs. Regardless of your class subject, they’ll need to be armed with the right tool to make their creations with the minimum amount of frustrations.
This doesn’t need to be too in-depth and can likely be covered in a short timeframe. It’s mostly what they need to avoid so that you don’t run into problems later with designs that won’t print well.
The next step is learning the CAD you’ve chosen. The first part of this should be sketching out the thing they want to design and print. If someone lacks enough creativity, help them with their design.
It will be far more engaging for them to be learning the design process directly relating to their own design as they go, rather than combining shapes and blocks together that don’t mean anything to them – or sitting through lots of theory before they even start designing. Solving their problems as they meet them will help it stick.
Of course it’s best to address all the students with some aspects of theory so they can at least get started on the right track, but keep it brief and only the key, interesting areas. Rule of thumb, don’t cover any theory they might need, just cover what you know they will need to know.
There’s no need to cover all the bases and boring ‘just in case’ knowledge that gets forgotten the moment they leave the classroom.
It’s worth setting limitations here on size or the complexity of the print based on the resources you have available. If you have a large class and only one printer, set expectations accurately by limiting the prints to say 5cm or 10cm cubed volumes.
Remember complexity of the model is free, it’s only the size that’s proportional to your resources such as printing capacity and filament supply. It’s important to communicate there’s no benefit to over-simplify their designs, the most complex* models have just as much chance of being printed as the simpler ones – the only factor is the volume.
*With regards to ensuring their model is printable of course, best 3D printing design practices should be adhered to.
As they learn how to create each shape, extruding or subtracting volume to make their model, you should be explaining why they’re doing it that way, and maybe even discussing other possible ways you could have achieved the same result as you go.
For example, if you chose to subtract a smaller area, or extrude the larger area around it?
Making the students draw this line, extrude this area, enter value of 20, flip etc. will just teach them to follow instructions and not understand what they’re doing or how it relates to what they’re working towards.
It’s important to break down these projects into chunks that easily fit into the time frames you’re limited to. If you are limited to 1-hour lessons, make sure each section has enough time for all the students to stay on track.
Engage the students that move ahead with their designs at a faster rate to help out those who are struggling with other design elements. It can be frustrating to problem solve in the last few remaining minutes if there wasn’t enough time to begin with.
It’s really important that before the students get to print their models, that the printer is setup and calibrated correctly. For a good printer, this may just mean you’ve run a couple of different prints through it reliably. Having to restart students’ prints due to failures can be frustrating and disheartening.
Finally, you’ll want to organize the print queue effectively. Is the capacity / printing time you have high enough for the amount of students you have? If so that’s great, everyone gets to print their model. But it may be that this is unrealistic, and only 50% of the students can print their models.
These are all things worth taking into consideration when setting the volume limits of their designs earlier.
If you’re allowed to leave the printer running overnight in the school, set the longest prints at the end of the day to maximize printing hours. If some prints are being calculated by the slicer at an unacceptably long time frame (take into consideration number of students’ projects, material needed, and printer speed) then you may need to reduce the scale of the print and or the infill used. Check out our article on overnight 3D printing for more.
How To Teach with 3D Printers if You Don’t Have Access
This is a great question! Fortunately, there are two key options for you. There are sites like Shapeways that allow you get your students designs printed at a commodity price point of £X per KG of filament used.
If your budgets are strictly limited you may have to choose just 3-5 of the students designs to get printed out. Prices vary hugely between services, but soda can-sized prints could be printed out for £5-£10 each including material costs.
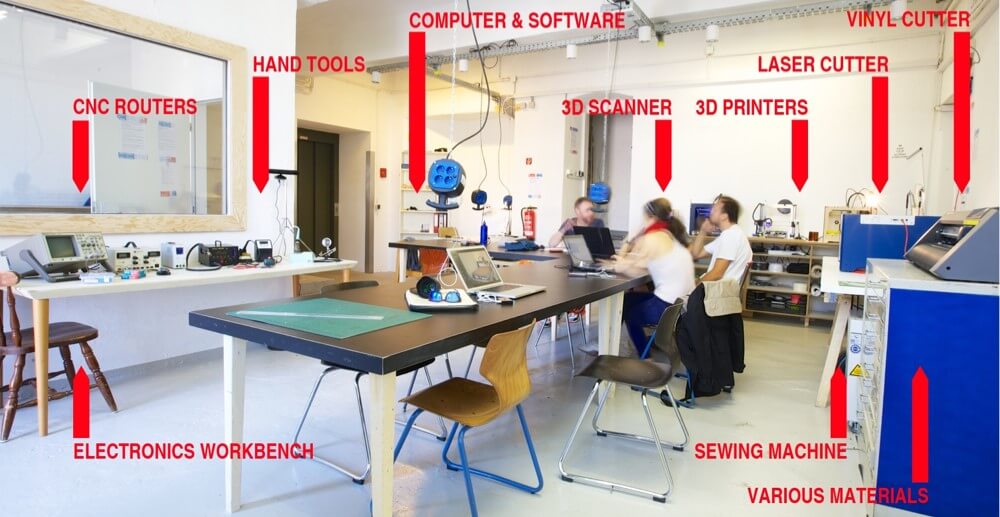
Alternatively and (our recommended option) is to take a class trip to your local Fablab. These are non-profit local facilities geared towards supporting education with a range of tools for invention, including often a variety of 3D printers. Seeing the printer in action is still an important element in completing the journey from conception to creation.
What About Finishing and Painting?
The finished part coming off the printer might not be the desired end result. In some instances the layer lines making up the print may be unsightly, or older students may want to add more professional finishes to their prints.
We’ve written an in-depth guide to finishing prints here. Some methods are not suitable for younger students (such as sanding parts) but they can certainly paint their creations, which can be a great way to personalize their creations further if everyone else’s prints are the same color, printing from a single spool of filament.
I hope this article has been a good starting point for you to get printers involved in the classroom or at home and hopefully given you some solid 3D printer ideas for school. If it has helped you, or you have questions please don’t hesitate to leave a comment below and we’ll respond or add your suggestions to the article.


