Cura Vase Mode: Beginner’s Guide & Best Settings
At 3DSourced we’ve covered everything 3D printing and 3D since 2017. Our team has interviewed the most innovative 3D printing experts, tested and reviewed more than 20 of the most popular 3D printers and 3D scanners to give our honest recommendations, and written more than 500 3D printing guides over the last 5 years.
Among the options, features, and settings within Cura slicer software, one of the most exciting for leveling up your print’s aesthetics is Spiralize Outer Contour, commonly called Cura Vase Mode.
It makes prints faster, and saves you filament, making Vase Mode a popular option for decorative prints with relatively simple geometries, like vases, pencil holders, cups, and other cylindrical shapes.
So, how does Cura Vase Mode work, and is it suited to all print projects? In this guide, we outline everything you need to know about Cura Vase Mode to make the most out of it.
Overview of Cura Vase Mode

What is Cura Vase Mode?
Spiralize Outer Contour, or Cura Vase Mode, is a specialized mode in Cura that produces a part or object in an uninterrupted line of filament with a thickness matching that of a single layer, roughly equivalent to the model’s outer wall. As Cura describes it, 3D printing vase mode turns a solid model into a single-walled print with a solid bottom.
Unlike standard printing, Vase Mode configures the printer to never stop extruding filament, and the print head moves uninterrupted throughout the printing process, ‘spiraling’ upwards to construct the model. The extruder doesn’t retract filament, and the print head doesn’t travel between sections of the print.

As a result of this smooth motion, single path movement, and thin, single wall thickness, Cura Vase Mode prints much faster than typical modes, and uses less filament.
Limiting itself to a single-layer thickness, Cura’s Vase Mode doesn’t produce long-lasting or structural resistance prints, so it’s chiefly used for decorative or display prints that don’t serve a functional purpose. If they did, they would break, shatter, or snap very easily due to their fragility.
Though prints made using Cura Vase Mode are fragile and slim, it’s compatible with quite a few filaments, including PLA, ABS and PETG, but also flexibles like TPU.
Why Use Cura Vase Mode?
Using Cura Vase Mode helps cut down on print times, saves filament, and improves the surface finish of objects with an unbroken outer surface or wall, with no bridges, gaps, or overhangs, that rises vertically with no top layer, such as a vase, pyramid, open top container, or lamp shade.
Cura Vase Mode is also popular for applications that require a part to have very thin or light walls that allow light to permeate through.
Best Settings for Cura Vase Mode
Here’s a breakdown of all the parameters that affect Cura Vase Mode and our recommended best settings:
| Setting | Recommended Value | Notes |
|---|---|---|
| Wall Line Count | 1 | Ensure Spiralize Outer Contour is ticked. |
| Wall Line Width | Match your nozzle size (e.g. 0.4 mm for a 0.4 mm nozzle) | Can be increased with higher temperature and slower print speeds. |
| Wall Thickness | Match your nozzle size | Check your nozzle size and adapt accordingly. |
| Print Speed | No higher than 30 mm/s, or as low as 20 mm/s depending on filament type | Dial speeds lower than typical prints due to the single thickness wall used in Cura Vase Mode, otherwise, filament won’t cool sufficiently to bond before the nozzle deposits the subsequent layer. |
| Smooth Spiralized Contours | On | Reduces visibility of Z-axis seam for smoother surface finish. Turn off for prints with lots of surface detail. |
| Temperature | Match recommended temperature for filament type and brand. Increase in small increments for larger nozzle sizes. | Larger nozzle sizes (e.g. 0.8 mm) and thicker wall lines may benefit from a slight temperature increase. |
| Travel Speed/Acceleration/Jerk | No need to adjust | Enabled Cura Vase Mode affects travel behavior due to Spiralize Outer Contour printing in one smooth, single motion. No need to adjust travel speed, acceleration or jerk. |
Is Cura Vase Mode Good?
Cura Vase Mode is considered a superb mode for those looking to print very thin, single-wall thickness prints for decorative purposes, such as lamp shades or 3D printing vases, hence the name. As an added benefit, the mode cuts down on filament usage and greatly reduces print times due to the economical way it prints a model.
Cura Vase Mode Advantages
- Prints faster: uninterrupted printing finishes layers and prints quicker.
- Uses less filament: saving you both time and money that would otherwise be spent on filament.
- High-quality results: by printing a single outer wall line of filament in one fluid motion, Cura Vase Mode tends to produce higher quality results with excellent surface finish and less obvious z-seam compared to standard printing modes.
- Versatile: you can print: vases, cylindrical shapes, open containers, pencil holders, lamp shades, pyramids, cups, mugs, and many other decorative pieces – as long as they have no top, and a continuous geometry.
Cura Vase Mode Disadvantages
- Fragile and flimsy: Due to the single, very thin, wall line, models and parts made using Cura Vase Mode are susceptible to breaking under very little pressure, so they aren’t suited to functional applications.
- You can only print one model at a time: because Cura Vase Mode prints in one continuous motion. So batch printing simply isn’t an option. Fortunately, faster print times make up for this somewhat.
- Struggles to print large objects: this is because the part can struggle to support the weight on subsequent layers layered on top. The single wall line design can’t bear heavy loads, so the larger the model, the more it will struggle to maintain its structural integrity.
- Limited uses: only works for objects with a continuous, uninterrupted outer surface or wall, with no bridges, gaps, or overhangs, that rises vertically with no top layer.
Best 3D Printers for Cura Vase Mode
Here are some 3D printers I recommend that are well-suited to pairing with Cura’s vase mode setting:
Ender 3 (and all the subsequent versions)
- Price: Check latest price at Creality here / Amazon here
- Build volume: 220 x 220 x 250 mm
- Filament compatibility: PLA, ABS, TPU, PETG
- Layer height: 100-400 microns
- Printing accuracy: ± 0.1 mm
- Max extruder temp: 255°C
- Max bed temp: 110°C
- Connectivity: USB, SD Card
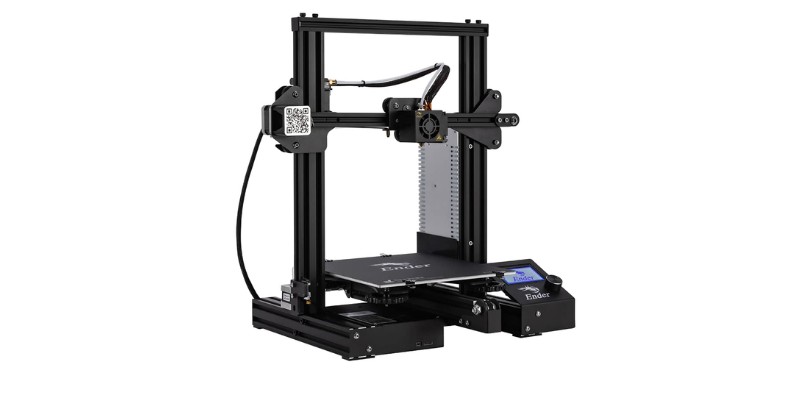
The Ender 3 is one of the best selling printers to ever hit the market, merging affordability with an excellent starting point for first-time makers, while offering a foundation to tweak and upgrade it if you wish.
It’s well suited to those wanting to use Cura Vase Mode. With some tweaking and calibration, the Ender 3 can make the most of Vase Mode to produce great-quality vases, pencil holders, lamp shades, and plenty more.
Touching briefly on the specifications, it features a 220 x 220 x 250 mm, support for all the most popular filament types, and a 100-micron minimum layer height.
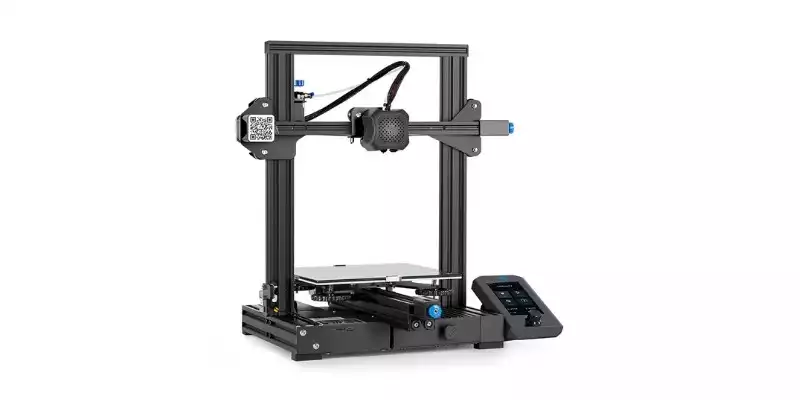
It lacks some modern niceties like automatic bed leveling, but if these are crucial for you then upgrade to either the Ender 3 V2 Neo, or Ender 3 S1 range. At 3DSourced, we have tested and reviewed both the Ender 3 V2 Neo, and the Ender 3 S1 Pro, and can recommend them both. We’ve also written an article on the best Cura settings for Ender 3.
Creality Ender 3 3D Printer
$189
The best budget 3D printer kit around - and the best-selling, too. If you have the budget, pick up the V2 or V2 Neo version, or even the Ender 3 S1 if you prefer a direct drive extruder.
We earn a commission if you make a purchase, at no additional cost to you.
Ultimaker S5
- Price: Check latest price at MatterHackers here / Dynamism here
- Dual Extrusion: Dependent dual extruders
- Build Volume: 330 x 240 x 300 mm
- Max Built Plate Temperature: 140°C
- Max Nozzle Temperature: 280 °C
- Layer Height: 20-600 microns
- Connectivity: Wi-Fi, Ethernet, USB
- Filament Compatibility: PLA, Tough PLA, PETG, ABS, NYLON, CPE, PC, TPU, PVA
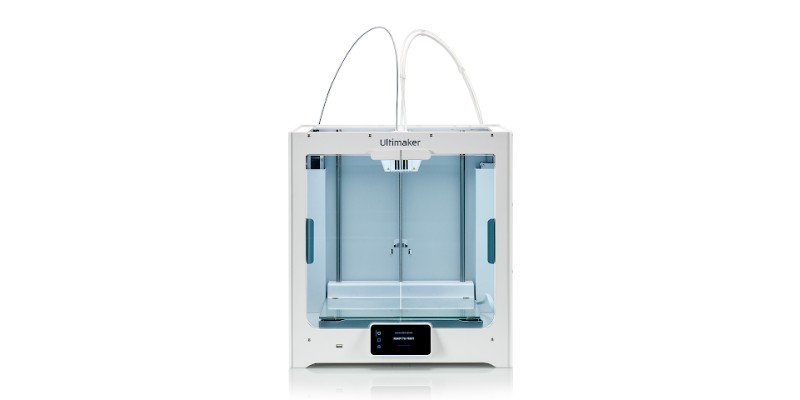
Though pricey at $6,000, the Ultimaker S5 offers a superb dual-extrusion system capable of handling a wide range of filament types thanks to its enclosed chamber, well-sized build volume, and 20-micron minimum layer height.
Though the dependent dual extruders and Cura Vase Mode won’t allow you to print two models at once due to the way vase mode works, the rest of the printer is extremely well suited to produce near-flawless single wall width prints for decorative purposes.
The Ultimaker S5 also offers Wi-Fi, automatic bed leveling, and a max nozzle temperature that makes it compatible with over 200 different filament types. We recommend the Ultimaker S5 for small businesses and enthusiasts with a big budget aiming to make the most of the reduction in print times offered by Cura Vase Mode.
FAQs:
How do I turn on Cura Vase Mode?
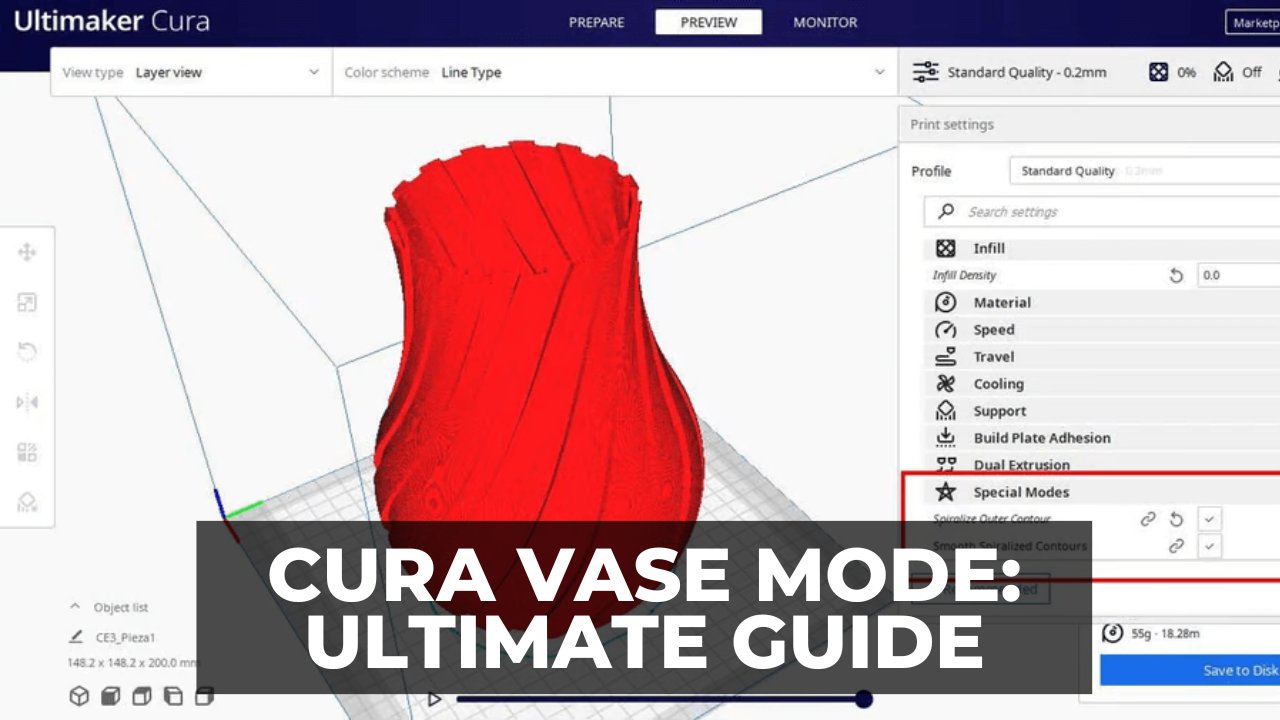
To turn on Cura Vase Mode, load up the Cura Slicer and load your STL file. Next, navigate to the Special Modes section of the right-hand Cura settings window. It’s near the bottom so scroll down to find it, or type ‘Spiral’ into the search bar. Then tick the option titled ‘Spiralize Outer Contour,’ Cura’s name for Vase Mode.
How to Use Cura Vase Mode?
Select Spiralize Outer Contour in the Special Modes portion of the Cura settings. Then, tweak your settings, including print speed, wall line width, smooth spiralized contours, temperature, and wall line count to suit your project’s needs. Then slice your model and export it.


