
Key Highlights
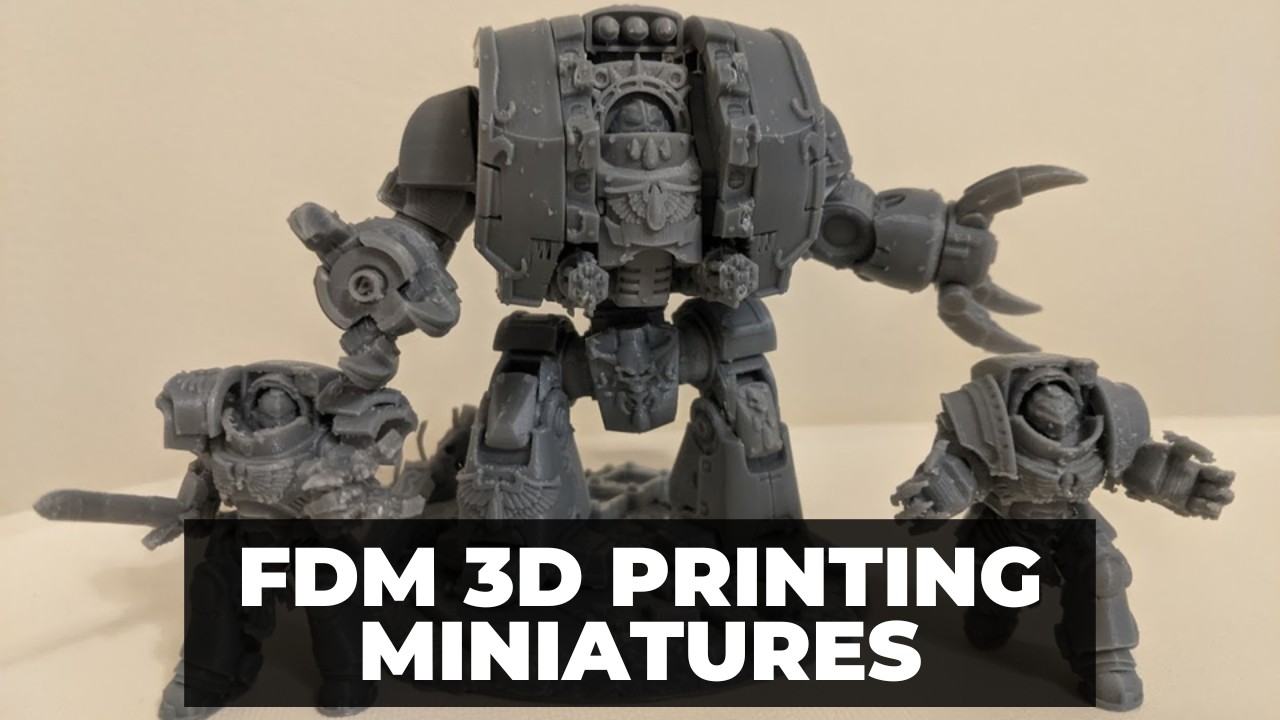
This article provides a guide to FDM 3D printing miniatures. First, we cover the basics of FDM 3D printing, the best practices for achieving high-quality miniature prints, and the equipment and materials needed.
We also offer tips and tricks for printing miniatures, such as using the right infill and layer height, and using supports where necessary.
Highlights:
- FDM 3D printing basics: Understanding the fundamentals of FDM 3D printing is crucial for printing high-quality miniatures.
- Best practices: Following best practices, such as using the right temperature and bed adhesion, is essential for successful prints.
- Equipment and materials: Having the right equipment and materials, such as a high-quality 3D printer and PLA filament, is important for achieving high-quality results.
- Tips for printing miniatures: Using the right infill and layer height, and employing supports where necessary, can improve the quality of 3D printed miniatures.
- Post-processing: Sanding and painting 3D printed miniatures can further enhance their quality and appearance.
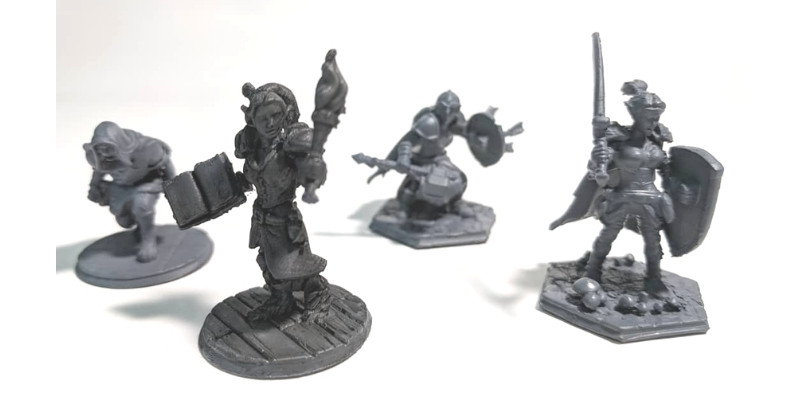
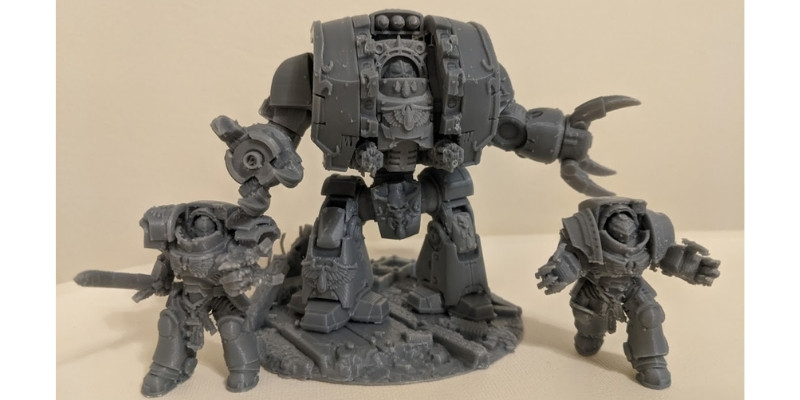
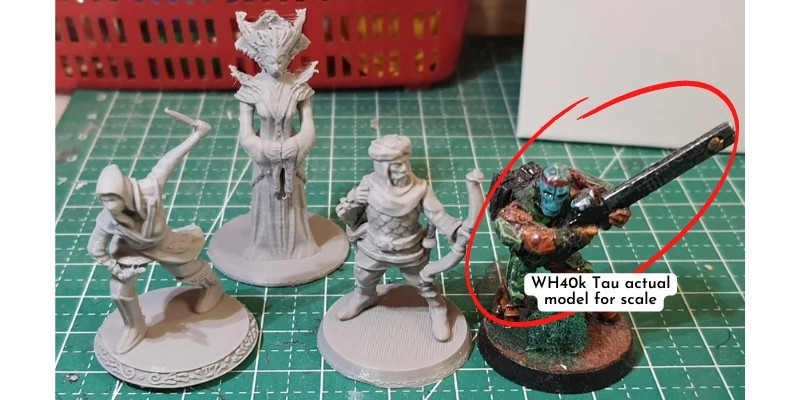
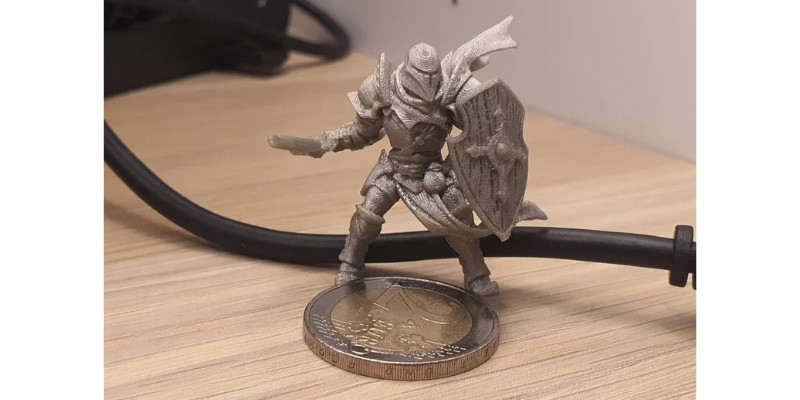
The common wisdom among 3D printer enthusiasts is that FDM printers pale in comparison to resin printers when it comes to producing miniatures, with filament preferred for larger projects such as terrain, background, and accessories.
Though this is certainly true when it comes to overall detail and finish quality, I’ve gotten surprisingly high quality minis with an FDM printer. You just need to go in with the right expectations and be prepared to tinker your way to a solid end result.
In this guide, we’ll walk you through how to exactly do that, leveraging everything FDM printers have to offer to print miniatures you’ll be happy to show off at your next wargaming, D&D, or tabletop session. We’ll cover settings, tuning, orientation, and material to have you on your way to a sea of minis in no time.
After this guide, we recommend reading our guide to the best filaments for 3D printing miniatures.
Read more: we have a ranking of the best 3D printers for miniatures (FDM and resin)
Can FDM Printers Make Miniatures?
Yes, you can print miniatures with FDM printers. However, the results won’t be as good as resin printers, whose higher resolution produces better detail and a smoother finish.
The quality of FDM filament miniatures should more than please most tabletop fans, if you’re comfortable with the odd blemish and artifact. In some cases, it’s even possible to get minis that aren’t all that far off resin prints, if only for an acceptable downgrade in feature richness and detail.
How to 3D Print Miniatures on a FDM 3D Printer
General Settings for FDM Miniatures
Print Speed
As with all 3D printed objects, print speed settings are a balance between quality and print times, while also avoiding common speed-related issues like adhesion problems, blobbing, and more.
When it comes to minis, favor slower speeds as these produce better details.
Though exact settings will depend on your printer – a Prusa MK3S+ can likely handle higher speeds than a stock Ender 3 – here are a few general tips.
- As with all types of prints, nailing the first layer is crucial, so lower the print speed for the first layer. Don’t hesitate to drop as low as 20-30 mm/s for the best results.
- You can save time by upping the print speed for infills, whose quality doesn’t matter compared to the outer layers where the details will show.
- To avoid stringing at slow speeds, adjust your retraction speeds. This will ensure the printer doesn’t leave any stray wisps of filament or oozes material as it pivots between details on the mini. Again, this is printer specific, but aim for 2-7 mm retraction distance, 20-40 mm/s, and a minimum travel distance of 1-2 mm.
- Adopt a slower travel speed than you usually would. This will ensure the print head doesn’t accidentally knock or dislodge the print as it moves around the bed. Doing so increases print times, but avoids painful headaches.
Layer Height
A lower layer height results in finer detail and richer features, and so logic dictates that you’ll want to push down the layer height as far as your printer allows.
However, doing so increases print times and creates more visible lines between layers that detract from the overall look of the mini. As such, it’s a question of finding the sweet spot.
If you’re aiming for the highest quality possible for a mini that will take center stage during your gaming sessions and needs to look the part, we recommend starting with 50 microns/0.05 mm – if your printer allows it to get the best results.
If you’re printing a batch of identical minis to swell the ranks of an army, or for scene setting where quality isn’t as important, then moving up to 100 microns/0.1 mm will save on print times.
It’s also worth capitalizing on the adaptive layering, where you can tune the slicer to use smaller heights for important, features rich parts of a mini, but use a bigger layer height for parts like the stand or base, where quality can take a hit.
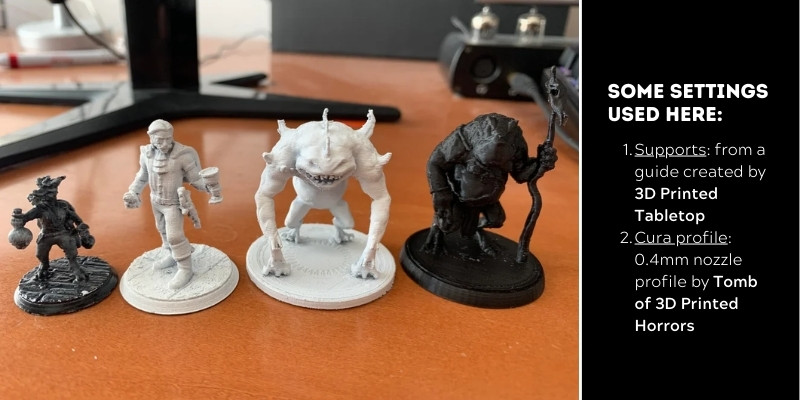
Cura Support Settings for Miniatures
Though it can be tempting to use support structures to ensure every detail doesn’t fall foul to gravity during printing, especially overhangs, horizontal features, or steep angled curves, you’ll want to use supports, but sparingly and only where genuinely needed.
The reason for this is that on most FDM printers supports leave blemishes when removed or, due to the small size of minis, can be difficult to remove without snapping off the end of a sword limb, for example. Here are a few tips to keep in mind when it comes to supports:
- Avoid stock automatic support generation slicer tools: and instead place supports manually. Automatic supports tend to be overkill and are difficult to remove after with a huge number of points of contact. By manually placing supports, you can ensure the support branches aren’t attached to the base of the mini and don’t touch other parts of the mini as they extend upwards from the build plate.
- Use the zigzag support pattern to reduce filament consumption and make removal easier. The pattern provides solid support for your mini, but the structure of the pattern means it snaps off the finished print without too much effort.
- Tree supports are an excellent option in that sense in that they avoid contact with the mini itself but provide excellent support during the printing process.
- Only use supports on parts of the print that require them and you can dial this in by using a reasonable angle for overhangs. 55° to 60° is a solid place to test things out – supports where they are needed but also relying on existing printed parts to support subsequent layers where appropriate. In general, overhangs with an angle below 45° will print correctly without support structures.
Best Orientation for FDM Miniatures
Reorientate your minis to reduce the need for supports. If the mini has limbs, clothes, or weapons jutting out 90°, tilting the orientation by 45° on the X-axis drastically reduces the number and complexity of the supports required.
Furthermore, titling the model 45° with the front facing upwards ensures support structures only have contact points with the back of the print. Doing this leaves the front free of blemishes and marks – which otherwise can be difficult to fix even with heavy post-processing.
With this orientation, supports won’t touch the detailed parts of the mini such as the face or, for example, chest armor, which tend to be the first place you look when viewing a mini.
The downside to 45° orientation is that printing at this angle can lead to pronounced layer lines, but generally makes minis sturdier and more able to handle the wear-and-tear of regular use in tabletop, Dungeons & Dragons, or wargaming sessions.
However, there’s also benefits to orienting minis standing with the underside of the base as the first layer of the print. Upright minis tend to require less supports because previous layers will hold up subsequent layers.
Additionally, supports will only contact parts of the mini facing downwards, the least visible part of the model. The issue here is that weaker and thinner elements of the print like a jutting out limb will be more fragile.
Printer Maintenance and Tuning

While the above can turn a poor print into an excellent one, they won’t be of any use if your printer isn’t tuned and maintained to perform at its best. This means keeping it in top shape with maintenance and general best-practice tuning.
- Whether it’s the build plate or the nozzle, always make sure your printer is free of debris, clogs, and residue before attempting to make a mini. Left unchecked, these seemingly inconsequential irritants can lead to nasty blemishes, poor extrusion, layer adhesion issues, or worse, completely failed prints. Though beyond the scope of this article, we recommend establishing a regular cleaning routine. A clean printer is a happy one.
- It’s likely your printer has a 0.4 mm nozzle. While a solid start, you may want to invest in a 0.15 mm nozzle, which offers a slower, more controlled flow rate. These smaller diameter nozzles tend to perform better at bringing the finer details we expect from good quality minis. They are also relatively inexpensive, so well worth the small investment, though they do increase print times. We have written a 3D printer nozzle size guide on this.
- Regularly checking the condition of your nozzle and swapping in a new one can have a major impact on the quality of your minis.
- Check the tension on belts and pulleys. Doing this ensures the print head is traveling smoothly and accurately as it pieces together a mini. Also regularly level your bed, whether manually or through an automatic bed leveling system. Accuracy and precision takes a hit when a bed isn’t level. If you haven’t already, calibrating your e-steps can further improve the accuracy of your prints.
- You may also want to consider several upgrades, namely improving the cooling capabilities of the printer (which is all the more important for minis that benefit hugely from the rapid and precise cooling detailed surface areas) with a 3D printed fan duct, a fresh Bowden tube to limit filament friction and retraction problems, an all-metal extruder, and a BL Touch automatic bed leveling probe.
3D Printing Miniatures on the Ender 3
Here are some general best settings for those printing miniatures on an Ender 3 3D printer:
- Layer Height: 0.05mm
- Nozzle Size: 0.4mm
- Speed: 25 mm/s
- Orientation: standing
- Infill: 100%
- Bottom Layers: 0
Which Filament Should You 3D Print Miniatures With?
Hatchbox PLA – A popular pick among thrifty makers, Hatchbox PLA strikes a balance between affordability and quality filament. It also comes in a range of colors and tends to perform well when tackling detailed prints like PLA miniatures. We also like that support structures snap off cleanly with little efforts, reducing post-processing clean-up.
Color: Black | Diameter: 1.75mm | Weight: 1 KG Spool | Dimensional Accuracy: +/- 0.03 mm | Recommended Extrusion/Nozzle Temp: 180°C - 210°C (356°F - 410°F)

Polymaker PLA – Another popular option among 3D printer enthusiasts, PolyMaker PLA is a solid general use filament that pairs well with the production of miniatures. It also scores points for an environmentally-friendly cardboard spool and a resealable bag to keep the filament moisture-free.
Color: Black | Diameter: 1.75mm | Weight: 1kg | Nozzle / Bed Temperature: 210˚C / 50˚C

Prusament PLA – Priced higher than the more budget-friendly recommendations above, Prusament PLA comes from the folks behind the excellent Prusa 3D printers with the quality to match. Stringing, bridging issues, and layer lines are all but nonexistent here, which sees this filament pair beautifully with miniature FDM printing.
Color: Lipstick Red | Diameter: 1.75mm | Weight: 1kg Spool (2.2 lbs) | Diameter Tolerance: +/- 0.02mm
How to Finish FDM Print Miniatures
- Use flush cutters to remove support structures.
- Sand down the marks and blemishes left by the supports using 200/400 grit sandpaper.
- Fill in any gaps, cracks, and chips with putty or epoxy resin. Sand down the filler to get a flush and smooth surface.
- Prepare the mini for painting using a coat of primer. Let it dry.
- Paint the miniature using paints that pair well with PLA or whichever filament type you are using.
For more specific instructions, head to our guide to How to Finish Your 3D Prints.
Related articles:
- Which is Best For 3D Printing Miniatures: Resin vs FDM 3D Printers
- Can You Sell 3D Printed Miniatures (Every Situation Explained)
- How to Design and 3D Print Miniatures
- Best Resins for Miniatures
- Beginner’s Resource: 3D Printing Materials Encyclopedia
- FDM vs SLA 3D Printing: Which One Is Better?
- Here Are The Best FDM 3D Printers For Every Budget Today
- Ever Wondered Whether If 3D Printing Miniatures Cheaper? We Did The Math!