Painting houses in the summer is an ideal time to give a home a fresh coat, because paint dries quicker in heat. In a similar fashion, UV resins cure faster (and even better) with the right kind of light.
But why is that? And what is it about different UV lights and light boxes that are ideal for curing UV resins and getting them ready for post-processing?
Here we’re going to look at what UV resins are, the best UV lights for curing resin, and how you can efficiently and safely expose your UV resin prints to these lights to get the best out of your resin projects.
Best UV Light for Curing Resin
- UV Clamp Lamp: The Portable, Flexible Alternative to Standard Lamps
- Darkbeam UV Flashlight: Portable and Versatile
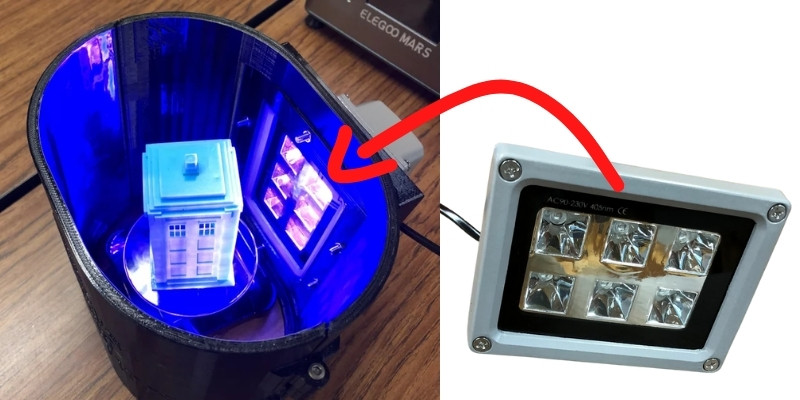
- UV Floodlight: Powerful and Practical
- Sovol 3D Curing Station: Well-priced curing station
- Elegoo Mercury 2-in-1 Washing & Curing Station V2.0: Top pick
- Anycubic Wash and Cure 2.0: Top pick
- Anycubic Wash and Cure Plus: Premium UV resin curing light
3DSourced is reader-supported. When you buy through links on our site, we may earn an affiliate commission. Learn more
- Best UV Light for Curing Resin
- What is UV Resin?
- Can You Use UV Light to Cure Resin?
- What Do You Need a UV Light Box For?
- Pros and Cons of UV Resin
- Pro – Much Faster Curing
- Pro – No More Extra Chemicals
- Pro – Less Toxic and Smelly
- Con – Often More Expensive
- Con – Low Shelf Life
- Con – Extra Equipment Needed for Best Use
- How to Use UV Resin
- Hints and Tips for UV Resin Crafting
- What Do You Need To Cure UV Resin?
- Best UV Flashlights and Lamps for Curing Resin
- UV Clamp Lamp – The Portable, Flexible Alternative to Standard Lamps
- Darkbeam UV Flashlight – Portable and Versatile
- UV Floodlight – Powerful and Practical
- Best UV Curing Boxes and Chambers for UV Resin
What is UV Resin?
There are two main types of resin used in creative pursuits:
- Epoxy resin
- UV resin
While epoxy resins will cure with hardeners, UV resins will only cure with exposure to UV radiation.
UV resins cure a lot faster than normal epoxy resins, though at the cost of being less durable. However, this cost is negligible if you’re only printing for decorative purposes.
Using UV light, UV resins cure in minutes, earning their nickname of ‘quick cure resins’ due to their impressive hardening speeds.
Can You Use UV Light to Cure Resin?
Yes, you can use many kinds of UV light to cure your resins.
Even if you don’t have a UV light box, you can use the natural UV light of the sun to cure your UV resins. Non-UV resins will still cure using this method, though you will have to wait for anywhere between 2-10 hours before it’s fully cured depending on the size of the project.
While this is the easiest and cheapest way to cure resins using UV light, it’s far from the most efficient. To find the best UV light for curing resin, you’re going to have to get some extra equipment like a UV lightbox or flashlight.
There are even UV lamps for resin, so you’ve got quite a few options for quick curing.
How Long Do You Cure Resin Under UV Light?
How long you need to cure your resins for will depend on how many layers it has and how thick it is. Small, thin crafts like pendants will take around 2 minutes, while thicker crafts like 3D printed minifigures or toys will have a cure time of 1-8 minutes on average.
If your project is bigger, say around the size of a curing station’s interior, it’ll need about 20 minutes to be fully cured.
What UV is Needed to Cure Resin?
While UV light of any notable strength will cure resin, to take full advantage of fast-curing UV resins, you’ll need higher wattage than your standard blacklight.

Specifically, the best kind of UV light to cure resin is UVA, which has a higher wavelength (up to around 395nm) while using less energy. Those of you who like to have tanned skin will know that this is the main kind of UV light used in tanning beds.
Unlike UVB light, UVA light penetrates windows. So you won’t need to expose your resins to direct sunlight to take advantage of this.
UVB light is excellent for curing resins, but it can be very damaging to the skin if exposed for long periods of time.
While not as dangerous as UVB light, UVA should still be used with caution and from a safe distance if possible.
What Do You Need a UV Light Box For?
UV light boxes, also known as curing stations, not only provide an adjustable environment for curing resins, they also protect the resin from any potentially harmful variables like overheating or airborne moisture. All while protecting you from being exposed to potentially harmful radiation.
While even the most sensitive of skin types need 20 minutes of full exposure to become damaged, most kinds of UV radiation are still not something to be taken lightly, as overexposure can lead to dangerous skin damage including melanomas.

These curing boxes aren’t good for just 3D prints, but all kinds of crafting resins too. Casting resins for making jewelry and decorative pieces also need to be cured, and using a UV light box is the fastest way to do this.
This is especially good news if you plan to, or already, sell your resin crafts online. The speed with which the best UV light cures resin is great for ensuring high turnover for your products, upping your inventory and thus boosting your potential profits.
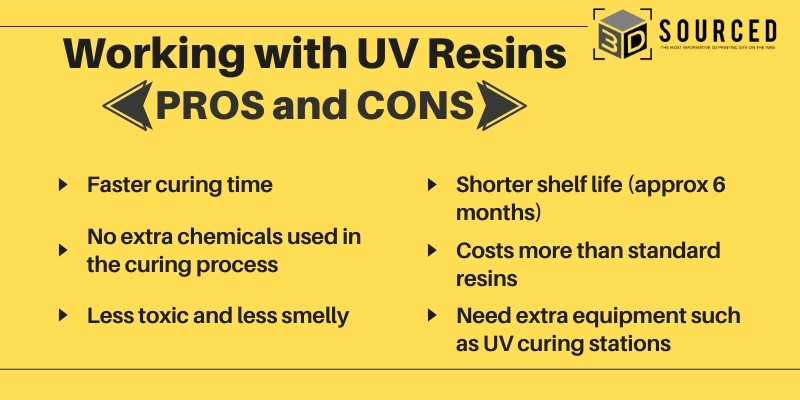
Pros and Cons of UV Resin
Pro – Much Faster Curing
The main advantage of UV resin is the fast curing times. The hardening process that once took hours can now be done in a matter of minutes or even seconds depending on your project’s thickness.
Pro – No More Extra Chemicals
Because UV resins only need radiation to cure, they make the tedious task of mixing in hardeners a thing of the past. Your UV resins will cure simply with exposure to UV light, so you can just leave your crafts in a suitable environment and let them harden.
Pro – Less Toxic and Smelly
UV resins are also far less odorous than their standard epoxy counterparts, meaning they won’t stink up your workspace or give off overly dangerous or toxic fumes.
That said, they are still dangerous if inhaled over long periods, so we still recommend a well-ventilated work area and any necessary face protection when used in close proximity.
Con – Often More Expensive
While these are some good reasons to go for UV resins, there are a few downsides. UV resins are notably more expensive than standard resins. While you may be able to find some on a good deal, you should expect to pay up to double what epoxy resins would cost.
Con – Low Shelf Life
Another major drawback is its shelf life. While 3D printing resins have seen advances allowing up between 12-18 months of shelf life, most UV resins will only stay good for about six months, half the time of epoxy resins.
Adding on to their increased price, to get the most out of UV resins you will need to also purchase a UV lamp or UV light box to take advantage of the speedy curing times.
Con – Extra Equipment Needed for Best Use
If you happen to live in a particularly sunny place, this might not be entirely necessary, but you’ll only see the real benefits of UV resin by purchasing extra equipment starting at around $40 – $60 on average, and that’s not even mentioning your electric bill.
How to Use UV Resin
In terms of use, UV resin isn’t really any different than your standard crafting resins.
First, make sure your workspace is clean and covered with a tarp or cloth. Drips and spills can be very hard to remove if your resin dries before you notice, so using a removable and flexible covering is ideal for post-craft cleaning.
Most UV resins work best in molds around 2-4mm in depth, though you can always change this thickness for more bulky crafts like larger jewelry items and decorative pieces. Be sure to use protective gear when pouring your resins like gloves and eyewear to prevent direct skin and eye contact should any of your resin splash or spill.
If you like, feel free to add any extras to your crafts to suit your tastes. Glitter, sequins, and even well-placed confetti will give your crafts a burst of color and character.
Hints and Tips for UV Resin Crafting
With the basics out of the way, here are a few extra hints and tips for using UV resin to get the best results every time.
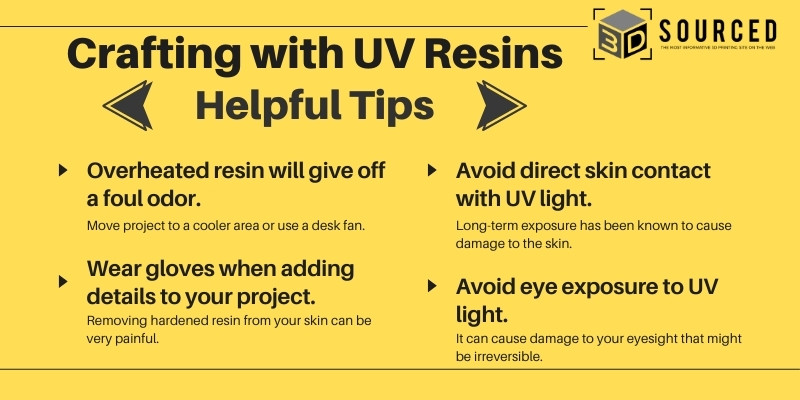
Listen to Your Nose
UV resins are very sensitive to heat. While this won’t be immediately noticeable to your eyes, it will be to your nose.
If your UV resin is getting too hot, it will begin to give off a stronger smell. If you notice this when using your resin, be sure to move them to a cooler environment before continuing. Failing that, try to make your workspace cooler by opening a window or using a desk fan.
Never Touch Resin Directly
If you are adding extra details to your resin crafts, be sure to do so using tools and gloves. Touching resin directly isn’t a good idea. If it hardens on your skin without you noticing, it can be very damaging and painful.
Avoid Skin Contact with UV Light
In addition to protecting your skin from resin, be sure to also protect yourself from any UV light you’re using to cure your resins. UV light, while relatively harmless in small doses, can be very dangerous with long-term exposure.
As a child, I once left a reading lamp on and woke up to a thoroughly melted alarm clock. UV lamps are equally harmful if you expose yourself directly to them over a long period of time. The most sensitive of skin types will be visibly damaged after around 20 minutes, but avoiding any exposure is always a good idea.
On that note, be sure to never look directly into a UV light source to avoid irreversible damage to your eyes.
What Do You Need To Cure UV Resin?
When you’re done crafting, it’s time to cure. As its name implies, you will need UV lights to cure UV resin, and there are a few options for how to go about exposing your resins to the light they need to harden.
While you can simply leave your UV resins in the sun, you’re better off using a UV lamp. Much like standard heat lamps you may have seen in your favorite diner, these UV lamps sit and ‘cook’ the resins in the ideal UV radiation for curing.
You can use other methods to cure your resins. But outside of large projects or 3D printed UV resins, UV lamps are your best option. They are cheaper than UV light boxes, and far more practical than UV flashlights.

UV flashlights are, however, generally cheaper and easier to carry around, which is good if you like to craft on the go.
If you’ve used resins for 3D printing, then you’ve probably got something a little thicker and in need of more direct and carefully adjusted UV light. For this, you’re better off using a UV light box as we’ve mentioned above.
These light boxes are enclosures that are adjustable, safe, and highly efficient at curing thicker UV resin projects, making them ideal for 3D prints and substantially larger UV resin crafts.
Of these four methods for curing UV resins, the best and most practical are UV flashlights, UV lamps and UV light boxes. And we’re going to look in more detail at the best options for these below.
Best UV Flashlights and Lamps for Curing Resin
UV flashlights and lamps are the cheapest and simplest options for curing UV resins. Which one you go for will depend on whether you prize practicality or portability.
UV lamps are great if you need to leave your crafts for long periods, while flashlights are better for taking on the go and aren’t so tedious to use if you only need to cure your UV resin for a minute or two.
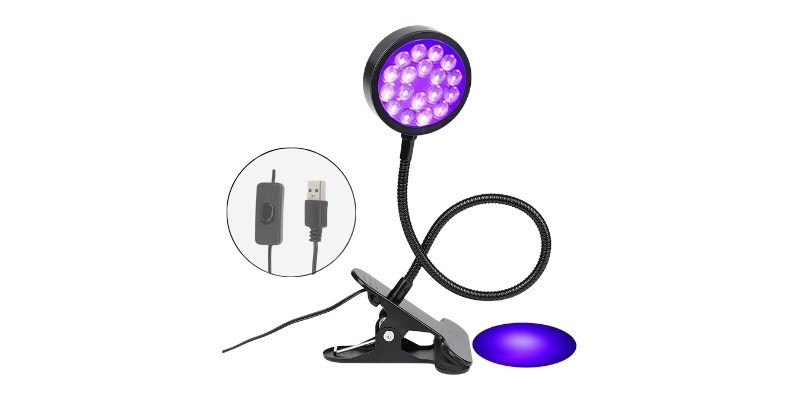
UV Clamp Lamp – The Portable, Flexible Alternative to Standard Lamps
- Price: Check price on Amazon here
- Wattage: 5W
Pros
One of the cheapest UV light sources available.
Ideal for small workspaces.
Cons
Not the most powerful UV light source.
One of the cheapest UV light sources on the market is this desk clamp UV lamp. It’s especially ideal if you have a smaller workspace and need something as efficient as it is practical.
While not the most powerful of UV light sources, it’s a great way to cure your UV resins while in mold, and its flexible stand makes it ideal if you have a lot of resins to cure and not much space in which to cure them.
This UV lamp is weak enough for safe short-term exposure to skin, making it great if you also need to use it to dry your recently painted nails. However, this weakness does mean it will take longer for UV resins to cure under it when compared to stronger, more specialized brands.
Darkbeam UV Flashlight – Portable and Versatile
- Price: Check price on Amazon here

Pros
Cheap alternative to expensive UV light boxes.
Ideal for curing thinner resin projects.
Cons
Relatively low-powered.
The Darkbeam UV flashlight is another cheap alternative to the more expensive UV light boxes. Ideal for curing thinner resin projects, it’s an easy-to-move, low-power flashlight that’s great for those of you who craft on the go.
As well as letting you cure UV resins, the light also doubles as a bedbug and pet urine detector, making it ideal if you happen to be a pet owner. Much like the clamp lamp, however, its relatively low power means it won’t cure resins quite as fast as stronger beams.
However, the curing time difference is negligible if you make particularly small resin crafts.
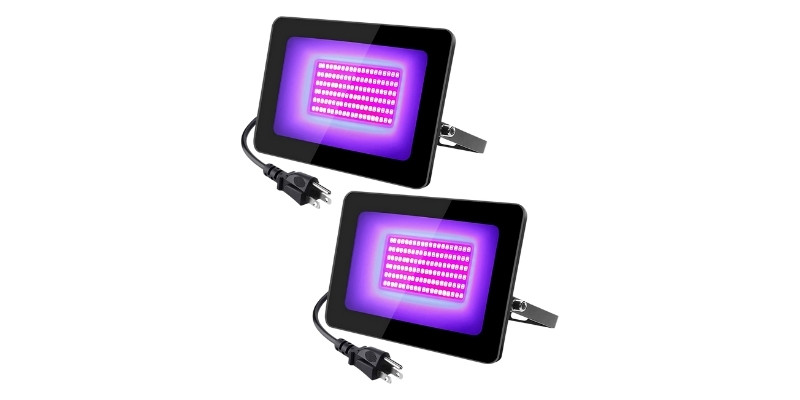
UV Floodlight – Powerful and Practical
- Price: Check price on Amazon here
- Wattage: 30W
Pros
Powerful, affordable, and efficient.
One of the most powerful UV lights at this price.
Long battery life.
Cons
Can be dangerous.
Advertised mainly as an outdoor recreational tool, the UV floodlight is powerful, affordable, and efficient as a UV resin curing lamp.
It’s one of the powerful UV lights at this price, making it ideal for resin curing, though it also makes it the most dangerous. We recommend keeping it pointed away from you if you’re planning on using it constantly, and avoid looking directly into the light source when switched on.
The UV floodlight’s long battery life and energy-efficient power make it a great tool if you need a good UV lamp for frequent use. This makes it the best option if you’re a business owner who needs to cure a lot of resins at once and often.
Best UV Curing Boxes and Chambers for UV Resin
If you use UV resin for larger, thicker projects than the average 3mm mold, or use UV resins for 3D printing, then you’re much better off using a UV curing box or chamber than a standard UV lamp.
Sovol 3D Curing Station
- Price: Check price on Amazon here
- Wattage: 15W

Pros
An efficient and practical addition to any workspace.
Can cure small projects quickly at a fraction of the cost.
Cons
Small size.
If you have smaller projects that you want cured quickly at a fraction of the cost, then the Sovol 3D curing station is amongst the best on the market.
Don’t let its small size fool you, this UV resin curing station is an efficient and practical addition to any workspace, especially one with limited space.
The rotating turntable is light-powered, so its 360° curing won’t drain the battery life while curing your UV resin print quickly and evenly. With an enclosure of only 6 x 6 x 6 inches, it’s a great choice for a curing station if you mainly print small, decorative pieces with your UV resin.
Read more: the best wash and cure stations compared
Elegoo Mercury 2-in-1 Washing & Curing Station V2.0
- Price: Check price at Elegoo here / Amazon here
- Wattage: 48W

Pros
2-in-1 curing station that washes and cures resin prints.
Runs silently.
Cons
Can only fit models with a build size of 125 x 85 x 160 mm.
Elegoo’s Mercury line of washing and curing machines come to a head with the affordable and extremely practical 2-in-1 washing and curing station V2.0.
Those of you with experience 3D printing with UV resins will know that post-processing is pretty tedious, and often quite time-consuming, making this curing station a lifesaver.
The 2-in-1 curing station both washes resin prints and cures them with the appropriate strength UV light for your project. The intelligent design detects the project’s weight and thickness and adjusts itself accordingly, taking a lot of trial, error, and guesswork out of the equation.
The Mercury 2-in-1 also runs silently, meaning night owls and late workers can rest easy knowing your work won’t disturb your household.
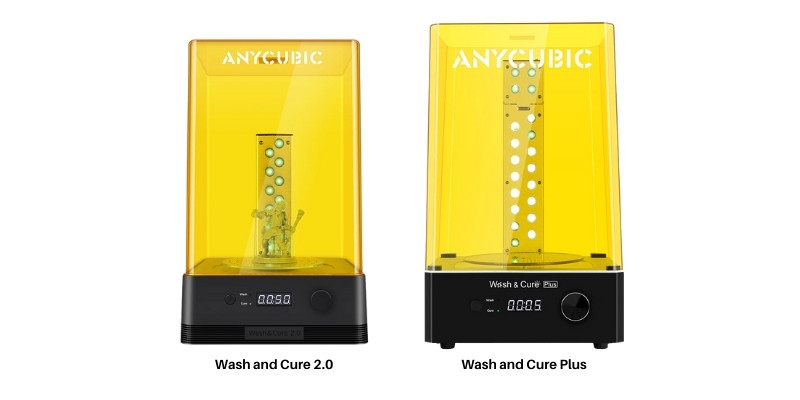
Anycubic Wash and Cure Machines
- Price: $109 – $199 – Available on Anycubic here / Check price on Amazon here and here
- Wattage: 25 – 40W
Pros
Great for fast curing with large prints.
Washing and curing combined in one great machine.
Cons
Can sometimes slightly vibrate.
Anycubic’s curing stations come in two forms, the Wash and Cure 2.0, and the Wash and Cure Plus. Don’t let the 2.0 confuse you, though, as the Wash and Cure Plus is actually the more advanced of the two.
The main difference between these two curing machines is the size, with the Plus model being much larger than its predecessor. This makes it the best machine for those of you who tend to print large and need faster curing than you’d get with non-UV resins, which can take hours.
The maximum time setting for these machines is 60 minutes, which is a testament to their speedy curing at a very affordable price.
Read more: Anycubic wash and cure stations compared
Related Posts:
- Best Resins for 3D Printers
- The Strongest 3D Printer Resins
- The Best Wash and Cure & Resin Curing Stations
- Anycubic Resin Buyer’s Guide
- The Best Resin 3D Printers
- Large Resin 3D Printers
- Best resin 3D prints and coolest resin project ideas
- Some of the best glues for resin
- How to Clean and Cure 3D Resin Prints