While the Prusa i3 MK3S+ and Prusa Mini are two of the best under $1000 printers around, like any open-design machine, their solid, predictable performance tails off when tackling temperature-sensitive filaments like ABS, PC, and ASA.
However, you can remedy this by either buying or fashioning your own DIY Prusa enclosure.
The main advantage of decking out your Prusa printer with an insulative enclosure is that it provides heat-sensitive materials with a stable ambient temperature because filaments like ABS warp when exposed to drafts and temperature fluctuations.
Furthermore, a Prusa enclosure protects the printer from dust and grime build-up.
It also provides a degree of sound dampening and helps contain the smelly odors and toxic fumes created when printing many temperature-sensitive materials.
In this guide, we’ve gathered up a selection of the best ready-made, manufactured Prusa enclosures along with a few DIY options you can piece together at home if you’re on a tight budget or enjoy a self-led project.
For each enclosure, we’ve noted whether it’s compatible with the i3 MK3S+, Mini, or both to help you make the right choice.
Buyable Prusa Enclosures
3DSourced is reader-supported. When you buy through links on our site, we may earn an affiliate commission. Learn more
Original Prusa Enclosure
- Price: Starting at $349.00 — Available at Prusa store here
- Prusa Printer Compatibility: Prusa i3 MK3S+, Prusa Mini

Prusa offers a tailor-made enclosure for its line-up of printers (including the filament spool), fittingly dubbed the Original Prusa Enclosure.
Though pricey compared to other buyable options, it’s a great choice if you’re looking for a no-fuss solution guaranteed to expand your Prusa printer’s filament range to tricky materials like PP, ASA, PC, and ABS.
Much like it’s done with its printers, Prusa has spared no expense.
The enclosure is a premium product through and through. It features a solid all-metal frame and see-through, highly insulative transparent PETG panels, an in-built digital thermostat, and mounting parts for cables and whatnot.
The design ensures unhindered visibility from all sides, while the hinged two-panel front door grants easy access to your Prusa printer.
If you have the money to spare, Prusa also offers several choice add-ons: an advanced filtration system to keep odors and ultra-fine filament particles in check, a fire suppression system, safety features like a mechanical lock, a white LED strip, and a power supply cable quick-release.
The Original Prusa Enclosure is also designed with cut-outs and mounting points to accommodate 3D-printed enhancements such as brackets and holders for cameras, tools, and other electronics.
Photo Studio Tent
- Price: $15.00-$45.00 — Check here on Amazon
- Prusa Printer Compatibility: Prusa i3 MK3S+, Prusa Mini

Back in 2018, Prusa published an in-depth article about how to make a homemade Prusa MK3S enclosure.
Within it is a curious but effective, low-cost solution – buy a cheap photo studio tent.
With Prusa’s stamp of approval and thousands of thrifty MK3S and Mini owners reporting solid results to back it up, a Photo Studio Tent is a surprisingly decent solution to maintain a stable printing environment.
As long as the tent can fit your printer, which one you go for is up to you.
Amazon is awash with well-priced options. As they are manufactured, assembly is generally effortless and straightforward.
And, as Prusa points out, you’ll also have a sleek photo tent to snap professional-looking shots of your freshly printed models and parts.
The Photo Studio tent enclosures come with some major trade-offs that are important to keep in mind. Firstly, visibility, when sealed, is virtually zero. Some may have a small opening to peek inside, but that’s as good as it gets here.
Secondly, the plastic used for studio tents isn’t known for its insulative properties; on the contrary, it’s slightly porous.
Consequently, a tent’s ability to retain heat isn’t on par with, say, Prusa’s own manufactured enclosure.
Don’t expect to be pushing very high temperatures, but the tent can confidently tackle ABS and more forgiving temperature-sensitive materials.
Wham Bam HotBox V2
- Price: $119.00
- Prusa Enclosure Compatibility: Prusa i3 MK3S+, Prusa Mini

With enough space for a broad range of printers, including the i3 MK3S+ and Mini, the Wham Bam HotBox V2 is another solid buyable Prusa enclosure option if convenience tops your list of requirements.
It’s essentially a reinforced tent that’s easy to assemble/ disassemble and even folds flat – great for storage when you’re printing PLA and other non-heat sensitive materials.
At $119.00, the Wham Bam HotBox V2 is a little pricey, but compared to the official Prusa enclosure, it’s significantly more affordable.
Though its insulative properties aren’t the best, it can maintain the right temperatures for ABS, PC, and ASA thanks to Nylon 600D fabric, fire-resistant coating, and a metallic heat-deflecting internal liner woven around a light but stiff honeycomb structure.
The enclosure holds up by itself and seals up completely thanks to two oversized zippers that run along the front and top of the enclosure.
Visibility is respectable thanks to a large front-facing clear plastic window.
It also has various access doors and velcro openings to feed in filament and cables, along with an in-built thermometer and a passage for an optional air filtration system.
Wham Bam also provides many vetted 3D printed add-ons to improve the HotBox V2 further, including an exhaust, feet, and filament riser.
Premium Pre-Built Prusa Enclosures
- Price: $209.00-$289.00
- Prusa Printer Compatibility: Prusa i3 MK3S+, Prusa Mini

Third-party companies like Printed Solid and 3D UpFitters specialize in printing accessories, including premium Prusa enclosures.
Though costly, these offer the highest insulative capabilities of any solution aside from Prusa’s manufactured enclosure.
Depending on the manufacturer, these consist of fully-enclosed acrylic or CNC machined metal with tons of added extras such as mounted spool holders, venting solutions, fire suppression systems, hinged doors, air filters, temperature gauges, and more.
We recommend 3D UpFitters’ Prusa Enclosure MK3S+ Acrylic Case Box Tent Kit for 360° visibility, plenty of optional add-ons, and the possibility to print connector pieces at home to save costs.
Printed Solid’s Next-Gen Enclosure For Prusa Style Printers is equally worth considering. It’s a robust, stable enclosure laser-cut designed to ensure a tight fit and a truly sealed chamber.
DIY Prusa Enclosures
Ikea Lack Table Prusa Enclosure
- Price: $50.00-$100.00
- Prusa Printer Compatibility: Prusa i3 MK3S+, Prusa Mini
A go-to option in the 3D printer community, a converted Ikea Lack table is a potent and relatively cheap DIY Prusa enclosure – good visibility, solid construction, and surprisingly good insulative properties.
The basic idea is to take the table and latch on a few acrylic or plexiglass panels between the legs to create an insulative chamber for your Prusa printer.
Though you can use any old table large enough to house the i3 MK3S+ and Mini, the Lack is extremely cheap (usually around $10) and provides a perfect fit.
The real money here is spent on the paneling, otherwise, most of the project uses 3D printed parts, easily-obtainable hardware, and if you’re looking to deck out the enclosure, low-cost electronic parts like a smoke detector, thermometer, and LED lighting.
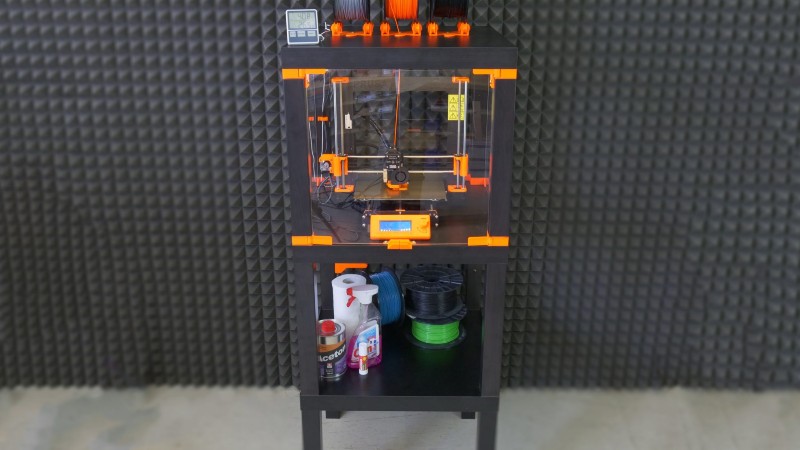
Numerous designs and guides are available, but we recommend Prusa’s own take on the project.
The Prusa Lack Enclosure V2 is detailed, well-guided, and geared towards the i3 MK3S+ specifically. It uses two Ikea Lack tables to give you some much-needed tool and filament storage space below the enclosure and includes mounts to house filament spools above the enclosure.
With the brackets and mounts printed in Prusa’s signature orange, it also blends nicely with the printer for a spot of aesthetic cohesiveness.
It goes without saying that assembly is more involved (and time-consuming – lots of 3D printed parts) than buyable alternatives, but as DIY projects go, it’s well within the capabilities of most.
Complexity can shift depending on whether you include extras and your own mods, but for us, that’s another benefit – you can tune and modify the Ikea Lack enclosure to your liking.
Exercise/Kids Play Mats
- Price: $20.00-$30.00
- Prusa Printer Compatibility: Prusa i3 MK3S+, Prusa Mini

A DIY Prusa enclosure doesn’t have to be a super complicated, involved project that requires hours of assembly and work.
You can piece together a decent enclosure using a set of interlocking kids or exercise maps in no time at all. Better yet, it’s one of the cheapest ways to make your Prusa printer ready to handle temperature-sensitive materials.
Expect to pay around $20.00-$30.00 for the six ethylene-vinyl acetate mats you’ll need for the project.
These are then positioned into a six-sided cube by locking the toothed edges – no need for additional brackets, mounts, or screws.
The design means you can easily access the printer by removing one or multiple mats, but it does mean there’s no way to monitor progress when the printer is working.
However, you can potentially cut out a hole in the front mat and install a see-through window relatively easily.
As for the insulative properties, it won’t come as a surprise that the mats aren’t the best option out there, and the interlocking edges generally have small gaps and openings which lets some cool air bleed into the chamber.
But, generally, the mats do well to keep temperature changes to a minimum, especially considering the price.
PVC Frame and Plastic Sheet
- Price: $20.00-$40.00
- Prusa Printer Compatibility: Prusa i3 MK3S+, Prusa Mini
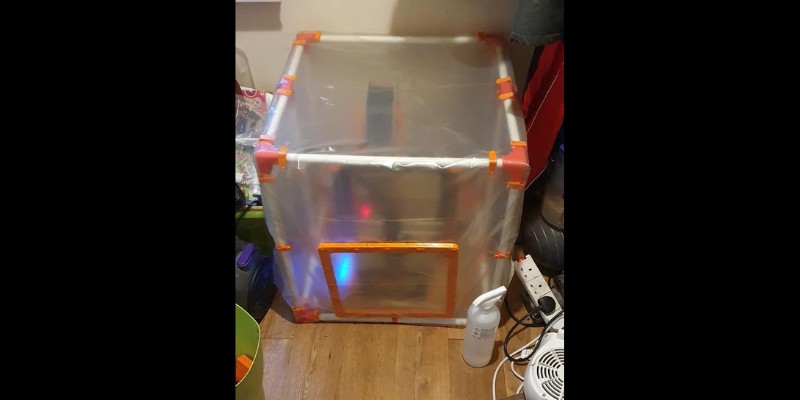
Almost matching the exercise mat Prusa enclosure solution for simplicity, combining a PVC frame with a plastic sheet is a cost-effective route to printing heat-sensitive materials with your Prusa printer.
It’s not a perfect solution and is probably the least insulative of the options we’re highlighting today, but it’s well worth considering for convenience and ease of assembly.
You’ll need PVC piping cut to size, then held together either using friction PVC or 3D printed brackets. The plastic sheet is then draped over the top, and held down either using duct tape or the weight or frame/printer.
Matterhackers have a great guide.
We recommend spending a bit more to get non-flammable and heat-resistant plastic sheets for that extra peace of mind. A heftier thickness is also a good choice to improve overall insulation.
Though not imperative, see-through sheeting offers better all-round visibility than opaque sheets.
Another popular tweak is to cut out a front door in plastic and then use velcro dots to hold it in place during printing.
This offers easier access than removing the entire sheet every time you need to reach your Prusa printer.
DIY Temperature-Controlled Prusa Enclosure
- Price: $250.00-$400.00
- Prusa Printer Compatibility: Prusa i3 MK3S+, Prusa Mini
Unlike many of our Prusa enclosure recommendations which use the heat generated by the printer, our final pick is to build a temperature-controlled chamber.
It’s a serious project that will likely cost more than even the most sophisticated passive Prusa enclosure. Still, it delivers arguably the most optimized environment for ABS, ASA, PC, and others to thrive.
The concept follows that of other Prusa enclosures: create a sealed chamber to house the printer, though this one allows you to dial in the desired temperature thanks to an incorporated heating unit.
Whether you need higher temperatures than those offered by passive enclosures is debatable, but the ability to set a temperature is undoubtedly an advantage for the most sensitive materials.
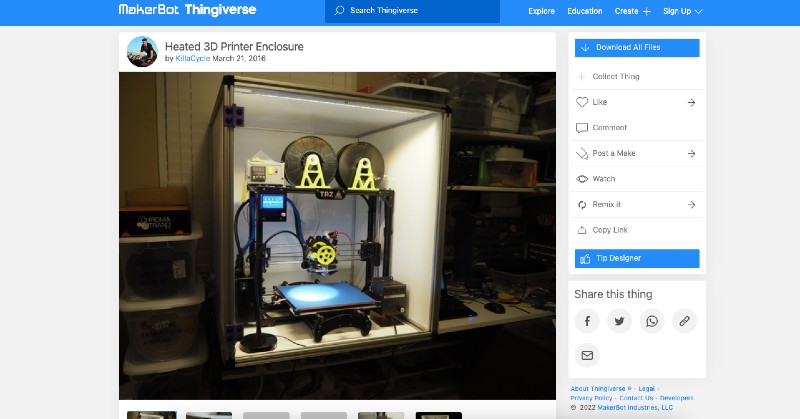
You’ll need to 3D print corner pieces and buy rigid aluminum extrusions, acrylic panels, corrugated plastic sheets, screws, bolts, and a heater with diallable temperature controls.
Thingiverse contributor KillaCycle offers a sleek design along with all the 3D part files and an assembly guide, but you can also design your own and adapt it to your needs.
FAQs
Does Prusa MK3 need an enclosure?
If you plan on using temperature-sensitive materials like ABS and ASA, then the Prusa i3 MK3S+ will indeed benefit from an enclosure.
The reasoning is that these material types are prone to cracking, shrinking, and warping when printed in an environment exposed to drafts, air currents, and cold temperatures.
An enclosure creates an insulative cocoon around the printer and maintains a consistent temperature around the printed part.
How do you make a Prusa enclosure?
There are quite a few DIY Prusa enclosure projects out there, ideal if you’re priced out of the buyable Prusa i3 enclosure kits or similarly manufactured enclosures that fit the Prusa Mini.
Popular ones include upcycling old furniture, such as an Ikea Lack table, into an enclosure, using PVC pipes to create a frame and draping plastic sheeting over the top, or using exercise/kid’s play mats.
Check out our list of DIY Prusa enclosure projects above for more details.
Does Prusa Mini need an enclosure?
Much like the Prusa i3 MK3S+, this depends on your printing ambitions.
If you’re sticking to PLA, then an enclosure is needed. If you’re hoping to experiment with temperature-sensitive materials like ABS, a Prusa enclosure is a must-have upgrade for your Prusa Mini.
It ensures the filament prints in a toasty thermal environment, which helps reduce problems like warping and cracking, both issues that can ruin prints.
Articles we recommend: