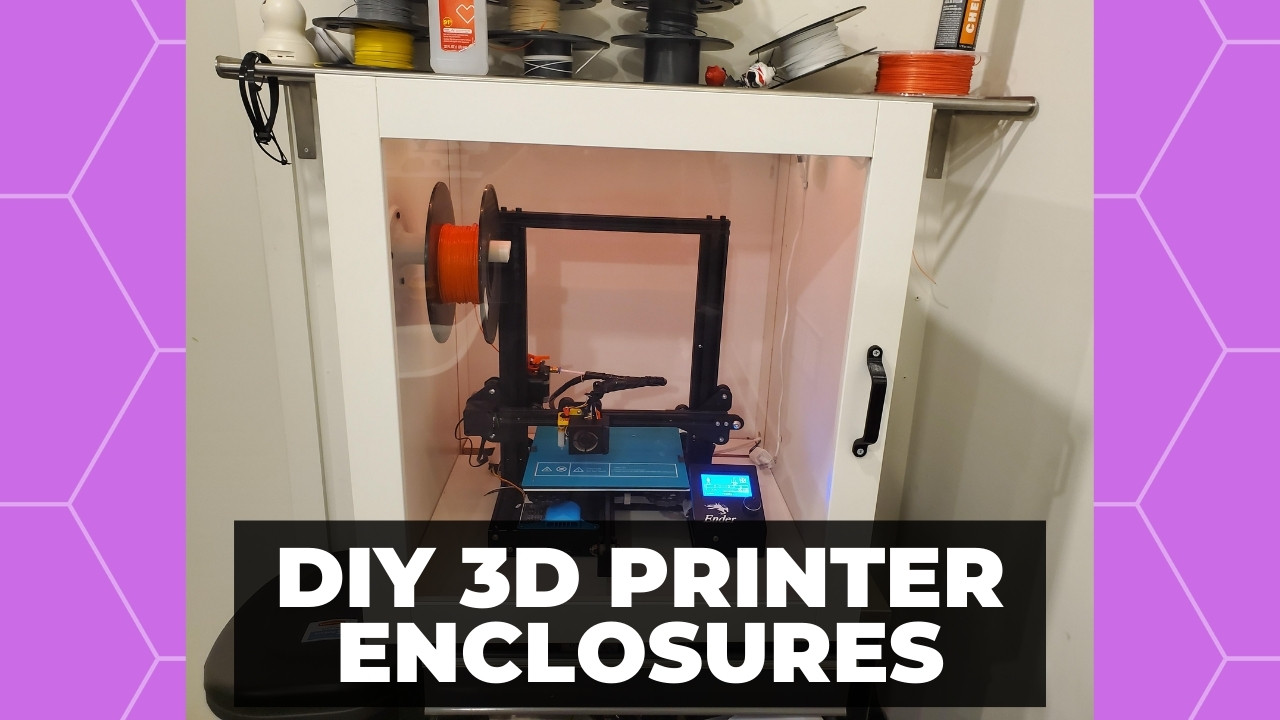
DIY 3D Printer Enclosures: 7 Best Cheap & Free Projects
At 3DSourced we’ve covered everything 3D printing and 3D since 2017. Our team has interviewed the most innovative 3D printing experts, tested and reviewed more than 20 of the most popular 3D printers and 3D scanners to give our honest recommendations, and written more than 500 3D printing guides over the last 5 years.
Is your printer not pairing nicely with heat sensitive filaments like ABS? Warping problems rearing their ugly head? Or do you need to quieten the noise when printing your latest creation?
These are common issues that all makers encounter at one point or another, that generally require a pricey enclosure to fix.
Top Picks
Best 3D Printer Enclosures – Full Round-Up
Best Cheap, DIY 3D Printer Enclosures
IKEA Lack Table: Best Repurposed DIY 3D Printer Enclosure
Exercise and Kids Mats: Best Basic DIY 3D Printer Enclosure
Wood Enclosure: Best DIY 3D Printer Enclosure for Large-Format 3D Printers
Sound Proof Enclosure: Best DIY 3D Printer Enclosure for Noise Reduction
Best Ready-Made 3D Printer Enclosures
Official Creality Enclosure
Wham Bam HotBox V2 Enclosure
Repurposed Photography Tent Enclosure
3DSourced is reader-supported. When you buy through links on our site, we may earn an affiliate commission. Learn more
But, if you’re on a tight budget, then it’s possible to fashion a cheap and easy DIY or homemade 3D printer enclosure that works just as well as the manufactured alternatives.
In this guide, we’ll walk you through the best cheap DIY 3D printer enclosure projects out there in an effort to help you save money. And, for those that shudder at the thought of a DIY project, we’ve included a couple cheap buyable options that won’t cost you an arm and a leg.

What Is a 3D Printer Enclosure?
An enclosure sits over and on top of your 3D printer, creating an insulated cocoon that protects it from temperature changes by trapping heat inside, effectively transforming an open-frame printer into a fully enclosed printer.
The main goal of an enclosure is the space around the printer warm and consistent, which opens the door to better quality prints and more sensitive filaments like Nylon, ABS, and PC.
An enclosure also shields the printer from airborne debris like dust, and keeps in pungent smells and toxic fumes that can be harmful to users. Additionally, certain enclosures can also act as noise dampeners to help contain the noise during printing.
Best 3D Printer Enclosures
Best Cheap, DIY 3D Printer Enclosures
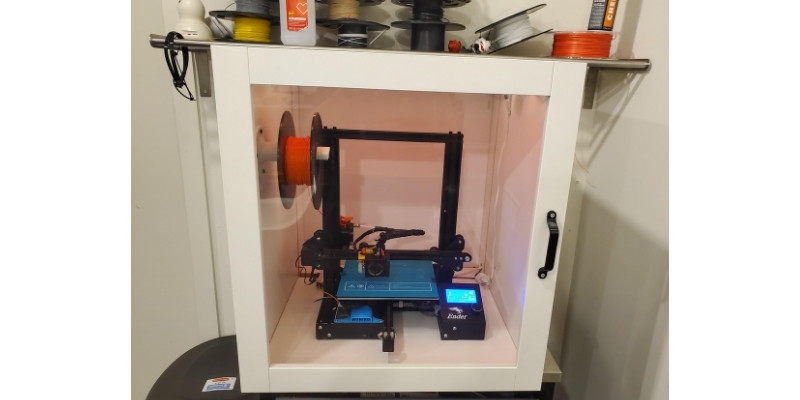
Best Repurposed DIY 3D Printer Enclosure – IKEA Lack Table

The IKEA Lack enclosure is an absolute classic DIY project among makers, especially those around for the early days of 3D printing’s resurgence in the early 2010s.
The idea is simple: repurpose a sturdy, and cheap, IKEA Lack table by fitting it with panels, usually acrylic, using a set of 3D printed brackets to hold them in place.
You can either source and cut the panels yourself, or buy one of the many pre-cut kits available on sites like Amazon. The kits typically include panels cut to size with cabling holes, mounting hardware, and even magnets to create latched doorsAs for the brackets, Thingiverse comes to rescue as it so often does with no shortage of options, including this one.
Once pieced together, the IKEA Lack is large enough to accommodate most small to average-sized printers and works to create the perfect temperature to print with ABS, PC, Nylon, and more. With see-through panels, visibility is among the best out there and you can monitor prints from all angles. Fashioning a door for access shouldn’t be too much trouble either, and, as above, most kits come with a hinged door or removable front panel.
As the frame is made of wood, it’s also fairly easy to attach add-ons like a thermometer or LED lights, for example. If you want to push the boat out, you can also stack several IKEA Lack tables for extra storage, another printer, an external spool holder, or a filament storage shelf.

The only downside of this DIY 3D printer enclosure project is that it’s quite hands-on compared to the mats above or a pre-made alternative. The kits help somewhat, but expect some troubleshooting along the way and creative problem-solving, especially if you’re customizing the enclosure with extra features.
Best Basic DIY 3D Printer Enclosure – Exercise and Kids Mats
Rather curiously, foam exercise and kid’s play mats make for a solid DIY 3D printer enclosure option. These tend to have interlocking teeth that allow you to piece together a cube that can house a standard size printer, like an Ender 3 or Anycubic Kobra, in a matter of seconds. There’s no need for tools, screws, or any additional components.
These mats are typically made of ethylene vinyl acetate, which is up there with materials like glass for insulation – they do a good job of keeping the air from escaping. As such, they are able to maintain enough of a stable environment for printing the likes of ABS, and per regulations in most countries they are non-flammable.
That said, the manufacturing process means the teeth don’t always provide a perfect seal, so some external air can seep into – but not enough to spoil a print.
Furthermore, access isn’t all that great as you’ll need to remove a panel to reach the printer, though it’s possible to carve out a whole and put in an acrylic window if you’re that way inclined.
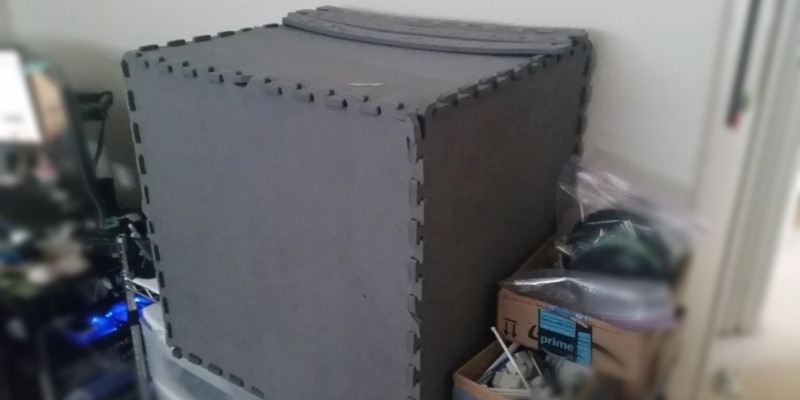
At roughly $20 for a pack of six panels, kids mats are hands down the cheapest, and yes basic, DIY enclosure option out there. A go-to for makers reluctant to spend a lot of money on an enclosure and for those daunted by a hands-on DIY project. The mats make for surprisingly solid noise cancellers due to the density of the foam, so another advantage to this option.
Best DIY 3D Printer Enclosure for Large-Format 3D Printers – Wood Enclosure
While the above options are a great way to save on costs, they are well suited to large format printers. If you own a big printer like an Ender 5 Plus, then a wood enclosure may very well do the job. Wood offers flexibility when it comes to dimensions, allowing you to make a box that fits your printer.
Beyond the size advantage, wood enclosures also surpass other options for overall aesthetics, insulation, and to a certain extent visibility. Wood is a reliable insulator and will prevent warping, keeping the space around your printer toasty as long as you fill in any air gaps.
As for visibility, you can either construct a wooden frame then attach acrylic panels on all sides, or use wood panels and fit a see-through front panel for monitoring and access.
All this does come at a cost, though having spare wood suitable for the project lying around can help keep the bill down. Otherwise, there are components like glue, screws, brackets, and trim to consider. Overall, and being thrifty, it’s possible to keep the budget to between $50 and $100.
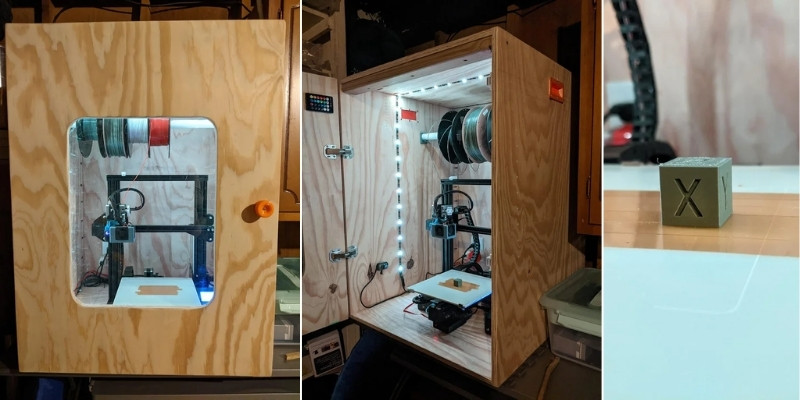
As for assembly, some DIY experience is recommended, but it all depends on the complexity of your plans. It’s also worth noting that wood is workable, you will need tools such as a drill and saw.
Best DIY 3D Printer Enclosure for Noise Reduction – Sound Proof Enclosure
The project comes to us from an Instructables post – with plans, measurements, and list of materials included. It’s an involved project that likely requires several days to complete, positioning it as one for the experienced tinkerers and builders out there.
Once constructed, it excels at noise dampening thanks to a combination of MDF panels, wooden slats, and ample insulation foam. The enclosure is designed to have mirrored latched front doors that open for easy access to the printer, while see-through panels on the doors giving you an unobstructed view of the printer at work. The enclosure has a massive footprint compared to most other enclosures, and is likely to dominate any room where it’s set up.
Aside from keeping noise from creeping out, the foam also works to keep a stable temperature inside the chamber, while the whole design also proves excellent at keeping moisture, dust, and other external unwanted debris from getting in.

Due to its size, which you can adapt to house all types of printers, you can customize the interior to your liking: mounted spool holder and LED lighting being two popular options for those who’ve undertaken the project.
For all that it offers the estimated $150-$200 building and material costs are reasonable and packed with value in our opinion. The beauty is that you can adapt the project to your needs to save money.
Best Ready-Made 3D Printer Enclosures
While DIY 3D printer enclosures made at home offer the most cost-effective route, there are pre-made options for those that want an easy and quick option who are happy to pay a reasonable price.
Official Creality Enclosure
The Official Creality Enclosure is a straightforward and affordable enclosure option designed specifically for 3D printers by one of the largest manufacturers in the industry.
The enclosure takes on a tent format – simply position the printer inside and zip the enclosure to create a heat-sustaining space. It consists of a rigid iron frame that takes a matter of minutes to piece together (or take down for storage), along a fabric tent that consists of a heat-retaining aluminum film and flame retardant outer layer.
Access is well covered with a front-facing zip door, and velcro openings positioned on the side and top of the enclosure. A front-facing window means you can monitor prints without opening the enclosure and releasing heat.
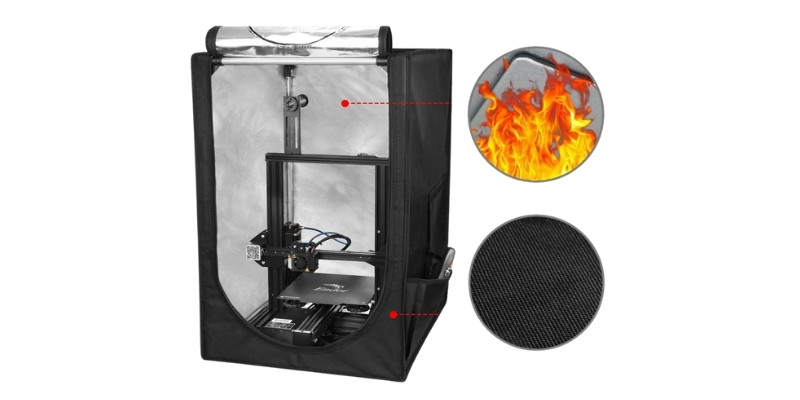
There’s even a tool holder pocket to help keep your printing space tidy. This composition offers a degree of sound proofing, but it’s by no means the best option if you’re looking to keep noise down in a small apartment or at night.
Creality’s enclosure comes in two sizes:
- One suited to mid-format printers like the Ender 3 (480 x 500 x 720 mm)
- And a larger variant with space to house a large-format printer like an Ender 5 Plus (750 x 700 x 900 mm)
Depending on the size you choose, expect to pay anywhere from $60 to $90 for Creality’s Official Enclosure.
Wham Bam HotBox V2 Enclosure
The Wham Bam HotBox V2 enclosure is a step up from the Creality Enclosure in both construction and price, for the DIY-averse out there. The focus is on an easily-assembled and hassle-free enclosure solution for those wanting the convenience of a paid-for option.
The Wham Bam HotBox V2 comes fully assembled, and setting it up is a matter of closing two zips to create the enclosure cube. Slide the printer in and you’re good to go. When you’re done, the enclosure folds flat for easy storage.
The HotBox V2 features a semi-rigid, lightweight polymer honeycomb structure that’s also insulative, consisting of a Nylon 600D outer layer and insulating internal lining. These work well to keep the heat in and block out externals like drafts and dust. Access is through a front-facing velcro panel when the printer is working away, but you can open up the enclosure fully via the zips mentioned above.

Elsewhere, the Wham Bam HotBox V2 includes several metal-lined filament passages giving you the option to mount the spool holder externally, and even plug seals should you decide not to use the passages. There’s also an air vent port should you want to install an air-filtration system, a thermostat for monitoring, and a cable passage for your power supply cabling.
The enclosure measures up to 568mm x 568mm x 484mm, which is enough for average-sized printers, so not a great option if you’re running a large-format printer. In that case, consider the HotBox’s larger sibling, the Wham Bam HotBox Mega enclosure.
Repurposed Photography Tent Enclosure
Sitting mid-way between a DIY enclosure and pre-made, it’s possible to repurpose a cheap, standard photography tent into a viable 3D printer enclosure.
There’s no set formula, but the gist is to buy a low-cost photography tent off Amazon, ideally one with zips or velcro to create a sealed inside, pop the printer inside, and print away with heat sensitive filaments.
These cost anywhere from $20 to $40 so even those on a tight budget can sidestep an involved DIY project and have an enclosure. They are also available in a range of sizes, so even a hulking large-format printer should fit with space to spare.
These tents have surprisingly respectable insulative properties and can quite comfortably maintain the 30-35° needed for materials like ABS. There’s next to no assembly and setup involves reacting the tent, making it the least DIY of our DIY options.
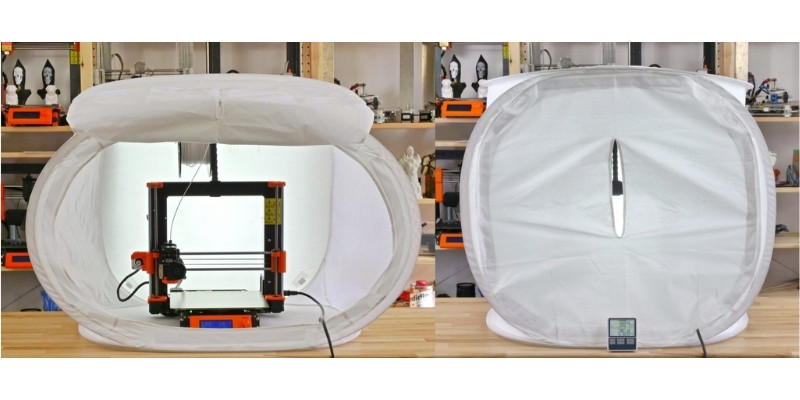
There is one downside, photography tents aren’t exactly known for their fire retardant properties, so it’s worth taking time or paying a tad more for a material that won’t burst into flames when temperatures crank up. Visibility isn’t near inexistent as most tents have an opaque white color that isn’t see-through, but at this price, this is a minor complaint.
All things considered, we’d suggest the photography tent option for those that want an enclosure for the sole purpose of storing and protecting their printer from dust and debris while it isn’t in use.
DIY 3D Printer Enclosures – Buying Guide
Here are a few tips to keep in mind when building or buying a 3D printer enclosure.
Size
An obvious one, but make sure the enclosure is large enough to house your printer. This is especially important if you have a large-format printer or if the filament spool holder is located above the printer.
Does it fit inside the printer or is there a way to house the spool outside of the chamber and route it into the enclosure?
If space allows it, we recommend an enclosure that’s slightly larger than the printer to give you room to work and move the printer. Be careful here: too big and the space will take longer to heat up and it will be harder to maintain higher temperatures.
Build Time
The length of time needed to complete an enclosure differs depending on the project. A from scratch chamber where you need to build the frame and paneling will naturally take longer than working with an IKEA Lack table as a foundation.
Similarly, using a photography tent should take minutes to set up compared to the hours required for most other enclosure projects.
Build Costs
Though DIY projects almost always work out cheaper than buying a pre-made enclosure, it’s worth getting an idea of the cost involved. These include any materials, hardware, and pre-built components you may need.
Accessibility
Make sure the enclosure build allows you to access the printer to remove prints, load filament, tighten bolts, and level the bed. Look for hinged doors or removable panels for ease of use.
You may also want to consider whether the enclosure sits over the printer to easily move it when printing with filaments like PLA that don’t benefit from an enclosure.
Visibility
Not all makers are fussed about having a perfect view of their printer through an enclosure, but having good visibility can help monitor prints. Consider using see-through materials like acrylic panels or plexiglass, or installing windows, for example.
Safety
- Is an enclosure safe?
- Are you using fire retardant materials?
- Can the materials sustain the temperatures you expect to maintain inside the exposure?
- Are pets/children able to get inside the enclosure?
- Is the printer/enclosure located next to a window or in a well ventilated space?
Safety is vital so it’s important to spend some time mulling over these points.
Noise Reduction
If your need for an enclosure is driven by a desire to lower noise levels that consider the noise dampening properties of the materials used.
Do you need to spend more and include sound dampening? Multiple layers?
Optional Extras
Optional extras like an air-filtration system, thermostat, cameras, LED strips, and so on are worth considering for remote monitoring of your prints, visibility, or for safety reasons.
Do You Need an Enclosure For Your 3D Printer?
It depends on what you’re printing with. If you’re printing exclusively with PLA, you’re unlikely to see much benefit to equipping your printer with an enclosure. However, with ABS, for example, an enclosure can greatly enhance the quality of your prints and prevent warping.
The other benefits mean that some still use 3D printer enclosures with PLA: protecting your printer from dust and quietening down operational noise – but beyond these, there are no other benefits.
Another situation where an enclosure easily proves its worth is if you’re printing in a busy environment such as an educational setting or in a home with children and pets. An enclosure protects not just people/pets from high temperature components and fumes but also the printer itself from curious interfering hands and paws.
Read more: the best 3D printers for kids.
Benefits of a 3D Printer Enclosure
Improved Print Results
An enclosure is all about creating a controlled environment around your printer so it can thrive.
This is achieved by shielding the printing from drafts, guts, and temperature fluctuations to create a stable thermal environment. Temperature control this mitigates instances of warping and layer adhesion issues, which translates to improved print quality and results.
Broader Filament Compatibility
Though budget 3D printer manufacturers love to plump their filament compatibility list with as many materials as possible to tempt sales, in most cases this isn’t the case.
Certain filaments, mainly heat sensitive filaments like ABS, Nylon, ASA, HIPS, and PC, are extremely susceptible to changes in temperature and gusts of cool air.
Open-frame printers simply aren’t designed to work well with these materials. To create decent quality prints with these filaments, a 3D printer enclosure is a must-have accessory.
For more details, be sure to check out our guide to the best enclosed 3D printers.
Noise Reduction
The whirr of fans and mechanical whizz of stepper motors can combine to produce substantial amounts of noise.
Having an enclosure provides a degree of noise dampening and isolation that’s useful if you’re printing at night, when you’re working, in a small apartment where it’s hard to avoid the noise, or near other people bothered by the noise.
Contain Smelly and Toxic Fumes
By offering a sealed environment, an enclosure contains fumes and odors produced during 3D printing.
This can be particularly beneficial when working with toxic filaments like ABS, which emit fumes that can cause irritation and smell. You can even install an air filtration system, carbon filter, and vent fumes outdoors as an extra safety step.
Keeps You Printer Clean and Free of Dust
Whether it’s the lubricant on the rods that seems to attract dust like a black hole gobbling up light, or the layer of dust that always seems to settle on the print bed between printing sessions, there’s always dirt and grime gunning to spoil your pristine printer.
A 3D printing enclosure provides protection from external debris, extending the lifespan of your machine and increasing the quality of your prints. It also offers a convenient storage solution for when the printer isn’t in use.
FAQs
Do You Need an Enclosure for a 3D Printer?
If you want to print using heat sensitive temperatures like ABS and Nylon, you will need an enclosure for your 3D printer. The enclosure ensures the environment around the printer maintains the stable thermal environment needed to avoid common issues related to insufficient temperatures like warping.
How to Heat a 3D Printer Enclosure?
There’s no need to heat a 3D printer enclosure. The heat generated by your 3D printer will produce the increase in temperature required for the enclosure to function as intended, which is to maintain a stable temperature and cut out drafts and cold air. The aim is to prevent heat escaping rather than providing additional heat.
How to Build a 3D Printer Enclosure?
There are many ways to build a 3D printer enclosure using a variety of materials. Popular options include repurposing old furniture like IKEA Lack tables in a 3D printing cabinet, using photography tents, building a sealed box from acrylic panels and/or wood, mdf, plexiglass, and even old household appliances like dishwashers.
Do 3D Printer Enclosures Need Ventilation?
In an ideal world, a 3D printer enclosure will have an air filter and a vent funneling fumes and particulates to the outdoors, especially when using noxious filament types like ABS. However, this setup tends to introduce cool air into the enclosure chamber, reducing its capacity to maintain a steady temperature. Due to the cost of these features and their potentially negative impact on print quality, it’s possible to do without as long as the printer and enclosure is set up in a well-ventilated area.
Do You Need a 3D Printer Enclosure for PLA?
No, you don’t need a 3D printer enclosure for PLA. If anything, PLA suffers from the additional heat maintained by an enclosure, which can affect the rate at which the filament cools as it’s printed leading to issues like elephant’s foot. For the best results using PLA, print without an enclosure.
Do You Need a 3D Printer Enclosure for PETG?
No, you don’t need a 3D printer enclosure to print with PETG and get good quality prints. Much like PLA, it melts at a relatively low temperature, so having an enclosure can push temperatures high enough to cause issues like elephant’s foot. That said, PETG is susceptible to poorly dialed cooling and an enclosure can help if tweaking settings fails to fix the issue.
Do You Need a 3D Printer Enclosure for ABS?
Yes, a 3D printer enclosure is a must-have when printing ABS. The filament requires a stable thermal environment free of drafts, which is exactly what a 3D printer enclosure is designed to do. ABS needs to cool slowly and steadily to produce good quality prints, which isn’t possible without an enclosure.
Do You Need a 3D Printer Enclosure for Nylon?
Yes, when printing with Nylon, a 3D printer enclosure is necessary. As a high temperature filament Nylon, you need to print in an environment when the temperature fluctuates very little otherwise issues like warping and stringing will pop up ruining prints.
How Do You Insulate a 3D Printer Enclosure?
While it’s possible to insulate a DIY 3D printer enclosure with a material like foam, cardboard, and cork, the best option is to build the enclosure using materials with naturally solid insulative properties such as glass.
If you enjoyed this post, also check out our other DIY and 3D printer enclosure articles:
- Ranking The Top DIY and Ready-to-use Enclosures For Your Ender 5 (and Pro / Plus)
- Our List of The Best Prusa Enclosures: Buyable & DIY Options
- Buy or DIY These Ender 3 Enclosures (Pro/V2)
- Fun and Easy 3D Printing Projects For Beginners
- Make It Yourself: Filament Dry Box Projects You Can Make at Home
- Make It Yourself: 3D Printed Home Décor Projects For Your Home Or Give Away As Gifts