
They range from standard 3D printing, to an all-in-one package with high-quality laser cutting, engraving, CNC, and dual extrusion printing. As such, they vary wildly in price and specs.
Snapmaker has created an impressive lineup of devices that work for a variety of different hobbyists and projects. In this article, we’ll cover the main selling points of each printer and which situations would make them a worthy purchase.
Let’s get started.
| Snapmaker J1 | Snapmaker Artisan | Snapmaker 2.0 A250T | Snapmaker 2.0 A350T | Snapmaker 2.0 F250 | Snapmaker 2.0 F350 | |
|---|---|---|---|---|---|---|
| Build Volume (3D Printing) | 300 x 200 x 200 mm | 350 x 400 x 400 mm | 230 x 250 x 235 mm | 320 x 350 x 330 mm | 230 x 250 x 235 mm | 320 x 350 x 330 mm |
| Machine Footprint | 539 mm x 401 mm x 464 mm | 665 mm x 943 mm x 705 mm | 405 x 424 x 490 mm | 495 x 506 x 580 mm | 405 x 424 x 490 mm | 495 x 506 x 580 mm |
| Build Plate | Double-sided PEI Glass Plate | Double-sided PEI-coated Glass | Double-sided PEI Flex Plate | Double-sided PEI Flex Plate | Double-sided PEI Flex Plate | Double-sided PEI Flex Plate |
| Extruder Type | Direct Drive | Direct Drive | Direct Drive | Direct Drive | Direct Drive | Direct Drive |
| Filament Compatibility | PLA, ABS, HIPS, PC, TPU, TPE, PETG, ASA, PP, PVA, PA, PA-GF, PA-CF | PLA, ABS, ASA, PETG, TPU, Breakaway PLA, PVA, HIPS, Nylon, Carbon Fiber Reinforced Nylon, Glass Fiber Reinforced Nylon | PLA, ABS, PETG, TPU, wood filled PLA, and more being tested | PLA, ABS, PETG, TPU, wood filled PLA, and more being tested | PLA, ABS, PETG, TPU, wood filled PLA, more being tested | PLA, ABS, PETG, TPU, wood filled PLA, more being tested |
| Max Extruder Temp | 300°C | 300°C | 275°C | 275°C | 300°C | 300°C |
| Max Bed Temp | 100°C | 110°C | 100°C | 80°C | 100°C | 80°C |
| IDEX? | Yes | No (dual extrusion) | No | No | No (dual extrusion) | No (dual extrusion) |
| Laser Cutting? | No | Yes | Yes | Yes | No (can be added) | No (can be added) |
| Supported Materials for Laser Cutting | N/A | Basswood, Paulownia, Pinewood, Plywood, Beech, Walnut, Bamboo, MDF, Leather, Fabric, Canvas, Corrugated Paper, Cardboard, Plastic, Dark Acrylic (Blue excluded) | Wood, leather, plastic, fabric, paper, non-transparent acrylic, and more being tested | Wood, leather, plastic, fabric, paper, non-transparent acrylic, and more being tested | N/A | N/A |
| Laser Wattage | N/A | 10W | 1.6W | 1.6W | N/A | N/A |
| CNC Carving? | No | Yes | Yes | Yes | No | No |
| CNC Wattage | N/A | 200W | 50W | 50W | N/A | N/A |
| Supported Materials for CNC | N/A | Hardwood (Beech, Walnut), Softwood, HDF, MDF, Plywood, Jade, Carbon Fiber, Acrylic, Epoxy Tooling Board, PCB | Wood, acrylic, PCB, carbon fiber sheet, jade, and more being tested | Wood, acrylic, PCB, carbon fiber sheet, jade, and more being tested | N/A | N/A |
| Enclosed? | Yes | Yes | No | No | No | No |
| Auto Bed-leveling? | Yes | No | Yes | Yes | Yes | Yes |
| Resume Print and Filament Sensor? | Yes | No | Yes | Yes | Yes | Yes |
| Touchscreen? | Yes | Yes | Yes | Yes | Yes | Yes |
| Connectivity | Wi-Fi, USB cable, USB flash drive | Wi-Fi, USB cable, USB flash drive | Wi-Fi, USB cable, USB flash drive | Wi-Fi, USB cable, USB flash drive | Wi-Fi, USB cable, USB flash drive | Wi-Fi, USB cable, USB flash drive |
| Price | $1,200 | $2,900 | $1,000 | $1,200 | $770 | $850 |
Snapmaker J1 vs Artisan vs 2.0 AT and F: A Quick Summary
Snapmaker J1
- Price: Check latest price at Snapmaker here
- Build volume: 300 x 200 x 200 mm
- Filament compatibility: PLA, ABS, HIPS, PC, TPU, TPE, PETG, ASA, PP, PVA, PA, PA-GF, PA-CF
- Layer height: 50 – 300 microns
- Printing accuracy: ± 0.1 mm
- Max extruder temp: 300°C
- Max bed temp: 100°C
- Connectivity: Wi-Fi, USB cable, USB flash drive
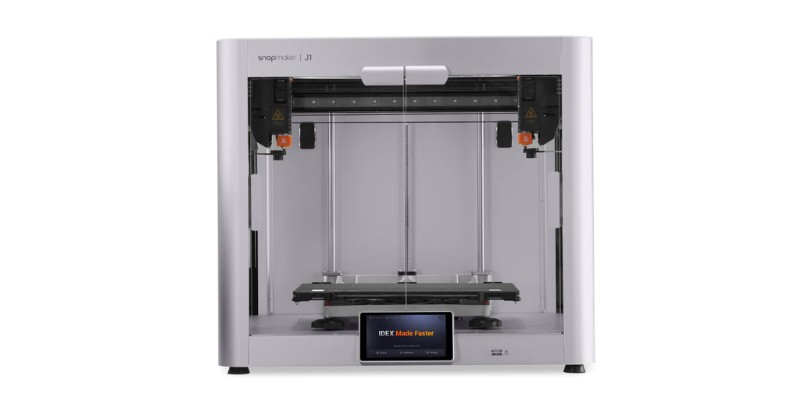
The Snapmaker J1 fits into an interesting niche compared to Snapmaker’s other 3D printers. It doesn’t have any of the multi-function capabilities of the Artisan or 2.0 models, but it does have IDEX (independent dual extruders).
These extruders open up a world of opportunities for 3D printing. You can use a wide range of filaments with it, like PLA, ABS, HIPS, and PC, as well as flexible filaments like TPU and TPE.
The J1 has a maximum extruder temperature of 300°C and a maximum bed temperature of 100°C. It includes an enclosure by default and uses a PEI glass plate. Combined with its build volume of 300 x 200 x 200 mm, it’s well-outfitted to handle a variety of projects.
It also has the quality of life features to make it welcoming to new and old hobbyists alike. The Snapmaker J1 has a filament runout sensor, a 5” touchscreen, and a simple auto bed-leveling system.
Ultimately, the J1 is an amazing option for anyone looking for an IDEX printer. It provides enough support and quality that even beginners could pick it up, which is great to see in a dual-extruder printer. The main downside, if you can call it that, is that the J1 isn’t built to be anything but a 3D printer – which might make you consider an Artisan or 2.0 instead.
Snapmaker Artisan
- Price: Check latest price at Snapmaker here
- Build volume: 350 x 400 x 400 mm
- Filament compatibility: PLA, ABS, ASA, PETG, TPU, Breakaway PLA, PVA, HIPS, Nylon, Carbon Fiber Reinforced Nylon, Glass Fiber Reinforced Nylon
- Laser cutting materials: Basswood, Paulownia, Pinewood, Plywood, Beech, Walnut, Bamboo, MDF, Leather, Fabric, Canvas, Corrugated Paper, Cardboard, Plastic, Dark Acrylic (Blue excluded)
- CNC materials: Hardwood (Beech, Walnut), Softwood, HDF, MDF, Plywood, Jade, Carbon Fiber, Acrylic, Epoxy Tooling Board, PCB
- Layer height: 50 – 300 microns
- Printing accuracy: ± 0.1 mm
- Max extruder temp: 300°C
- Max bed temp: 110°C
- Laser module: 10W
- CNC cutting module: 200W
- Connectivity: Wi-Fi, USB cable, USB flash drive
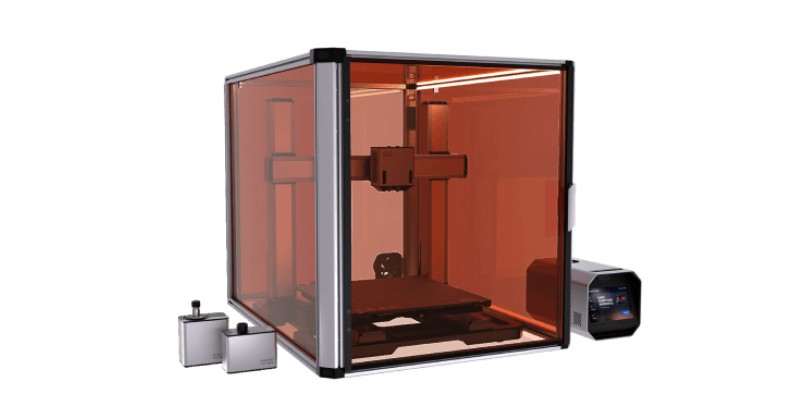
The Snapmaker Artisan is a high profile (winning the CES innovation award), high cost, and highly upgraded version of the 2.0 models. It uses a quick-swap design that’s reminiscent of the modular 2.0 F.
Included in the couple thousand dollar package is the ability to swap between 3D printing with a dual extruder, laser engraving and cutting, and CNC engraving and cutting. Despite being a 3-in-1 device, it doesn’t sacrifice the individual quality of any function.
The laser cutter module can work with a variety of woods, leather, plastic, and acrylics, while the CNC module can work with woods, plastics, carbon fiber, acrylics, and even stones like Jade. Both modules are high power: 10W and 200W respectively.
On the 3D printing side of things, you still have many options. The Artisan’s max extruder temperature of 300°C and max bed temperature of 110°C, paired with a dual-sided PEI and glass build plate and an enclosure, let you use filaments like PETG, ABS, TPU, Nylon, Carbon Fiber Reinforced Nylon, and more.
The Snapmaker Artisan doesn’t let up with smaller features, either. It boasts an updated UI and a 7” touch screen, which makes it easy to use.
Overall, the Artisan is an incredible tool that can only be replaced by purchasing high-quality versions of each machine separately. As it stands, its main pitfall is that it does lack some smaller features – possibly because it’s a 3-in-1 machine. It doesn’t have auto bed-leveling or a filament sensor, and the dual extruder is not IDEX.
Snapmaker 2.0 (AT Models)
- Price: Check latest price at Snapmaker here
- Build volume (A250T): 230 x 250 x 235 mm
- Build volume (A350T): 320 x 350 x 330 mm
- Filament compatibility (A250T and A350T): PLA, ABS, PETG, TPU, wood filled PLA, and similar
- Laser cutting materials: Wood, leather, plastic, fabric, paper, non-transparent acrylic
- CNC materials: Wood, acrylic, PCB, carbon fiber sheet, jade
- Layer height: 50 – 300 microns
- Printing accuracy: ± 0.1 mm
- Max extruder temp (A250T and A350T): 275°C
- Max bed temp (A250T): 100°C
- Max bed temp (A350T): 80°C
- Laser module: 1.6W
- CNC cutting module: 50W
- Connectivity: Wi-Fi, USB cable, USB flash drive
The A250T and the A350T are both complete packages including a 3D printer, a laser cutting module, and a CNC module. While neither of them are as expensive as the premium Snapmaker Artisan, they are reasonably well-equipped.
As the cheaper model, the A250T has a lower build volume of 230 x 250 x 235 mm compared to the A350T’s 320 x 350 x 330 mm. The work areas for the laser and CNC modules are the same, at 230 x 250 mm and 320 x 350 mm, respectively.
The differences are minimal aside from work area size. There’s a decent range of filaments, including PLA, ABS, PETG, TPU, and wood-filled PLA for both the A250T and A350T.
The maximum extruder temperature on both models is 275°C, which helps the ATs print with those trickier filaments like wood-filled and TPU. However, the laser cutting and CNC modules aren’t quite as impressive. The default laser is 1.6W, and you have to pay an extra few hundred dollars to get the 10W high-power laser module that comes with the Artisan by default. The 50W CNC head is also significantly weaker than the 200W Artisan CNC.
However, I still managed to cut wood with the 1.6W laser (I also have the 10W module for my Snapmaker 2.0, though), and fashioned an accurate chess piece using the 4-axis rotary module on some epoxy resin.
They come with a laser camera for seamless calibration, helpful carving bits for CNC work, and are perfectly designed for fast swapping between modules.
Although the AT models aren’t enclosed, they’re well-stocked with filament sensors, auto bed-leveling, and touchscreens. You can also read my full review of the Snapmaker 2.0 A350T.
Snapmaker 2.0 (F Models)
- Price: Check latest price at Snapmaker here
- Build volume (F250): 230 x 250 x 235 mm
- Build volume (F350): 320 x 350 x 330 mm
- Filament compatibility (F250 and F350): PLA, ABS, PETG, TPU, wood filled PLA, and similar
- Layer height: 50 – 300 microns
- Printing accuracy: ± 0.1 mm
- Max extruder temp (F250 and F350): 300°C
- Max bed temp (F250): 100°C
- Max bed temp (F350): 80°C
- Connectivity: Wi-Fi, USB cable, USB flash drive
Compared to the Snapmaker 2.0 AT and A models, the Snapmaker 2.0 F models are more about versatility and flexibility. They don’t come with any modules by default, but you have the option of purchasing them. As you might expect, they’re cheaper printers that work better for entry-level hobbyists.
Like the AT models, the F250 has a build volume of 230 x 250 x 235 mm compared to the F350’s 320 x 350 x 330 mm.
The filament compatibility is also the same on the F models compared to the AT models, with PLA, ABS, PETG, TPU, wood-filled PLA, and similar filaments. That’s because the build plate (double-sided PEI and glass) is the same, and the maximum extruder temperature (300°C) is actually higher than on the AT models.
As a 3D printer first and foremost, the F250 and F350 have filament runout sensors and auto bed-leveling – which are not with the Artisan.
Between the F250 and F350, Snapmaker claims to have upgraded the F350 to have much faster print times without sacrificing quality. Both F models have touchscreens and an upgraded cooling system.
The quality of the laser cutting/engraving and CNC modules should be about the same as on the AT models. Even the system of swapping them is more or less the same– the only difference is needing to purchase the modules separately.
However, the F models have a trump card over the 2.0 ATs: they have a dual extruder. They aren’t IDEX, but dual extrusion gives you more flexibility with your projects. Increased flexibility and versatility are what the Snapmaker 2.0 F printers are all about.
Comparison Showdown
Functions
| 3D Printer | Functions |
|---|---|
| Snapmaker J1 | Dual extrusion 3D printing (IDEX) |
| Snapmaker Artisan | Dual extrusion 3D printing, Laser cutting, Laser engraving, and CNC cutting |
| Snapmaker 2.0 (AT Models) | 3D printing, Laser engraving, and CNC cutting |
| Snapmaker 2.0 (F Models) | Dual extrusion 3D printing (modular capability) |
Each Snapmaker device fits in its own unique niche.
Although they’re all makerspace-worthy, the Snapmaker Artisan has the most functionality overall. It can do laser engraving and cutting thanks to the higher power laser, CNC cutting, and dual extrusion 3D printing.
The Artisan is compatible with more modules than the AT or F models. You can see a complete list of compatible modules on the product page.
The only thing the Artisan doesn’t have are independent dual extruders, which are better compared to dual extruders built into the same print head. IDEX 3D printers can set different temperatures for each print head, and so print multiple filaments, and multiple objects simultaneously.
By a technicality, the AT models have more functionality than the F models – but only until you purchase modules to add. If you buy a laser engraving and a CNC cutting module, then you’ll have everything the AT models have – but with dual extrusion.
The J1 is dead last when it comes to functionality. It’s not made to be multi-purpose like the other Snapmaker devices, which isn’t necessarily a bad thing. The Snapmaker J1 does its job of being a high-quality IDEX printer quite well.
When making your decision, remember the differences between 3D printing capabilities between the printers are relatively minimal. They can all print quality designs using a wide range of filaments.
Build Volumes and Work Areas
| 3D Printer | Build Volume and Work Areas |
|---|---|
| Snapmaker J1 | 300 x 200 x 200 mm |
| Snapmaker Artisan | 350 x 400 x 400 mm |
| Snapmaker 2.0 A250T | 230 x 250 x 235 mm |
| Snapmaker 2.0 A350T | 320 x 350 x 330 mm |
| Snapmaker 2.0 F250 | 230 x 250 x 235 mm |
| Snapmaker 2.0 F350 | 320 x 350 x 330 mm |
The Snapmaker Artisan is meaningfully larger than all of the others at an impressive 350 x 400 x 400 mm. The Snapmaker 2.0 A350T and F350 are in second place, at 320 x 350 x 330 mm.
The Artisan, as a more ‘premium’ device, will give you the most leeway to create fun pieces. But we feel the work area alone likely isn’t worth the increased price. You should stick with the 2.0 A350T or F350 if you want a larger build volume and don’t need the extra features.
Although the Snapmaker J1 is a perfectly reasonable middle ground for a 3D printer at 300 x 200 x 200 mm, the smaller sizes of the Snapmaker 2.0 models might give you some trouble. Make sure you carefully consider not only what you want to 3D print, but which projects you would use CNC or laser modules on.
Temp Resistance and Wattage
| Max Extruder Temp | Max Bed Temp | CNC Wattage | Laser Wattage | |
|---|---|---|---|---|
| Snapmaker J1 | 300°C | 100°C | N/A | N/A |
| Snapmaker Artisan | 300°C | 110°C | 10W | 200W |
| Snapmaker 2.0 A250T | 275°C | 100°C | 1.6W | 50W |
| Snapmaker 2.0 A350T | 275°C | 80°C | 1.6W | 50W |
| Snapmaker 2.0 F250 | 300°C | 100°C | N/A | N/A |
| Snapmaker 2.0 F350 | 300°C | 80°C | N/A | N/A |
Once again, the Snapmaker Artisan proves its higher quality through high-power CNC and laser modules, and a high-temperature extruder.
Most Snapmaker printers have similar max temperatures. However, you can swap in higher-quality pieces if need be.
Since the Artisan and 2.0 models are modular, you could get some of the Artisan’s specs on the 2.0 models. Compatibility can be found in the FAQ section of the Artisan’s product page.
The 10W high power laser module works for the A250T, A350T, F250, and F350 (I have the 10W module on my Snapmaker 2.0).
However, the 200W CNC module that Artisan uses doesn’t work with any of the other 2.0 models. If you want CNC power, the Artisan is the way to go.
At base, the modules that come with the AT models aren’t all that special. The laser module uses 1.6W and the CNC module uses 50W, far from the Artisan’s quality.
It could be worthwhile to purchase a 2.0 F model and a 10W laser module if you’re the most interested in having the laser engraving/cutting capability. Keep in mind, though, that it won’t offer cost savings since the 10W laser module is $490 and even the F250 is $770 at base.
The benefit of opting for this path is that you’d get a higher-wattage laser for around the same price as the A350T. We also have a standalone review of the Snapmaker 10W laser module.
Filaments and Materials
| Filaments | CNC Materials | Laser Materials | |
|---|---|---|---|
| Snapmaker J1 | PLA, ABS, HIPS, PC, TPU, TPE, PETG, ASA, PP, PVA, PA, PA-GF, PA-CF | N/A | N/A |
| Snapmaker Artisan | PLA, ABS, ASA, PETG, TPU, Breakaway PLA, PVA, HIPS, Nylon, Carbon Fiber Reinforced Nylon, Glass Fiber Reinforced Nylon | Hardwood (Beech, Walnut), Softwood, HDF, MDF, Plywood, Jade, Carbon Fiber, Acrylic, Epoxy Tooling Board, PCB | Basswood, Paulownia, Pinewood, Plywood, Beech, Walnut, Bamboo, MDF, Leather, Fabric, Canvas, Corrugated Paper, Cardboard, Plastic, Dark Acrylic (Blue excluded) |
| Snapmaker 2.0 A250T | PLA, ABS, PETG, TPU, wood filled PLA, and more being tested | Wood, acrylic, PCB, carbon fiber sheet, jade, and more being tested | Wood, leather, plastic, fabric, paper, non-transparent acrylic, and more being tested |
| Snapmaker 2.0 A350T | PLA, ABS, PETG, TPU, wood filled PLA, and more being tested | Wood, acrylic, PCB, carbon fiber sheet, jade, and more being tested | Wood, leather, plastic, fabric, paper, non-transparent acrylic, and more being tested |
| Snapmaker 2.0 F250 | PLA, ABS, PETG, TPU, wood filled PLA, and more being tested | N/A | N/A |
| Snapmaker 2.0 F350 | PLA, ABS, PETG, TPU, wood filled PLA, and more being tested | N/A | N/A |
Snapmaker tests materials and filaments for each printer in-house, which makes it easy to know which materials are good to go. Unfortunately, the materials that they’ve tested don’t truly run the gamut of what should be possible on their devices.
For example, the Snapmaker J1 and Snapmaker Artisan should be more than capable of handling wood-filled PLA, just like the various 2.0 models.
As you might expect, the Snapmaker Artisan and Snapmaker J1 have the best selection of usable filaments. The J1 gets bonus points for having IDEX, allowing it to use multiple filaments in the same print. Higher-quality laser and CNC modules on the Artisan makes for better material options, too.
In the context of 3D printing, the enclosed designs of the J1 and Artisan are what set them apart the most. These designs allow for better temperature control, which in turn means you’ll find more success when printing with filaments like Nylon that need stable environments. You can also buy an enclosure for the 2.0 models though, and I bought the enclosure for mine for a few hundred extra dollars.
We think you’ll likely be able to use Nylon fibers on the Snapmaker J1 based on the specs and enclosure, though Snapmaker doesn’t explicitly list them as tested filaments.
Price
| 3D Printer | Price |
|---|---|
| Snapmaker J1 | $1,200 |
| Snapmaker Artisan | $2,900 |
| Snapmaker 2.0 A250T | $1,000 |
| Snapmaker 2.0 A350T | $1,200 |
| Snapmaker 2.0 F250 | $770 |
| Snapmaker 2.0 F350 | $850 |
For Artisan’s high-quality modules and premium specs, you’ll pay a hefty $2,900. It’s not comparable to even the 2.0 A350T’s $1,200.
Aside from the J1, all of these printers use a modular design to swap in and out new functions. Since the Snapmaker Artisan has the best CNC and laser modules, it’s actually a good deal.
The Snapmaker 2.0 F250 and F350 may be the cheapest, but that’s only because they don’t include any modules in the package. To get a better idea of what the total price will be, make sure you’re including the modules or add-ons that you want in your calculations
You can also read up more on the Snapmaker 2.0 laser engraver and CNC toolhead before making any final decisions.
Snapmaker J1 vs Artisan vs 2.0 AT and F – The Bottom Line
We’re big fans of Snapmaker here at 3DSourced, and there’s a Snapmaker machine for every need – depending on what you prioritize.
Let’s get the Snapmaker J1 out of the way first: it’s a great IDEX printer, no more and no less. We feel it’s a good option for beginners and more experienced hobbyists alike.
If you’re interested in Snapmaker devices for their modular designs, you’ll want one of the other machines. The Snapmaker Artisan is the best, hands down, in content and quality. We’d suggest purchasing the Artisan so long as you can swing the price.
It’s going to be cheaper for most casual hobbyists to purchase a 2.0 AT or F model. Considering the AT’s included modules, either the A250T or the A350T will be a better all-around choice.
The F models are geared toward versatility and customization, but they actually can’t use all of the modules that the AT models can since the 2.0 Fs are older.
If you opt for one of the 2.0 Fs, then you need to do your due diligence to make sure the lower price is really worth it – or if you’re just dooming yourself to a subpar experience.
]]>The Prusa MINI is generally considered to be the more advanced and reliable printer, suitable for intermediate to advanced users, while the Ender 3 is a popular budget option, suitable for beginners with plenty of upgrade potential.
They’re the two most popular choices – but you may also choose to opt for the larger Ender 3 V2 or Pro if you need more build volume.
In this guide, I’ll compare all four candidates for the ultimate budget royalty head-to-head based on my hands-on experience to help you make a confident choice.
We’ll discuss the differences across all the key metrics – ease of use, print quality, value for money, and everything else you need to know
Does the diminutive Prusa MINI have enough printing pep to loosen the proven Ender 3’s firm grip on the entry-level 3D printing market? Let’s find out.
OUT-OF-THE-BOX PICK
Prusa MINI
Available at:
BUILD VOLUME PICK
Ender 3 V2
Available at:
Prusa MINI vs Creality Ender 3 / Pro / V2 – Meet The Contenders
Creality Ender 3
- Where to buy: Creality official store here
- Printing technology: FDM
- Build volume: 220 x 220 x 250 mm
- Filament compatibility: PLA, ABS, TPU, PETG
- Layer height: 100-400 microns
- Printing accuracy: ± 0.1 mm
- Max extruder temp: 255°
- Max bed temp: 110°
- Connectivity: USB, SD Card
Pros
Has some standout features.
One of the best budget 3D printers.
Cons
Wobble-prone plastic Y-axis extrusion.
Manual bed leveling.
The original Creality Ender 3 burst onto the 3D printing scene in 2017 and, in one fell swoop, changed the budget landscape, with an impact that still echoes today.
800,000 units shipped and counting attests to the Ender 3’s abiding popularity.
The Ender 3 offers a roomy 220 x 220 x 250 mm build volume, a heated BuildTak-like build plate, a power recovery mode, and support for PLA, ABS, PETG, and TPU printing, to name the standout features.
The Ender 3 isn’t without its faults, though.
Its wobble-prone plastic Y-axis extrusion has been the subject of much debate, and manual bed leveling feels outdated in this day and age of low-cost auto-leveling probes.
Although several contenders and copycats have appeared in the intervening year and the specification sheet is no longer as eye-catching, the vanilla Ender 3 remains a benchmark for all value-packed printers out there.
A strong buy for first-timers or cash-strapped makers with bucket loads of upgrade potential.
Read more: our Creality Ender 3 review
Creality Ender 3 Pro
- Where to buy: Creality official store here
- Printing technology: FDM
- Build volume: 220 x 220 x 250 mm
- Filament compatibility: PLA, ABS, TPU, PETG
- Layer height: 100-400 microns
- Printing accuracy: ± 0.1 mm
- Max extruder temp: 255°
- Max bed temp: 110°
- Connectivity: USB, SD Card
Pros
New and improved wider Y-axis aluminum extrusion, patching the wobble woes of the Ender 3.
Slim and quieter power supply.
Cons
Some will find the upgrades not worth the extra $100.
With the Ender 3 having obtained household name status, Creality brought out the Ender 3 Pro to address some of the original’s most glaring issues.
The price tag also surged upwards to finance those enhancements, bringing the Ender 3 Pro into the sub $300 segment.
Among the most notable changes is new and improved wider Y-axis 40×40 aluminum extrusion, patching up the wobble woes of the Ender 3.
A slimmer and quieter Mean Well power supply unit, a textured removable magnetic bed, an improved MK-8 extruder, larger bed leveling nuts, and a smarter repositioning of the motherboard fan spruce up the Ender 3 Pro compared to the original.
The question here is whether these enhancements warrant the roughly extra $100 Creality levies for the Ender 3 Pro.
While the Ender 3 Pro benefits from tangible improvements that make printing easier, is it worth paying slightly more for the refreshed 2020 Ender 3 V2 or even the Prusa MINI?
Creality Ender 3 V2
- Where to buy: Creality official store here
- Printing technology: FDM
- Build volume: 220 x 220 x 250 mm
- Filament compatibility: PLA, ABS, TPU, PETG
- Layer height: 100-400 microns
- Printing accuracy: ± 0.1 mm
- Max extruder temp: 255°
- Max bed temp: 110°
- Connectivity: USB, SD Card
Pros
The best Ender 3 yet.
Many upgrades and quality-of-life enhancements over the previous Ender 3 printers.
Provides meaningful upgrades, unlike the Ender 3 Pro.
Cons
Can be a little pricey for those on a tight budget.
Rounding up our overview of the Ender 3 family, we have the Creality Ender V2.
While not a complete overhaul of the Ender 3, the Ender 3 V2 takes the same core easy-to-use budget printing experience and injects a series of transformative upgrades that, in our estimation, make it the best Ender 3 yet.
Aesthetically and construction-wise, the Ender 3 V2 diverts from its predecessor with a sleek, sheet metal injection and plastic panel design, abandoning the cheaper look for something wholly more pleasing.
On the technical side, the Ender 3 V2 now includes a silent 32-bit motherboard, TMC2208 stepper motor drivers, and a tempered carborundum glass platform, a significant adherence upgrade over even the Ender 3 Pro’s magnetic plate that also speeds up bed heating.
Creality has also added several quality-of-life enhancements that make using the Ender 3 V2 more enjoyable long-term.
These include a new detachable 4.3-inch HD color screen, a nifty, if a little gimmicky, toolbox embedded into the printer’s base, and XY-axis tensioners to keep belts taut.
As the most sophisticated budget Creality printer yet, the Ender 3 V2 succeeds where the Pro falters in that it provides a meaningful upgrade over the original that’s well worth the extra cost.
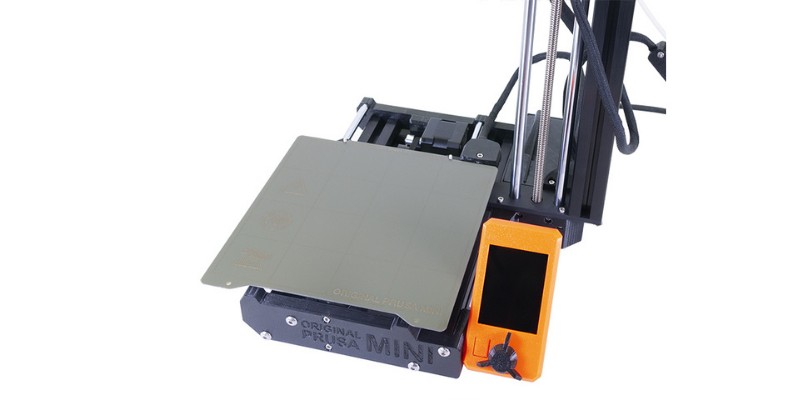
Prusa MINI
- Where to buy: Prusa official store here
- Printing technology: FDM
- Build volume: 180 x 180 x 180 mm
- Filament compatibility: PLA, PETG, ASA, ABS, PC, CPE, PVA, PVB, HIPS, PP
- Layer height: 50-250 microns
- Max extruder temp: 280°
- Max bed temp: 100°
- Connectivity: USB, Ethernet
Pros
Borrows most of the technical know-how from the Prusa i3 MK3S+ for half the price.
Sports an excellent heated removable magnetic PEI-coated bed.
Can tackle a generous range of materials.
Cons
Small print area.
The Prusa MINI represents Prusa’s first foray into the budget sector to duke it out with, predominantly, the Ender series.
The Prusa MINI borrows much of the technical know-how and lashings of the market-leading usability found in Prusa’s i3 MK3S+ crown jewel, but at less than half the cost.
As the name implies, it’s a modest, toy-sized printer, but behind a small footprint lies a sleek, uncluttered, and confident 3D printing machine capable of print quality that all but equals the full-fat i3 MK3S+.
The Prusa Mini sports an excellent heated removable magnetic PEI-coated bed.
Alongside, the MINI can tackle a generous range of materials, including PLA, ABS, PETG, ASA, PC, and HIPS. It also does away with the standard SD Card connectivity for both USB and Ethernet.
Finally, a 2.8″ full-color LCD, fully-automatic mesh bed leveling, and well-guided kit assembly round-off the baked-in usability that courses through the Prusa MINI’s entire design.
Prusa’s expertise in creating reliable and convenient 3D printers shines through with the Prusa Mini.
Whether you’re buying your first printer or looking to level up to a premium-budget machine, the Prusa MINI should serve you well.
Prusa MINI vs Creality Ender 3 / Pro / V2 – At a Glance
Now that we’ve got a sense of what each printer has to offer, it’s time to hone in on what sets them apart.
But, keep in mind that use case and, ultimately, budget are the final adjudicators of whether the Ender 3, Ender 3 Pro, Ender 3 V2, or Prusa MINI is the right and best printer for you.
For all-out bang-for-your-buck, balanced out by the best print quality and performance under $200, the Ender 3 is the uncontested winner.
The fact it’s highly modifiable and the wide availability of upgrades means you can tweak it to a make-shift Ender Pro for much less than its successor’s respective asking price.
If you’re prepared to spend $100 to $150 more, then the waters murk with both the souped-up Ender 3 V2 and the small but mighty Prusa MINI joining the fray.
With these two head-to-head, we’re once again back to printing needs. Is a large build volume more important than overall usability and convenience? Do you need broader material compatibility above all else, and so on?
Prusa MINI vs Creality Ender 3 / Pro / V2 – Comparison Showdown
Build Volume
All three Ender 3 printers have a build volume of 220 x 220 x 250 mm. Stacked against the Prusa MINI comparatively cramped 180 x 180 x 180 mm, we have a clear winner.
The Ender 3 opens up more possibilities and variety in print types and sizes.
Considered in the context of the budget, beginner-friendly segment, the Prusa MINI’s 180 x 180 x 180 mm build volume should be sufficient to cover all the most popular hobbyist prints. It’s enough for models, toys, household items like vases, and any other homemade trinket you can think of.
Indeed, if we were to push the Prusa MINI to its limit, we’d still get an 18 cm² cube of plastic. Failing that, you can still fall back on printing an object in parts.
That said, there’s no skirting around the fact that the Ender 3 trumps the Prusa MINI in build volume.
While we’d be surprised if newcomers made anything exceeding that build area, it’s still small by budget 3D printer standards. If you need plenty of build area, the Ender 3 takes the lead.
Winner: Ender 3
Print Bed
The type and quality of the build plate are where our four contenders distinguish themselves most from one another.
The Ender 3 features a fairly basic, serviceable, fixed heated BuildTak-style print bed, which more often than not benefits from some adhesive love (glue, hair spray, etc.).
The Ender 3 Pro has a flexible, textured, and removable C-MAG magnetic print bed. The Ender 3 V2 goes even further, drafting in a tempered carborundum glass platform, arguably the best 3D printing solution for adhesion and easy finished print removal.
The Prusa MINI features a removable textured magnetic PEI-coated spring steel bed.
Because of shaped edges that sit snugly between screws on the printer itself, the alignment of the plate is far superior on the Prusa MINI than even the Ender 3 V2’s glass plate.
For that reason alone, the Prusa MINI eclipses the Ender 3 at its best.
Winner: Prusa MINI
Bed Leveling
The Ender 3 bunch all feature manual bed leveling, although the Ender 3 V2’s larger and labeled leveling knobs housed under each corner of the build platform simplify the process considerably.
The Prusa MINI delegates leveling duties to clever point-based fully-automatic mesh bed calibration and sensorless homing.
Manual bed leveling is no fun, even if you’re a weathered maker. Prusa’s hands-off mesh leveling works a treat, optimizing the MINI for problem-free printing.
A clear winner here for convenience alone and a welcome feature for first-timers eager to get printing without tinkering for hours beforehand.
Winner: Prusa MINI
Ease of Use
The Ender 3, in its three iterations, comes semi-assembled, with more or less identical assembly paths in both components and the time involved to piece them into a functional printer.
The Prusa MINI ships either as a kit or semi-assembled, the latter costing $50 more for the pleasure.
While the kit build isn’t particularly taxing or beyond the means of a curious beginner and offers a crash course in the principles and hardware of 3D printing, semi-assembled printers are just more convenient.
Something that also plays into usability is interfacing with the printer.
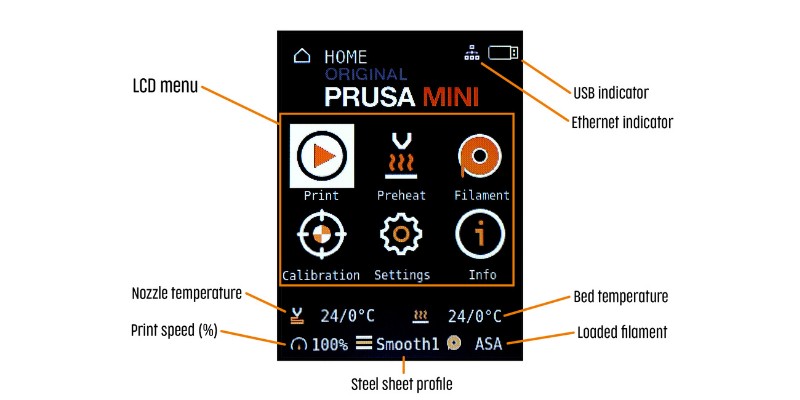
The Ender 3 and Pro’s LCD feels aged, especially compared to the sleek 2.8″ full-color LCD on the Prusa MINI and the entirely redesigned 4.3″ HD color screen. The MINI nudges ever so slightly ahead for offering on-screen print preview.
More granular usability features on the Ender 3 V2, such as belt tensioners, the handy toolbox, and a new rotary knob to feed filament into the extruder, make it a more enjoyable printer to use than its siblings.
Still, the Prusa MINI’s overall experience is smoother.
Winner: Prusa MINI
Prusa MINI vs Creality Ender 3 / Pro / V2 – Price
While price is somewhat a misleading indicator of a printer’s overall merit, we’re all bound to a budget. It’s an essential factor to keep in mind and often a deciding one, especially in the budget range.
The Ender 3 currently sells on the Creality shop for $189.00, while the Ender 3 Pro is available for a steeper $219.00. The Ender 3 V2 pushes the price to $262.00.
Jumping over to the Prusa MINI, you’ll find it priced at $349 in kit form.
The Ender 3 packs an awful lot of value into that $189.00, and the print quality is remarkable for the price.
As for the Ender 3 Pro, we don’t feel the minor improvements over the original genuinely warrant that extra $30, especially as you can splash out a further $40 and get the vastly improved Ender 3 V2.
With all its usability, convenience, and features such as auto bed leveling, the Prusa MINI justifies its price, but for us, the Ender 3 V2 comes out on top.
If $262.00 blows past your allocated budget, the Ender 3 is a solid fallback option.
Winner: Ender 3 V2
Upgrade Potential
For the fruit of hordes of engaged Ender 3 owners, there’s no end to resources, mods, and upgrades conjured up by the community surrounding the printer in all its guises.
The open design also makes it particularly mod-friendly, and Creality has a trove of accessories and upgrades for sale to simplify the process if 3D printing your own parts isn’t your cup of tea.
When it comes to the Prusa MINI, it’s not as suited to upgrades and hacking as the Ender 3 printers.
It’s not because it has a tightly controlled ecosystem or because Prusa makes it inordinately hard to tear the machine apart, but simply because it already sports all the upgrades it could ever need.
The Ender 3 is prized for baked-in ease-of-use and quick assembly that pose little in the way of obstacles to pumping out excellent quality prints for the price, rivaling printers three times the price.
Much of its popularity comes from a mod and upgrade-friendly design, something the vibrant Ender community has embraced, birthing all manner of 3D printed add-ons and hacks.
Defining a clear winner here is problematic.
The Prusa MINI has it all, but on the other hand, the Ender 3 offers plenty of scope to fine-tune and improve the printer to suit your preferences. A great option for hands-on makers or beginners looking to dive into the more technical aspects of 3D printing.
Winner: Draw
Read more: the best Ender 3 upgrades
Material Compatibility
When it comes to material compatibility, the three Ender 3 printers all exist on a level playing field and are compatible with your standard PLA, ABS, TPU, and PETG.
On the other hand, the Prusa MINI broadens the cluster of compatible filaments to include:
- PLA
- ABS
- TPU
- PETG
- ASA
- PC
- CPE
- PVA
- PVB
- HIPS
- PP
Whether you’ll use these less-popular material types determines whether the Prusa MINI’s extra material range has any value. Still, Prusa’s little wonder wins by offering more possibilities.
Winner: Prusa MINI
Prusa MINI vs Creality Ender 3 / Pro / V2: The Winner
Prusa MINI vs Creality Ender 3 / Pro / V2 – Best Overall
Setting aside cost, the Prusa MINI+ is an all-around better printer than the Ender 3, even though it has a comparatively modest build volume.
You get a Prusa machine at a reasonable price, stellar usability, features usually found on pricier printers, and, arguably, more importantly, superb print quality.
OUT-OF-THE-BOX PICK
Prusa MINI
Available at:
BUILD VOLUME PICK
Ender 3 V2
Available at:
Prusa MINI vs Creality Ender 3 / Pro / V2 – Best Value
If we factor in price, the Prusa MINI loses some appeal. For those on a tighter budget, the Ender 3 V2 is a worthwhile alternative, a printer that fixes the faults of its predecessors while retaining all of the mod and hack potential of the series.
Prusa MINI vs Creality Ender 3 / Pro / V2 – Best On a Budget
If you can only spend around $200, the Ender 3 fully deserves to be ranked among the best budget printers, and, years after taking the 3D printing world by the storm, still boasts remarkable value for money.
It’s a great starter printer we happily recommend to anyone looking to tackle that initial learning curve in style.
We’d recommend avoiding the Ender 3 Pro entirely. The targeted improvements are an advantage, but you could install these yourself on a vanilla Ender 3 for less money.
Articles we recommend:
- The best Prusa alternatives
- Differences Between Prusa Mini+ and Prusa i3 MK3S+
- Prusa i3 MK3S+ vs Ender 3 V2 / Pro / S1
- Prusa enclosure guide (DIY and buyable options
- Ender 3 vs Ender 5
- Ender 3 competitors and alternatives
- Ender 3 vs Ender 3 Pro, V2 and Max
- Ender 5 vs Ender 5 Pro vs Ender 5 Plus
- Elegoo Mars 3 vs Elegoo Saturn
- Sovol SV06 vs Ender 3 (V2 / Neo)
- Anycubic Mono X vs Elegoo Saturn
- Flashforge Adventurer 3 vs 3 Lite
- Flashforge Adventurer 3 vs Ender 3
- Anycubic Kobra vs Kobra Plus and Max
Both are great printers in their own right, but what sets them apart?
The key differences lie in their build volumes and price points. The Ender 3 is a budget-friendly option with a smaller build volume, while the CR-10 offers a massive build volume at a slightly higher price point.
But that’s not the whole story!
In this guide, I’ll compare my hands-on experience with both printers across other key points like material compatibility, bed leveling, and ease of assembly so you can be confident about which is right for you.
We’ll also take a look at the newer Ender releases (V2, Pro, and S1) alongside the CR-10 V2 and CR-10 V3 in case you need to step beyond the beginner options.
Is the CR-10’s mammoth build volume worth the extra cost? Has the Ender 3 lost some of its luster over the years? Let’s find out.
BUDGET PICK

Creality Ender 3
Available at:
BUILD VOLUME PICK

Creality CR-10
Available at:
Creality Ender 3 vs Creality CR-10 – Reviews
3DSourced is reader-supported. When you buy through links on our site, we may earn an affiliate commission. Learn more
Creality Ender 3
- Printing technology: FDM
- Build volume: 220 x 220 x 250 mm
- Filament compatibility: PLA, ABS, TPU, PETG
- Layer height: 100-400 microns
- Printing accuracy: ± 0.1 mm
- Max extruder temp: 255°
- Max bed temp: 110°
- Connectivity: USB, SD Card
The budget king, the Creality Ender 3 is an entry-level 3D printer that despite looking a little long in the tooth remains one of the most widely-lauded options on the market.
The machine features everything you need to start your 3D printing journey in style:
- a 220 x 220 x 250 mm build volume
- PLA/ABS/TPU/PETG filament compatibility
- a heated BuildTak-style print bed
- and it ships semi-assembled
More pressingly, the Ender 3’s reliable print quality feels at odds with the asking price.
There’s little in the way of hobbyist applications the Ender 3 can’t tackle. It’s also ripe for tinkering and mods, powered by a massive community happy to impart their extensive knowledge should you stumble and share all manner of mods you can install yourself.
If the basic Ender 3 doesn’t tick all your boxes, the updated Ender 3 Pro and Ender V2 are spruced up iterations, bundling in targeted upgrades such as a silent 32-bit mainboard, a carborundum glass platform, a Mean Well PSU, handy belt tensioners, and a sharper overall look and feel.
Pros:
- Affordable
- Excellent print quality for the price
- Mod and hack-friendly
Cons:
- Wobble-prone Y-axis extrusion
- Manual bed leveling
Read more: our Ender 3 review
Creality CR-10
- Printing technology: FDM
- Build volume: 300 x 300 x 400 mm
- Filament compatibility: PLA, ABS, TPU, PETG
- Layer height: 100 microns
- Max extruder temp: 250°
- Max bed temp: 100°
- Connectivity: USB, SD Card
Though it hasn’t left quite the same indelible mark on the 3D printing scene as the Ender 3, the Creality CR-10 gets mentioned alongside for offering a hulking build volume at, once again, a price the average person can afford.
The emphasis with the Creality CR-10 is very much on size: the 300 x 300 x 400 mm dwarfs most other budget printers. We’ve owned and tested the CR-10 Smart and felt it was an interesting upgrade, with other notable upgrades (V2 and V3) also improving on the base design.
Best of all, supersizing doesn’t affect print quality. Much like the Ender 3, the Creality CR-10 has no business printing as well as it does for the price and rarely skips a beat for day-to-day hobby printing.
Other notable features include compatibility with popular filament types like PLA, ABS, and TPU, a beefy aluminum frame, a heated glass bed, and a simple yet functional design.
The base CR-10’s popularity pushed Creality to pump out successor models, namely the CR-10 V2 and CR-10 V3. These are new and improved versions tweaked based on feedback gathered from the community.
Enhancements include a direct drive E3D extruder, 24V Mean Well PSU, a filament run-out sensor, TMC-208 silent drivers, and what Creality calls ‘gold triangle’ support rods to improve frame stability.
Pros:
- Massive build volume
- Affordable
- A tinkerer’s playground
- Reliable print quality
Cons:
- Manual bed leveling
- Slow heating bed
- 8-bit motherboard
Read more: our CR-10 Smart review
Creality Ender 3 vs Creality CR-10 – At a Glance
With introductions out of the way, we can now turn our attention to a head-to-head showdown between Creality’s flagship budget printers.
At this point, it’s worth remembering that ‘best’ is a highly subjective term.
While we’ll help get an overview of what each printer is all about and where they shine brightest, they aren’t direct competitors, each catering to a different set of needs. It’s up to you to decide which aligns best with your requirements and 3D printing aims.
The Ender 3 is a solid pick for a first printer.
It’s less barebones than the Creality CR-10, and it has a great stack of features for the price with plenty of scope for upgrades but at a cost to overall build volume.
It’s also more affordable than the CR-10, even in its best-yet V2 iteration.
If you need plenty of build volume, the Creality CR-10 is the best choice here. The Creality CR-10 V3, in particular, is the culmination of the CR-10’s long journey: a superb extruder, a sturdy frame, a carborundum glass bed, and ever-surprisingly good print quality for the price.
Generalities aside, let’s see how the two compare when we look at specifics.
Creality Ender 3 vs Creality CR-10 – Head-to-Head Comparison
Build Volume
Large build volumes can be costly, but with the Creality CR-10, they’ve become as affordable as other budget 3D printers.
The Creality CR-10 (including the V2 and V3) offers a 300 x 300 x 400 mm build volume, while the Ender 3 (once again in all its iterations) sticks to a standard 220 x 220 x 250 mm.

The numbers speak volumes here, and the Creality CR-10 is great for makers with plans to print larger parts and models. Creality cranks things up with the V2 and V3 models with the ‘gold triangle’ design mentioned above.
Extra support rods beef up the frame to reduce potential unwanted movement when the extruder runs along the Y-axis, even when pushing to the upper limits of the build volume.
The Creality CR-10 takes the lead here, but only if you need the extra print space. Otherwise, the Ender 3’s build volume is standard fare and should cover daily printing nicely.
Winner: CR-10
Print Plate
There’s a lot of build plate variety among all the available Ender 3 and CR-10 models.
The vanilla Ender 3 features a heated magnetic BuildTak-style print bed. It does the job but may require drafting in some adhesive help such as glue, slurry, or sticky tape for the best results. The Ender 3 Pro levels up to a textured C-MAG magnetic plate, a significant advantage over the original.
The Ender 3 V2 takes it one step further, fitting in a tempered carborundum glass platform, the best of the bunch for adhesion and easy print removal.

Jumping to the Creality CR-10, the basic model has a rudimentary heated glass plate, while the V2 and V3 jazz things up with a carborundum glass plate.
Like the Ender 3 Pro and V2, the improved glass plate does wonders for adhesion and print removal.
Overall, the two printers are roughly on par with one other in each category. Due to the size of the CR-10’s plate, it takes longer to reach the optimum printing temperature than the smaller Ender 3.
A reasonable trade-off for the extra print volume, but a point to keep in mind if you’re working with ABS or prefer a quick heating bed. Creality replaces the 12V PSU for a 24V Mean Well unit in the CR-10 V2 and V3, which does help with heating speeds and consistency.
Winner: Draw
Material Compatibility
Both printers’ filament compatibility covers your generic 3D printing materials, namely PLA, ABS, TPU, PETG.
Both machines fare best when working with PLA and produce decent print quality using TPU and PETG.
ABS is somewhat of a mixed bag, chiefly due to the lack of an enclosed chamber – a crucial piece of the ABS puzzle for keeping a steady toasty ambient temperature – on both the Ender 3 and CR-10. With that in mind, we call it a draw for material compatibility.
Winner: Draw
Bed Leveling
All six Creality Ender 3 and CR-10 3D printers have manual bed leveling. Par for the course in the budget segment.
The chunkier and labeled leveling knobs found on the Ender V2 and Pro are great at easing some of the trickiness of bed leveling. The CR-10 bed leveling has remained essentially unchanged since the original version – unremarkable but functional, even for a novice.
The Ender 3 V2 and CR-10 V2/V3 house ports to install a BLTouch automatic bed leveling probe on the mainboards.
A wise and affordable upgrade in our book because, whatever your level of 3D printing experience, manual bed leveling is tedious and time-consuming.
Winner: Draw
Assembly
The Ender 3 lands on your doorstep semi-assembled, whether that’s the original, Pro, or V2, but you’re still presented with quite a few parts to piece together. It’s a great introduction to the technology and hardware of 3D printing in that respect.
Well-guided instructions and good quality machining should see you mount it into a functioning printer in a couple of hours.
The CR-10 ships semi-assembled, but this is far more consistent with what we expect these days. You’ll need to attach the Z-axis to the base, connect a few wires, and you’re ready to go.

Expect to spend no more than 30 minutes, at most, even if this is your first printer. For convenience alone, the CR-10 takes the crown here.
Winner: CR-10
Build and Part Quality
The Ender 3 and CR-10 in all their incarnations feature a sturdy frame and overall solid build quality.
The Ender 3’s Y-axis extrusion has been known to cause wobble for some users, something that’s been rectified by a thicker extrusion on the Ender 3 Pro and Ender 3 V2.
The Ender 3 features a 32-bit motherboard, while the CR-10 relies on a modest 8-bit variant, complicating the installation of firmware updates.
Similarly, the CR-10 features a 12V board compared to the Ender 3’s 24V, leaving you with little in the way of additional power for upgrades. The CR-10 V3 features a 24V Mean Well PSU, so look to that model if you need that extra power.
Note that the CR-10 PSU exists outside the frame, so factor this into the printer’s already sizable physical footprint.
While the Ender 3 and CR-10’s standard Creality extruder gets the job down, notwithstanding the occasional longevity issue due to some plastic construction, we’re partial to the workhorse characteristics of the all-metal direct drive E3D Titan extruder on the CR-10 V3.
No clear winner here, as each has its flaws. It’s more a case of what is less likely to cause you irritation.
Winner: Draw
Software
The Ender 3 and CR-10 stand on equal footing in software compatibility. They play well with all the most popular third-party slicers such as Cura, Simplify3D, and Slic3r, to name a few.
Winner: Draw
Price
Here’s a breakdown of the pricing for each Ender 3 and CR-10 model currently available, as seen on the Creality Store. You may find higher or lower prices at third-party retailers.
- Ender 3 – $189 — Available here
- Ender 3 Pro – $219 — Available here
- Ender 3 V2 – $262 — Available here
- CR-10 – $309 — Available here
- CR-10 V3 – $459 — Available here
At under $200, the Ender 3 wins as the most affordable option considering its features and the print quality on offer. It’s worth noting that the basic CR-10 costs more than the top Ender 3 V2, chiefly due to the much larger build volume.
We recommend avoiding the Ender 3 Pro entirely, instead paying less for the Ender 3 or spending a bit more on the superior Ender 3 V2. Similarly, if you can afford the CR-10 V2, we recommend paying a bit more for the CR-10 V3 for the benefits it offers.
Winner: Ender 3
Creality Ender 3 vs Creality CR-10: The Winner
Creality Ender 3 vs Creality CR-10 – Best Overall
For us, the Ender 3 retains its crown as the go-to pick for savvy 3D printing beginners.
The most recent Ender 3 V2 highlights Creality’s efforts to weed out the issues of its successors while still keeping the core of what makes it a favorite among makers. More importantly, the original and V2 are priced lower than the basic CR-10.
We’re all guided by budget, and you get an awful lot of printing vim for the price.
BUDGET PICK
Creality Ender 3
Available at:
BUILD VOLUME PICK
Creality CR-10
Available at:
Creality Ender 3 vs Creality CR-10 – Best Value Option
If day-to-day hobby printing is more your speed and you’ve no plans to pump out towering parts or models, the Ender 3 packs in the most value.
Best of all, the vanilla Ender 3 is ripe for upgrades that you can print yourself, turning it into a machine that surpasses not just the Pro version but flirts with the V2 at a fraction of the cost.
Creality Ender 3 vs Creality CR-10 – Best For Large Prints
If you’re comfortable sacrificing certain features like print recovery and faster bed heating for the sake of build volume, we recommend the Creality CR-10.
The Ender 3 is our top pick, but no amount of tweaks and improvements can make up for a smaller build volume.
Articles we recommend:
- Ender 3 vs Ender 5
- Ender 3 vs Ender 3 Pro, V2 and Max
- Ender 3 V2 vs Prusa Mini
- Ender 3 V2/S1 vs Prusa i3 MK3S+
- Sovol SV06 vs Ender 3 (V2 / Neo)
- Alternatives to the Ender 3 3D printers
- Ender 5 vs Ender 5 Pro vs Ender 5 Plus
- Elegoo Mars 3 vs Elegoo Saturn
- Anycubic Mono X vs Elegoo Saturn
- Flashforge Adventurer 3 vs 3 Lite
- Anycubic Kobra vs Plus vs Max
- Creality CR-10 upgradables
Community favorites and consistent entries in many a top budget 3D printer list, these are two of the most popular printers around.
But what sets them apart?
The Ender 3 V2 is an easy-to-use beginner pick that is hard to beat in terms of value for money.
While the Ender 3 Neo shares many key features (like build volume and filament compatibility), it also adds some “nice-to-haves” like a glass bed and silent motherboard.
The Ender 5 Pro is a step up in terms of price and advanced features, and a better choice for more ambitious projects that require less common filaments or a larger build volume.
I’ll share my hands-on experience with each of these 3D printers, and compare all the key differences so you can make a confident choice.
So let’s work out which Ender is the best fit for your needs.
BUDGET PICK

Ender 3 V2
Consistent, durable, and fantastic value at under $300
Great for every printing situation apart from very large prints
Available at:
BUILD VOLUME PICK

Ender 5 Pro
The best large height build volume printer in its price range
Overall a more premium 3D printing experience
Available at:
3DSourced is reader-supported. When you buy through links on our site, we may earn an affiliate commission. Learn more
Table Of Contents
Meet The Printers – Creality Ender 3 V2 vs Ender 5 Pro
Ender 3 V2

| Ender 3 V2 Specs | Values |
|---|---|
| Printing technology: | FDM |
| Build volume: | 220 x 220 x 250 mm |
| Filament compatibility: | PLA, ABS, TPU, PETG |
| Layer height: | 100-400 microns |
| Printing accuracy: | ± 0.1 mm |
| Max extruder temp: | 255°C |
| Max bed temp: | 110°C |
| Connectivity: | USB, SD Card |
Pros
Easy to use and budget-friendly.
Many good features make the Ender 3 V2 quiet and fast.
Cuts down that initial learning curve a few pegs.
Cons
The setup instructions are pretty basic and difficult for beginners.
The Ender 3 V2 matches the original Ender 3’s core easy-to-use, budget printing appeal. It injects a series of significant upgrades that, in our humble opinion, make it one of the better Ender 3 printers yet. As we know, there’s been quite a few over the years.
Looks and construction-wise, the Ender 3 V2 changes from its predecessor with a sharp, sheet metal injection and plastic panel design, doing away with the low-cost look for a more cohesive finish that gives it an extra touch of class.
On the specifications side, the Ender 3 V2 features a silent 32-bit motherboard, TMC2208 stepper motor drivers, and a tempered carborundum glass platform, a big adhesion upgrade over previous Ender 3 beds, which also speeds up bed heating.
Creality has also added various quality-of-life top-ups that make using the Ender 3 V2 a more pleasant and enjoyable printer to use long-term. These include a new, detachable 4.3-inch HD color screen, a potentially useful toolbox carved into the printer’s base, and XY-axis tensioners to easily tweak belt tension on the fly.
If you’re new to 3D printing, the Ender 3 V2 cuts down that initial learning curve a few pegs but keeps the core Ender 3 spirit of tinkering and upgrading to get the very best out of the machine. It’s an iconic printer refined, adding even more value to an already affordable machine.
Ender 5 Pro
| Ender 5 Pro Specs | Values |
|---|---|
| Printing technology: | FDM |
| Build volume: | 220 x 220 x 300 mm |
| Filament compatibility: | PLA, ABS, TPU, PETG |
| Layer height: | 100-400 microns |
| Printing accuracy: | ± 0.1 mm |
| Max extruder temp: | 260°C |
| Max bed temp: | 110°C |
| Connectivity: | USB, SD Card |
Pros
Great upgrade over the Ender 5.
Has an all-metal extruder that smoothes filament loading and extrusion consistency.
V1.15 silent mainboard with TMC2208 drivers for quieter printing compared to the Ender 5.
Cons
Relatively more expensive.
In the same way that Creality did with the jump from Ender 3 to the Ender 3 Pro and Ender 3 V2, the company bundled up the much-loved experience and features of the Ender 5 and spruced them up with some quality upgrades to create the Ender 5 Pro. This printer is very much a super-charged replacement for the original, with only a slight price jump tacked on.
So, what does the higher price tag land you? Firstly, you get the same cube frame, well-proportioned 220 x 220 x 300 mm build volume and the nippy bed heating of the original Ender 5. From there, the Ender 5 Pro pivots with a V1.15 silent mainboard with TMC2208 drivers for quieter printing compared to the Ender 5. There’s now thermal runaway protection in case things get a little too heated, too.
A much better all-metal extruder smoothes filament loading and extrusion consistency with a handy adjustable bolt to fine-tune gear pressure to suit different filament types. The Ender 5 Pro swaps the plastic tubing for brand name Capricorn Bowden PTFE tubing, raising the printer’s printing potential when fed flexible materials and cutting down on unwanted movement and other common filament loading problems.
It’s a tight set of upgrades that prove their worth from the get-go with a better printing experience than the stock Ender 5.
Ender 3 Neo

| Ender 3 Neo Specs | Values |
|---|---|
| Printing technology: | FDM |
| Build volume: | 220 x 220 x 250 mm |
| Filament compatibility: | PLA, ABS, TPU, PETG |
| Layer height: | 50-350 microns |
| Printing accuracy: | ± 0.1 mm |
| Max extruder temp: | 260° |
| Max bed temp: | 100° |
| Connectivity: | USB, SD Card |
Pros
Comes with plenty of new features.
Multiple quality of life improvements.
Benefits from a facelift, borrowing the same sharp, full-metal gantry design found on the Ender 3 S1.
Cons
Bit of a learning curve for beginners, similar to other Ender printers.
We also have to mention the recently launched Ender 3 Neo, the tenth printer to join the Ender 3 line-up.
As the Neo name implies, there are plenty of new features here. There’s automatic bed leveling courtesy of Creality’s CR Touch system, a full-metal Bowden extruder, and a flexible PC spring steel magnetic build plate.
Elsewhere, there are multiple quality-of-life improvements over the vanilla Ender 3 V2.
There’s a 32-bit mainboard (below 50 dB according to Creality, a built-in toolbox, print resume function, belt tensioners, and a new UI with a print preview function. Looks wise, the Ender 3 Neo benefits from a facelift, borrowing the same sharp, full-metal gantry design found on the Ender 3 S1.
Ender 3 V2 vs Ender 5 Pro – Head-to-Head Comparison
Build volume
Build volume determines the size of the prints you can create, so is a feature well worth mulling over before pulling out your credit card. The Ender 3 V2 has a 220 x 220 x 250 mm build volume, while the Ender 5 Pro offers a slightly larger 220 x 220 x 300 mm.

Both are what we’d consider average for entry-level 3D printers and are enough for a wide variety of projects, including decorative and displays pieces, household items, functional items, models, toys, and all those go-to Thingiverse favorites.
The Ender 5 Pro extra 50 mm on the Z-axis gives you a bit more room to print taller objects.
Max Nozzle and Bed Temperature
The Ender 3 V2 sports a maximum extruder temperature of 255°C and a maximum bed temperature of 110°C. The Ender 5 Pro features a maximum nozzle temperature of 260°C and a maximum bed temperature of 110°C.
Aside from a 5°C bump on the Ender 5 Pro nozzle temperature, the two printers are identical. Both are suited to the most common 3D printing materials – PLA, ABS (enclosure required for the best results as ABS requires a stable thermal environment), TPU, and PETG.
The Ender 5 Pro is ever so slightly more suited to more temperature-sensitive materials like nylon that require hotter nozzle temperature to print well.
As the Ender 5 Pro has a slightly larger build volume, the bed takes slightly longer to heat than on the Ender 3 V2.
As for the hot ends, you’ll find the same typical Creality parts on both machines, fed filament through a standard PTFE tube (Capricorn branded on the Ender 5 Pro) and frame-mounted extruder in normal Bowden style.
The Ender 5 Pro has a metal-extruder, which helps iron some of the more common Bowden issues such as filament jams and clogs. The Ender 3 V2 instead uses a plastic alternative, but this is easily upgraded.
If extruder and nozzle temperature are top of your list of requirements, it may be worth taking a peek at Creality’s new Ender 3 S1 Pro. With a nozzle that can reach temperatures up to 300°, the Ender 3 S1 Pro is equipped to print a broader range of materials – PLA, ABSE, PETG, Nylon, TPU, Wood fill, and numerous other high-temperature filament types.
Read more: we tested and reviewed the Ender 3 S1 Pro
Alongside, it also ships with Creality’s new proprietary Sprite full metal dual-gear direct drive extruder system that helps minimize common flexible printing issues like poor retraction, jams and clogs in the PTFE tubing, while also improving filament control and feeding.
Print Bed

The Ender 3 V2 ships with a tempered carborundum glass bed, while the Ender 5 Pro has a classic magnetic build plate.
Each has their strengths. The magnetic bed allows for easy pop-off print removable seconds after a print finishes thanks to its flexible properties, while the glass bed on the Ender 3 V2 offers first-rate first layer adhesion and also allows prints to come off with little effort once the bed has cooled down.
On that note, both machines have heated beds, gearing them for a wider range of temperature-sensitive materials. The Ender 3 V2 can reach up to 110°C, making it slightly hotter than the Ender 5 Pro, which is capped at 100°C.
Automatic Bed Leveling
Neither machine features automatic bed leveling out of the box, so back to the time consuming task of manual calibration whichever machine you decide to buy.
Both are screaming out for an ABL upgrade, either BL Touch or CR Touch, so a worthwhile mod to make as soon as possible.
Creality seems well aware of this, which is why we’ve seen the newer Ender models, specifically the Ender 3 S1 and Neo lines-up fitted with CR Touch probes for automatic bed leveling.
Read more: the best auto-bed leveling 3D printers
Assembly
Both the Ender 3 V2 and Ender 5 Pro come in DIY, semi-assembled kits and take roughly 20-30 minutes to piece together even for first-timers.

Both come with well-guided instructions and it’s a case of attaching the gantry and plugging in a few cables. The Ender 5 Pro is arguably a tad more challenging due to the design of the printer, but we’re talking an extra few minutes for most people so hardly a major difference.
Assembled, the Ender 5 Pro is a bit bigger than the Ender 3 V2 – 552 x 485 x 510 mm and 475 x 470 x 620 mm, respectively – so factor this in if you’re working with limited workshop or bedroom space.
Firmware
Both the Ender 3 V2 and Ender 5 Pro have Creality’s silent V.4.2.2 mainboards charged with the heavy lifting under the hood. As for firmware versions, the Ender 3 V2 has Marlin 2.0 pre-installed, while the Ender 5 Pro comes with Marlin 1.8.
Other than being a better all-round and quieter board than previous Creality’s electronics, the V4.2.2 also includes a bootloader, allowing you to easily upgrade the firmware. On previous Enders, upgrading required a laborious process involving a third-party single-board computer like an Arduino. This is all much easier here and both machines score points in that respect.
Price
- Ender 3 V2 – $260 – Available at Creality here / Check Amazon pricing here
- Ender 5 Pro – $399- Available at Creality here / Check Amazon pricing here
A $130 price gap separates the two machines, though we’ve seen both drop lower thanks to Creality’s love for a good sale. Given half a chance or seasonal occasion, the company systematically lowers the prices, so it’s worth waiting a little to snap up a bargain. We’ve seen the Ender 3 V2 go as low as $235 and the Ender 5 Pro down to around $330.

If you’re on a budget, the Ender 3 V2 makes more sense value wise, but if you need the extra build volume verticality, then the extra spend is warranted for the Ender 5 Pro. Squared up to other budget printers with similar specifications, both machines distinguish themselves as affordable picks.
Upgrade Potential
As with most Creality printers, the Ender 3 V2 and Ender 5 Pro are both upgrade-friendly devices with open designs that facilitate modification and add-ons. It’s something the Ender community has embraced, and you’ll find a huge wealth of options out there from 3D printed parts to third-party parts to improve your printer.
Whether you’re after a new extruder, hot end, tubing, nozzles, tensioners, knobs, casings, cooling systems, and so much more, there’s an option out there. For a deeper dive into what’s available, head to our dedicated Ender 3 upgrade guide and Ender 5 Pro upgrade guide.
Ender 3 V2 vs Ender 5 Pro – The Bottom Line
Which printer is right for you ultimately comes down to your needs and budget.
The Ender 3 V2 is a great starter printer that takes the basic blueprint of the popular Ender 3 and levels it up with a host of targeted improvements that make it one of the better Ender 3 options available. With so much upgrade potential, you can build on the Ender 3 V2 as your skills improve, giving it a welcome slice of future-proofing. We’d also recommend checking out the Ender 3 S1 and Ender 3 V2 Neo, as both push further down the upgrade path than the Ender 3 V2.
The Ender 5 Pro should suit those looking for a standard budget printer with a more vertical build volume to print larger prints. It has enviable upgrades, not least the metal extruder, 32-bit mainboard, and a unique design.
Both are reasonably priced 3D printers that should serve the majority of amateur makers well. As we noted above, Creality loves a sale, so look out for this with a heavy discount, which adds even more value to two already affordable machines.
BUDGET PICK
Ender 3 V2
Consistent, durable, and fantastic value at under $300
Great for every printing situation apart from very large prints
Available at:
BUILD VOLUME PICK
Ender 5 Pro
The best large height build volume printer in its price range
Overall a more premium 3D printing experience
Available at:
For the newest version, the Ender 3 V2 Neo, we recommend that you read our hands-on Ender 3 V2 Neo 3D printer view.
Related Posts:
- Ender 3 Neo vs Ender 3 V2 Neo vs Ender 3 Max Neo [Compared]
- Ender 3 V2 vs Voxelab Aquila X2 – Compared
- Creality Ender 3 vs Ender 3 Pro vs Ender 3 V2
- Ender 3 Extenders: The Best Extension Kit Upgrades
- Ender 3 Print Speed: Best Speed Settings for Ender 3 V2 & Pro
- Ender 3 Glass Bed (Pro/V2) Guide (& Best Options)
- The Best Ender 5 Pro Upgrades (Printable & Paid)
- The Best Ender 5 Enclosures (and Pro / Plus): DIY & Ready to Buy
- Ender 5 vs Ender 5 Pro vs Ender 5 Plus
- Sovol SV06 vs Ender 3 (V2 / Neo)
After all, both printers are known for being entry level, extremely budget friendly, and reliable.
But is the Aquila X2 actually different from the Ender 3 V2 in any meaningful way?
Overall, both printers are great for beginners and hobbyists, but the Voxelab Aquila X2 is best for those on a tight budget, while the Ender 3 V2 is better for those who want access to a strong community and additional quality-of-life features.
In this guide, I’ll compare these entry-level 3D printers across all the key factors- upgradeability, filament compatibility, and plenty more – so you can make the right choice for you and your projects
Is the Aquila X2 a knockoff version of Creality’s superstar – or is it a real contender among low-cost 3D printers? Let’s find out.
|
Budget Pick
|
Top Pick
|
|
|
|
|
Build Volume:
220 x 220 x 250 mm
|
Build Volume:
220 x 220 x 250 mm
|
|
Max Print Speed:
Up to 180 mm/s
|
Max Print Speed:
Up to 200 mm/s
|
|
Filament runout sensor:
Yes
|
Filament runout sensor:
Optional Add-on
|
|
Filament Compatibility:
PLA, PETG, ABS, TPU
|
Filament Compatibility:
PLA, PETG, ABS, TPU
|
|
|
$279.99
|
|
|
Budget Pick
Build Volume:
220 x 220 x 250 mm
Max Print Speed:
Up to 180 mm/s
Filament runout sensor:
Yes
Filament Compatibility:
PLA, PETG, ABS, TPU
Top Pick
Build Volume:
220 x 220 x 250 mm
Max Print Speed:
Up to 200 mm/s
Filament runout sensor:
Optional Add-on
Filament Compatibility:
PLA, PETG, ABS, TPU
$279.99
Voxelab Aquila X2 vs Ender 3 V2: A Quick Summary
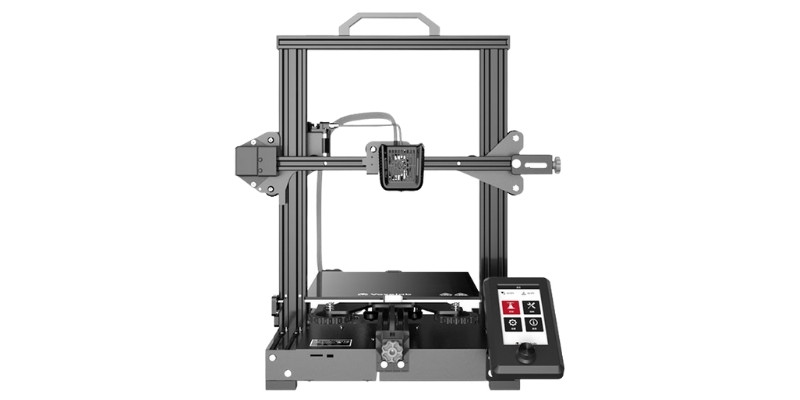
Voxelab Aquila X2
- Price: Check latest price at Voxelab here / Amazon here
- Printing technology: FDM
- Build volume: 220 x 220 x 250 mm
- Filament compatibility: PLA, ABS, PETG, TPU
- Layer height: 100 – 400 microns
- Printing accuracy: ± 0.1 mm
- Max extruder temp: 250°C
- Max bed temp: 110°C
- Connectivity: USB, SD Card
Pros
Way cheaper than the Ender 3 V2.
Similar specs and capabilities to the Ender 3 V2.
Comfortably works with the same filaments as other budget FDM printers do.
Has a filament runout sensor.
Cons
The cooling fan is pretty loud.
The Voxelab Aquila X2 is best known as yet another copycat of the Ender 3 V2, but that’s not necessarily a bad thing. Voxelab priced the Aquila X2 at $179.99 to undercut the Ender 3. At a price point that’s nearly $80 less than Creality’s budget king, the Aquila made itself a strong contender in the market.
Like other Ender 3 clones, the Aquila X2 has similar specs and capabilities to the Ender 3 V2. It has the same build volume of 220 x 220 x 250 mm, the same layer resolution of 100 – 400 microns and similar printing accuracies.
The Aquila also comfortably works with the same filaments that other budget FDM printers do: PLA, ABS, and PETG. Although it technically can print with TPU, it’s likely you’ll need to upgrade the extrusion head, if nothing else.
Aside from the price, what sets the Aquila X2 apart from the Ender 3 V2 is the filament runout sensor. This can be a great help for longer prints and for newer hobbyists, and it’s also the biggest upgrade from the original Aquila.
The Aquila X2 comes equipped with a carrying handle attached to the top as a quality of life feature. Other features, like a rotary encoder-controlled color screen, quiet printing, and an easy method to tighten the belts, are shared by the Aquila X2 and Ender 3 V2.
Voxelab Aquila X2
$239.00
$179.00
Open source FDM 3D printer with the following features: Filament Detection, Resume Printing, Removable Build Surface Plateform, 32-bit Silent Mainboard, Auto Filaments Feed/Return
We earn a commission if you make a purchase, at no additional cost to you.
05/25/2023 05:13 am GMT
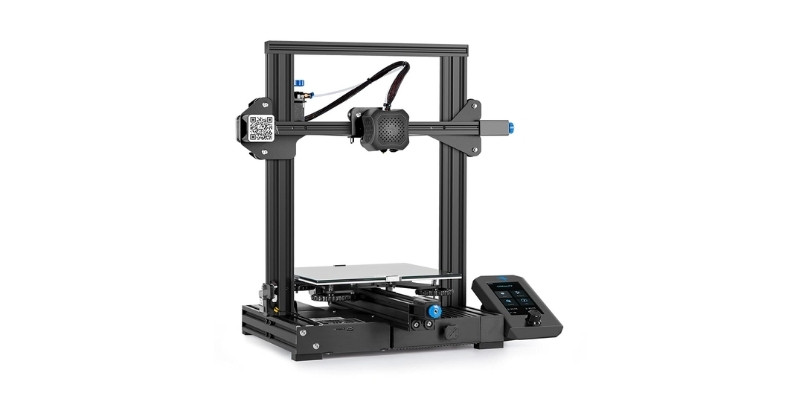
Ender 3 V2
- Price: Check latest price at Creality here / Amazon here
- Printing technology: FDM
- Build volume: 220 x 220 x 250 mm
- Filament compatibility: PLA, PETG, ABS, TPU
- Layer height: 100 – 400 microns
- Printing accuracy: ± 0.1 mm
- Max extruder temp: 255°C
- Max bed temp: 110°C
- Connectivity: USB, SD Card
Pros
Strong community and well-known company.
Comes with many great features.
Quiet printing thanks to a superior motherboard.
Cons
Bit more expensive than the Voxelab Aquila X2.
Creality’s Ender 3 V2 is the reigning champion of budget FDM printers. It’s easy to see why, as the original Ender 3 was a price leader with solid features when it was first released – it’s still one of the world’s best-selling 3D printers.
The Ender 3 V2 costs around $259. It’s not the absolute cheapest on the market, but you’re paying for a product with a strong community and well-known company backing it.
That community is actually one of the main selling points of the Ender at this point. It has a build volume of 220 x 220 x 250 mm, which the Ender 3 popularized as the standard for its many budget copies. That’s not bad by any means, but it doesn’t set it apart from the competition.
It’s the same story for the Ender 3 V2’s other features. The rotary controlled color screen, 100 – 400 microns layer resolution, and even the filament compatibility aren’t special compared to other budget options. The filaments are identical to the Aquila X2’s: PLa, PETG, ABS, and TPU.
That being said, the Ender 3 V2’s community really does put it ahead of the game. Just like the Aquila X2, the Ender 3 is only able to properly make use of TPU with some upgrades and fine tuning. It’s much easier to make that happen when there are hundreds of people who have done it before you.
Creality made a couple key improvements on the original Ender 3 that make the V2 really stand out. Firstly, the V2 has quiet printing thanks to a superior motherboard. This is pretty meaningful, since budget printers often need upgrades tacked on in order to run quietly.
The V2 has a belt adjuster, so there’s no need to pull out any tools. But if you did need to, it also has a handy toolbox to store them in. Overall, these quality of life improvements keep the Ender 3 V2 competitive with other budget options.
Creality Ender 3 V2 3D Printer
$279.99
Upgraded version of the original Ender 3 with a number of key quality-of-life improvements.
We earn a commission if you make a purchase, at no additional cost to you.
Comparison Showdown
Build Volume
- Voxelab Aquila X2 – 220 x 220 x 250 mm
- Ender 3 V2 – 220 x 220 x 250 mm
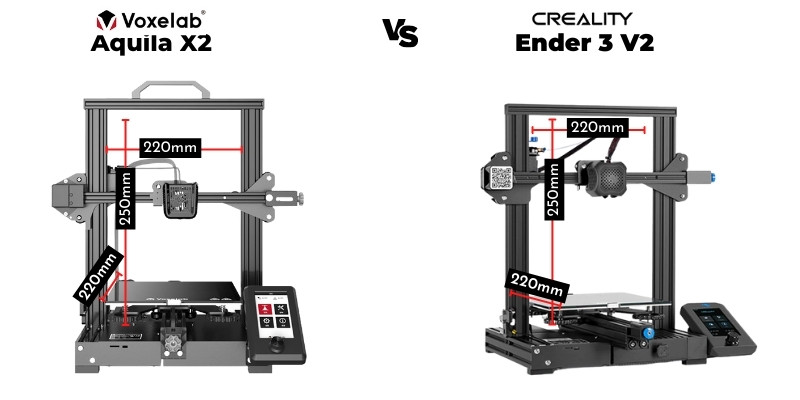
The Aquila X2 and the Ender 3 V2 have the same build volume of 220 x 220 x 250 mm. You’re not likely to get anything bigger unless you’re willing to pay a higher price, since this is the unspoken standard for printers in that price range.
That means large prints and printing en masse are going to be strictly off limits regardless of which printer you use. Still, it’s definitely easier to extend the print bed with the Ender 3 V2 because there are Ender Extender products designed specifically for that purpose.
With the Aquila X2, you would have to attempt to co-opt an Ender Extender to get the same results. You’d be taking the risk of blowing your money on a product that ultimately might not work, which is a hard sell if you’re looking for an entry-level printer.
Print Speed
- Voxelab Aquila X2 – Up to 180 mm/s
- Ender 3 V2 – Up to 200 mm/s
The Ender 3 V2 has a slightly higher maximum print speed, at 200 mm/s compared to the Aquila X2’s 180 mm/s. On a practical level, though, neither of these max speeds will ever be used because of the printing errors they would cause.
Even if we ignore that and compare max print speeds anyway, the Ender 3 only has a lead of 20 mm/s. It’s not meaningful enough to make a difference in your experience with the printer.
Filament Runout Sensor
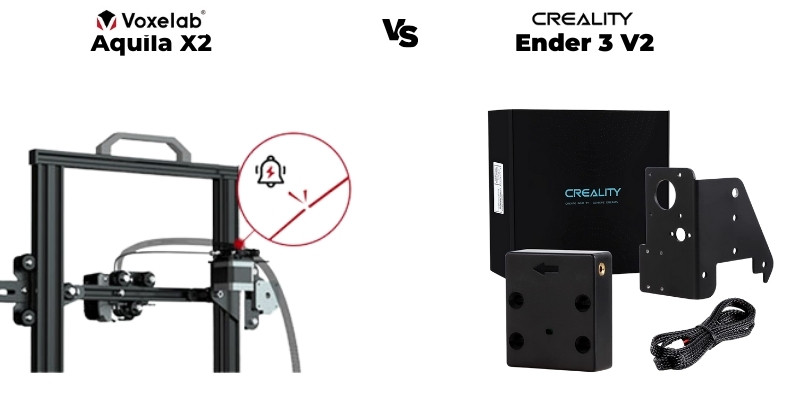
The standout feature of Voxelab’s Aquila X2 is that it has a filament runout sensor and auto feeding capabilities. Despite the Ender 3 V2’s reputation as a great entry-level printer, it lacks that ability.
It might not be an absolute must-have, but that doesn’t mean it’s irrelevant. A filament sensor for the Ender 3 would cost between $7 – $15. You also have to consider the time it takes to install– and potentially troubleshoot– a filament sensor if you wanted to add one.
Official Creality Ender 3 V2 Filament Runout Sensor
$14.99
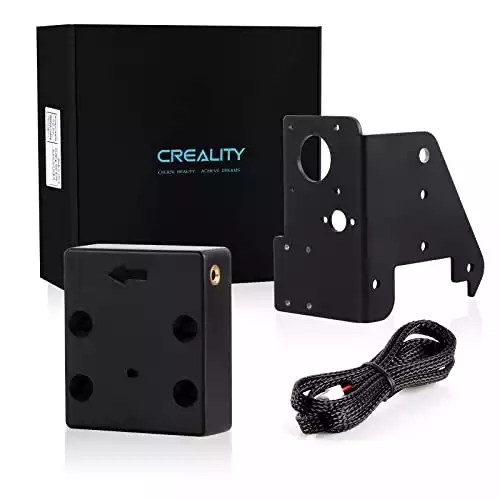
The normal filament feed indicator is a blue LED light that turns off when the sensor detects filament runout. This product is compatible with Ender 3, Ender 3 V2, Ender 3 Pro, Ender 3 MAX, Ender 5 Plus, CR-10S PRO, CR-10 V2, and CR-10 V3.
We earn a commission if you make a purchase, at no additional cost to you.
05/25/2023 02:13 am GMT
An alternative is to go ahead and purchase the Ender 3 V2 Neo. Just like the Aquila, it’s equipped with a filament sensor. The downside is that it’ll be much more expensive than the extra $15 it takes to upgrade the Ender 3 V2.
Consistent Pick
We earn a commission if you make a purchase, at no additional cost to you.
Ultimately, the lack of a runout sensor isn’t going to be a deal breaker in most cases. It’s just a convenient feature that makes the Aquila X2 slightly more efficient and beginner friendly.
Bed Leveling
The Ender 3 V2 and the Aquila X2 have standard manual bed leveling. It’s good to get familiar with the process, but it’s also an extra step that you might not want to deal with if this is your first printer. Introducing more variables when you’re already using a budget printer can make things much more difficult than they should be.
For a higher price, the Ender 3 V2 Neo has automatic bed leveling that Creality has dubbed CR Touch. It works through touch probes, just like antclab’s BLTouch.
Read more: the best low-cost 3D printers with auto-leveling
Upgradeability
When you purchase a cheap, entry-level 3D printer, you’re usually accepting that upgrades will be a necessity. The Aquila X2 and Ender 3 V2 are no exceptions. With either printer, you’ll probably want to upgrade basics like the fans, the extruder, and the bed mounts.
The noise level of these printers hovers around 50dB. Upgrading their fans (including the part cooling, hot end, PSU, and control board fans) is the best option for quieter printing.
Getting a better extruder and replacing the default bed springs with silicone mounts will also benefit both printers equally, and it’s relatively easy to find parts for either of them. Since the Aquila is nearly identical, most things that will work with the Ender 3 will also work for the Aquila.
Of course, these upgrades aren’t free. As the more expensive printer, every additional upgrade makes the Aquila X2 look more appealing and the Ender 3 V2 seem less worthwhile.
Read more: all the best Ender 3 upgrades (both DIY and buyable options)
Filament Compatibility
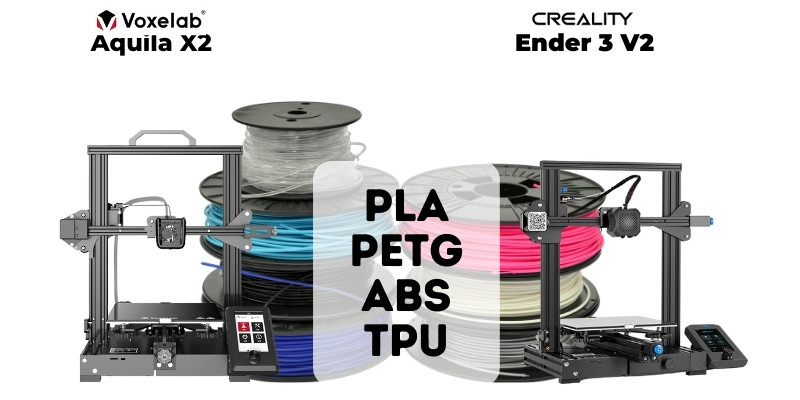
You’ll be working with the same basic set of filaments, whether you have the Aquila X2 or the Ender 3 V2. They’re compatible with PLA, PETG, and ABS. It’s common for hobbyists to upgrade the Ender 3’s extruder for the sake of using TPU, and in fact, it’s actually advertised as being able to use TPU.
Regardless, flexible filaments like TPU can be finicky. The Ender 3 isn’t the ideal option if you want a wide range of filaments to use, and neither is the Aquila. This is another area where the two printers are at a near-standstill.
Any upgrades that can be done to the Ender 3’s extruder can also be done to the Aquila’s, and the end result is two printers that can use essentially the same pool of filaments.
If you opt for the Ender 3 V2 Neo, you’ll have a clear advantage over the Ender 3 V2 and the Aquila X2: a fully metal Bowden extruder. It will give you a better time with handling filaments and be more durable, to boot.
Read more: the best filaments for the Ender 3
Assembly
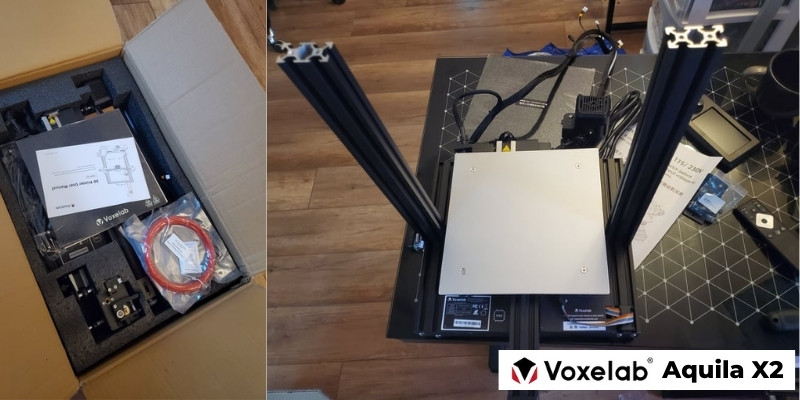
Creality chose to leave the Ender 3 V2’s complete assembly in the hands of whoever buys it for the sake of a lower price. The Aquila X2 follows in Creality’s footsteps, leading the two printers to have very similar assembly times.
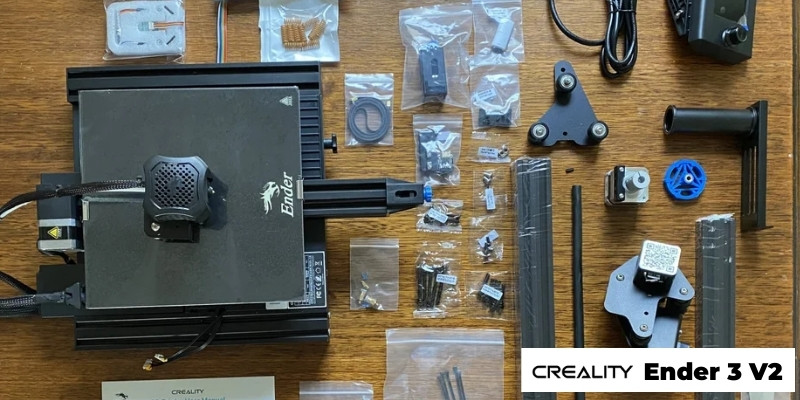
It commonly takes between 30-45 minutes to set up the Ender 3 V2 or the Aquila X2. There are detailed guides for building either printer, so they’re both fine choices for beginners from this perspective.
Price
- Voxelab Aquila X2 – $179.99
- Ender 3 V2 – $259
- Ender 3 V2 Neo – $298
With few other features or specs to differentiate the two, price is the biggest factor between the Ender 3 and the Aquila X2.
The Ender does get marked down for sales regularly, but it usually won’t dip beneath $199. The Aquila X2 blows the Ender 3’s regular and sales prices out of the water with a price of $179.99.
The Ender 3 V2 Neo is, of course, even more expensive at $298. In perspective, this is still a relatively cheap printer. It just can’t compare to the Aquila X2’s price.
Community
Many hobbyists flock to the Ender 3 purely because of how established it is. As far as 3D printers go, the Ender 3 is a household name– and with that comes a flourishing community.
The benefit of having dozens of large and growing forums is that troubleshooting becomes much easier. Chances are, any issue you have with the Ender 3 V2 is an issue someone else already has experienced and posted about somewhere on the Internet. If you’re new to the world of 3D printing, the community alone can make the difference between success and a 3D printer that never gets used.
But although the Ender 3 V2 technically wins out when it comes to community support, the Aquila X2 isn’t a total loser. The build of the Aquila is so similar to that of the Ender 3 that many resources can be used interchangeably between the two.
|
Budget Pick
|
Top Pick
|
|
|
|
|
Build Volume:
220 x 220 x 250 mm
|
Build Volume:
220 x 220 x 250 mm
|
|
Max Print Speed:
Up to 180 mm/s
|
Max Print Speed:
Up to 200 mm/s
|
|
Filament runout sensor:
Yes
|
Filament runout sensor:
Optional Add-on
|
|
Filament Compatibility:
PLA, PETG, ABS, TPU
|
Filament Compatibility:
PLA, PETG, ABS, TPU
|
|
|
$279.99
|
|
|
Budget Pick
Build Volume:
220 x 220 x 250 mm
Max Print Speed:
Up to 180 mm/s
Filament runout sensor:
Yes
Filament Compatibility:
PLA, PETG, ABS, TPU
Top Pick
Build Volume:
220 x 220 x 250 mm
Max Print Speed:
Up to 200 mm/s
Filament runout sensor:
Optional Add-on
Filament Compatibility:
PLA, PETG, ABS, TPU
$279.99
Voxelab Aquila X2 vs Ender 3 V2 – The Bottom Line
The Ender 3 V2 has paved the way for future budget printers, and the Aquila X2 is exactly the printer to take its place. There is only one feature that really differentiates the two printers, and that’s the Aquila’s filament sensor.
Aside from that, Voxelab and Creality have made near-identical printers in everything but price. They have the same (or nearly the same) specs, need the same upgrades, and work with the same filaments.
The Ender 3 V2’s main appeal is being an entry-level, budget 3D printer. If the Aquila can do everything the Ender can at a lower cost– and it can– then why not buy the Aquila instead?
The only possible caveat is if the Ender 3’s community is worth the extra cash. But even then, there’s nothing stopping you from using resources for the Ender 3 and applying them to the Aquila X2.
Related articles:
- Comparing The Elegoo Neptune 2/3 vs Ender 3
- A Highly Improved Classic: Ender-3 V2 Neo Review
- Creality Ender 3 vs Ender 3 Pro vs Ender 3 V2
- Selected Ender 3 Series 3D Printers Compared: Ender 3 Neo, V2 Neo & Max Neo
- Best Ender 3 Print Speed Settings for Ender 3 V2 & Pro
- Sovol SV06 vs Ender 3 (V2 / Neo)
Cura has been the go-to choice for millions of makers since 2016. Creality Slicer, which is based on Cura, comes from the folks behind the iconic Ender 3 – Creality. Though it may not have the reputation of Cura, it’s still an efficient slicer worth considering.
If you’re considering the two and are having trouble making a choice, given the similarities between the two, this article is for you. We’ll cover what sets Cura and Creality Slicer apart, what features they share, their respective pros and cons, and suggest a few alternatives to these two slicer heavyweights.
Before we begin, here’s a brief breakdown of the differences between Creality Slicer and Cura in easy-to-digest table format:
| Cura | Creality Slicer | |
|---|---|---|
| User Interface | Clean, user-friendly | Clean, user-friendly, almost identical to Cura |
| Operating System Compatibility | Windows, MacOS, Linux | Windows, MacOS, Linux |
| Print Times | Normal | Slightly faster depending on settings choice. |
| Compatible 3D Printers and Profiles | Pre-configured profiles for most brands and models | Pre-configured profiles for Creality and Ultimaker printers only. |
| Updates | Regular updates with new features and improvements | Less frequent updates |
| Toolbar | Identical | Identical |
| Import/Export File Types | Broad range of file types including STL and many more. | Same as Cura + Creality Cloud |
| Support | Massive, established community. Stacked only resources, guides, videos, groups | Smaller community of users, but good range of guides, groups, and videos to help with issues. |
| Cost | Free | Free |
| Plugins | Yes | Yes |
What Are the Differences Between Creality Slicer and Cura
The main difference between Cura and Creality Slicer lies in their range of features and complexity. Creality Slicer is best seen as a simplified and streamlined version of Cura that’s easier for beginners to use and understand.
Cura, on the other hand, has a broader range of advanced features better suited to tweaking and fine-tuning the slicing process, making it more versatile, but still extremely user-friendly.
Let’s dive into the specifics.
User Interface
- Cura: Cura features a clean, intuitive, and easy-to-navigate UI that presents information and settings in a digestible format. The real beauty here is that the arrangement of the toolbar, features, and settings won’t overwhelm first-timers, but collapsible submenus reveal a wealth of options for those wanting to dive deeper into what the program has to offer.

- Creality Slicer: Given that Creality Slicer is a fork of Cura, retooled for Creality printer owners, the UI is more or less identical, bar a different color scheme. Some may prefer the sleeker colors of Cura, but for all intents and purposes, we’re working with the same core UI on both programs.
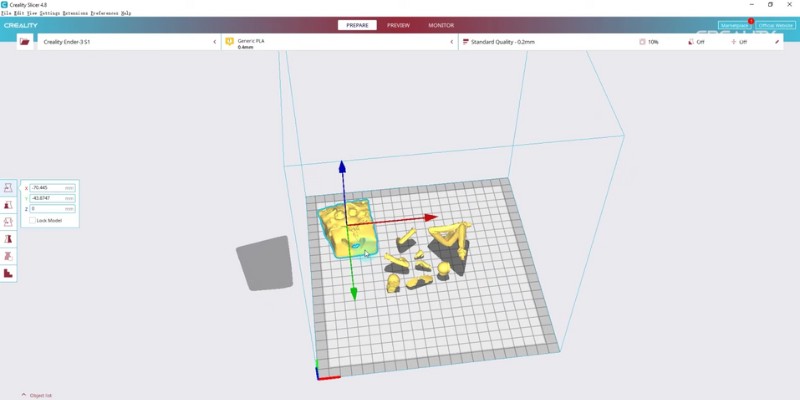
Operating System Compatibility
| 3D Slicer | Operating System Compatibility |
|---|---|
| Cura | Ultimaker offers Cura versions for Windows, MacOS, and Linux. |
| Creality Slicer | In the past Creality Slicer was limited to Windows, but is now compatible with both MacOS and Linux, putting both slicer software on par with each other. |
Print Times
| 3D Slicer | Print Times |
|---|---|
| Cura | Average print times, though this depends on what settings are used – layer height, print speed, etc – and the size of the model. |
| Creality Slicer | Creality Slicer is said to be slightly faster than Cura due to the fact it has less advanced features and options to extend print times than Cura. But for most users, the print times are identical for both programs. |
Compatible 3D Printers and Profiles
| 3D Slicer | Compatible 3D Printers and Profiles |
|---|---|
| Cura | Cura is compatible with the overwhelming majority of FDM printers, old and new machines included. It even has pre-configured profiles for most printers from leading manufacturers like Anycubic, Ultimaker, and Creality, though it lacks specific profiles for revisions and modern updates in some cases, though the base profile should be suitable with a little tweaking here and there. |
| Creality Slicer | Creality is technically compatible with a huge range of printers too, but is chiefly designed to work best with Creality printers, as illustrated by pre-configured profiles for every Ender 3, Ender 5, CR-10, ever released. These profiles are fine-tuned specifically for Creality machines and are ideal if you want the best settings from the get-go. Creality Slicer also includes profiles for Ultimaker machines, presumably a condition for Creality creating the slicer as a fork of Cura, which is an Ultimaker product. |
Updates
| 3D Slicer | Updates |
|---|---|
| Cura | Cura benefits from regular updates that chiefly focus on bug fixes, optimization, and new features. Expect updates every few months. |
| Creality Slicer | As Creality Slicer is based on Cura, updates are dependent on Creality effectively catching up on what Cura updates and then adapting these to suit their slicer. As such, updates aren’t as regular, but are frequent enough to deck out Creality Slicer with the most recent and popular features. |
Toolbar
| 3D Slicer | Toolbar |
|---|---|
| Cura | Cura features a clean and easy-on-the-eye toolbar on the left of its interface. Large buttons collapse into submenus with a wealth of settings touching on aspects of the print such as scale, rotate, supports, move, and more. Cura also features an in-depth settings menu accessible from a tab at the top right of the screen with options for global profiles that cater for different quality and print speeds. |
| Creality Slicer | Creality Slicer’s toolbar is identical to Cura’s, with the same spread of options and the same settings drop-down in the top right on the program’s interface. |
Import/Export File Types
Cura:
- 3MF File (.3mf)
- AMF File (.amf)
- COLLADA Digital Asset Exchange (.dae)
- Compressed COLLADA Digital Asset Exchange (.zae)
- Open Compressed Triangle Mesh (.ctm)
- STL file (.stl)
- Stanford Triangle Format (.ply)
- Wavefront OBJ File (.obj)
- X3D file (.x3d)
- glTF Binary (.glb)
- glTF Embedded JSON (.gltf)
- BMP image (.bmp)
- GIF image (.gif)
- JPEG image (.jpeg)
- JPG image (.jpg)
- PNG Image (.png)
- Compressed G-code file (.gz)
- G file (.g)
- G-code file (.gcode)
- Ultimaker Format Package (.ufp)
Creality Slicer:
Creality Slicer offers the same import/export file compatibility as Cura with the option to send sliced models to Creality Cloud, the manufacturer’s all-in-one cloud-based 3D printing platform, with features like a 3D model library, remote printing, and cloud slicing.
Support
| 3D Slicer | Support |
|---|---|
| Cura | As the most popular FDM slicer on the market, Cura’s active community produces a wealth of Cura-related content. These cover how-to guides, best setting suggestions, videos, in-depth analysis of new features, enthusiasts groups, and troubleshooting discussions. Facebook and Reddit are great resources in that respect. If you encounter any issues, help and resources to help you troubleshoot are just a few clicks away. |
| Creality Slicer | Though less popular than Cura, Creality Slicer still has a dedicated user base that, again, have published plenty of support material in guide, video, and forum format to help users. To boot, Creality Cloud offers a one-stop shop for not just 3D models, but also community discussion where you’ll find help and support in abundance to get the best out of the software. In addition, most of the support for Cura applies directly to Creality Slicer due to the deep similarities between the two slicer programs. |
Cost
| 3D Slicer | Cost |
|---|---|
| Cura | Free |
| Creality Slicer | Free |
Plugins
| 3D Slicer | Plugins |
|---|---|
| Cura | Cura features what it calls a marketplace, stacked with plugins that allow you to customize the slicer to your needs. These plugins, or extensions, include tools like support generation, integration with CAD software, calibration models, startup time optimizers, z offset, and much more. These are available as both free and premium. |
| Creality Slicer | Much like Cura, Creality Slicer has its own plugins marketplace, full of add-on tools to enhance the base software. |
Creality Slicer vs Cura: Pros and Cons
Creality Slicer Pros and Cons
Pros
One of the main pros of Creality Slicer is full compatibility with all Creality printers, including the Ender 3, Ender 5, and CR-10.
This also extends to optimized pre-configured profiles to get the best settings immediately with no tinkering.
Creality Slicer is also based on Cura, so the layout and UI are familiar to anyone that’s used Cura. It’s easy to use, intuitive, and features descriptions for most settings and features to guide first-time users.
Creality Slicer supports a wide range of file formats for both export and import. The software also supports plugins, allowing you to customize the slicer with tools and features beyond those offered by the base program. Creality Slicer is 100% free to use and integrates with Creality’s Cloud service, giving you access to discussion, 3D models, and remote printing.
Cons
Creality Slicer is technically compatible with most printers, but is optimized for Creality machines, so you won’t get the best experience if you’re using a different branded 3D printer.
You can create a custom profile and enter your 3D slicer settings yourself, but this doesn’t offer the same, sleek, optimized experience as the pre-configured Creality printer profiles.
As Creality is based on Cura, any improvements rely on Creality implementing the latest Cura updates into its slicer, which generally means a delay in having access to the latest features and bug fixes, for a slightly outdated feel compared to Cura.
Ultimaker Cura Pros and Cons
Pros
Cura offers a clear, intuitive, and streamlined user interface that accommodates both beginners and experts alike.
There’s plenty of depth to the features and options, but these aren’t pushed to the user from the get-go, allowing for a gentle learning curve.
Cura is regularly updated with bug fixes, performance optimizations, and new features, giving users access to the latest in slicer capabilities.
Cura is free to use with no limitations and is compatible with a huge range of 3D printers, with robust, tested pre-configured profiles for most FDM printers currently on the market and even older printers no longer available to buy.
Due to its popularity, Cura has a massive community of users with a vast range of resources, guides, and tutorials to help you get the most out of the software. This also extends to a huge marketplace of plugins to customize your Cura experience.
Cons
Though Cura caters to most 3D printer brands, it doesn’t have profiles for all versions.
For example, the Ender 3 profile only covers the basic version and the Ender 3 Pro, leaving out more recent versions like the Ender 3 S1 and Ender 3 V2 Neo for example, which requires fine tuning. We have recently reviewed and tested both the Ender 3 S1 Pro, and Ender 3 V2 Neo, and though it was right when they were released, at that time neither had a custom Cura profile. Check out our article on the best Cura profile settings for Ender 3 for more.
Alternatives to Creality Slicer and Ultimaker Cura
Though Ultimaker Cura and Creality Slicer are excellent slicers for most users, you may want to explore what else is out there with slightly less popular, but equally capable alternatives.
PrusaSlicer

Developed by the folks behind the highly-respected Prusa i3 MK3S+, PrusaSlicer is an open-source program based on Slic3r. Though, Prusa has polished and beefed up the feature set and user experience that PrusaSlicer now stands on its own two feet.
It ships with pre-configured profiles for the most popular printers out there, includes import/export options for all the go-to file types, and is available for MacOS, Windows, and Linux.
Among PrusaSlicer’s most notable features is a vase mode similar to Cura’s, custom supports, integration with OctoPrint, automatic variable layer height, model repair tool, infill wipe function, and macros.
Though PrusaSlicer houses a wealth of features and options, it remains very user-friendly with a clean, polished layout. Regular updates and solid printing results with little tweaking make it a solid choice for those wanting something different to Cura and Creality Slicer.
Simplify3D

While Cura and Creality Slicer aim to welcome users of all experience levels, Simplify3D is designed mainly for professional applications with a suite of features and a level of tinkering unavailable on more consumer-geared slicers. With this comes a price tag, something that’s rare for most slicers, with Simplify3D asking users to drop $200 to use the software.
For the money, you get a customized workflow, abundant settings, and superb quality results at every turn, all housed in a UI that’s easy on the eye and intuitive to use for all the complexity lurking below the surface. It also ships with plenty of pre-configured profiles, import/export of all the major file types, and excellent support from both the developers and a committed community.
Beginners may be a little daunted by the versatility here, so we recommend using a simpler slicer like Cura to begin, but once you’ve nailed the basics, Simplify3d is a great environment to hone your skills and gain absolute control over the slicing process.
Slic3r

Slic3r is another open-source slicer program that is largely responsible for most of the advanced features we’ve come to expect from a slicer these days – brims, variable layer heights, unusual infill patterns, and much more.
With such a focus on innovation, Slic3r is chiefly geared towards established enthusiasts and makers with years of printing under their belt who a glut of features won’t put off. Newcomers may be overwhelmed with the depth of the program.
Slic3r is compatible with MacOS, Windows, and Linux systems and is available for free on the Slic3r website. Unlike Cura and others, Slic3r has very few profiles, so expect plenty of custom tinkering to hone in our settings that work for your 3D printer.
FAQ:
Are Cura and Creality Slicer the Same Thing?
No, Cura and Creality Slicer are two different programs. Technically, however, they are more or less identical. Creality Slicer is a fork of Cura, with almost the same UI, functionality, and user experience. Where they differ is in printer compatibility, as Creality Slicer is geared towards Creality printers like the Ender 3 and Ender 5, while Cura is compatible with most 3D printer brands.

Is Creality Slicer Based on Cura?
Yes, Creality Slicer is based on Cura. It’s what is called a fork of the open-source Cura, meaning Creality has taken the based UI, interface, and underlying code and then modified it to better serve its range of printers. Other than a few changes to settings, color scheme, and printer profiles, the two programs are virtually identical in most respects.
All hovering around the $500 – $600 price range, they make dual color and dual filament printing more accessible than ever before.

It can be a challenge to pick which printer is going to best serve your needs, though. They all offer different printing experiences, including unique features that are difficult to add with DIY or upgrading.
We’ll go over the main pros and cons of each, plus add information on why certain features are good and who they cater to (ex. Newer hobbyists). By the end of it, you should have a better idea of what IDEX printer will serve your needs the best.
Without further ado, let’s dive in.
| Sovol SV04 | Flashforge Creator Pro 2 | Tenlog TL-D3 Pro | |
|---|---|---|---|
| Build Volume | 300 x 300 x 400 mm | 200 x 148 x 150 mm | 300 x 300 x 350 mm |
| Printer Footprint | 653 x 625 x 803 mm | 526 x 360 x 550 mm | 590 x 520 x 760 mm |
| Build Plate | Magnetic flexible plate | Aluminum | Borosilicate glass |
| Extruder Type | Direct Drive | Direct Drive | Direct Drive |
| Filament Compatibility | PLA, TPU, TPE, HIPS, ABS, PETG, Wood, PC, PA, PVA, ASA | ABS, PLA, PVA, HIPS | TPU, PVA, PLA, ABS, HIPS, PETG, Wood, most flexible filaments |
| Max Extruder Temp | 260°C | 240°C | 300°C |
| Max Bed Temp | 100°C | 120°C | 110°C |
| IDEX? | Yes | Yes | Yes |
| Enclosed? | No | Yes | No |
| Auto Bed-leveling? | Yes | No | No |
| Resume Print and Filament Sensor? | Yes | No | Yes |
| Touchscreen? | Yes | Yes | Yes |
| Connectivity | SD Card, Data Cable | SD Card | SD Card, USB |
| Price | $500 | $550 | $560 |
Sovol SV04 vs Flashforge Creator Pro 2 vs Tenlog TL-D3 Pro: A Quick Summary
Sovol SV04
- Price: Check latest price at Sovol 3D here / Amazon here
- Build volume: 300 x 300 x 400 mm
- Filament compatibility: PLA, TPU, TPE, HIPS, ABS, PETG, Wood, PC, PA, PVA, ASA
- Layer height: 100 – 400 microns
- Printing accuracy: ± 0.1 mm
- Max extruder temp: 260°C
- Max bed temp: 100°C
- Connectivity: SD Card, Data Cable

Sovol 3D’s foray into dual extruder printers is the SV04, a printer equipped with IDEX, a flexible magnetic plate, and a surprisingly large build volume for the price. It sounds great already, but let’s go over the exact specs.
The SV04 has a build volume of 300 x 300 x 400 mm. We wouldn’t quite consider this a large volume printer, but it certainly will have enough room for most hobbyists. It also has a max extruder temperature of 260°C and a max bed temp of 100°C.
It can handle a range of filaments, including PLA, TPU, TPE, HIPS, ABS, PETG, Wood, PC, PA, PVA, and ASA according to the store page. Although it’s true that most of these filaments should be pretty easy for the SV04, you might want to upgrade the nozzle to make the most out of harsher filaments like wood.
Despite the low price, we were impressed by the quality of life features that the SV04 has to offer. Not only is there the flexible magnetic plate, but it has auto bed-leveling, a filament sensor, and a touch screen.
If you don’t want to spend a lot but you want a lot in return, the SV04 is a solid option as far as IDEX printers go. We have a standalone review of the Sovol SV04 if you want more detail on its functionality.
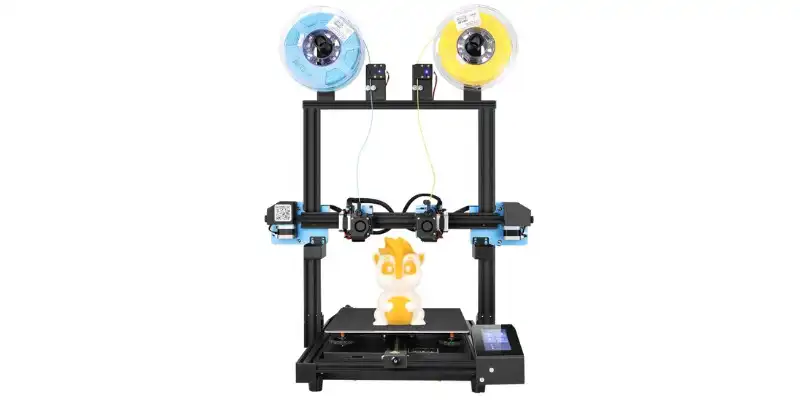
We earn a commission if you make a purchase, at no additional cost to you.
Flashforge Creator Pro 2
- Price: Check latest price at Flashforge here / Amazon here
- Build volume: 200 x 148 x 150 mm
- Filament compatibility: ABS, PLA, PVA, HIPS
- Layer height: 100 – 400 microns
- Printing accuracy: ± 0.1 mm
- Max extruder temp: 240°C
- Max bed temp: 120°C
- Connectivity: SD Card

Unlike the original Creator Pro, Flashforge’s Creator Pro 2 uses direct drive IDEX to let you use multiple colors and filaments at the same time. It’s still ‘budget’ for an IDEX printer, but the low price didn’t stop Flashforge from giving the Pro 2 an enclosure.
Enclosed printers have superior temperature control, which can make them more newbie-friendly by reducing the likelihood of certain problems. But new or not, preventing issues like warping is a plus for any hobbyist.
You shouldn’t expect it to be a quiet printer, though– the Pro 2 tends to be loud despite the enclosed design. The drawbacks don’t stop there. It has a very high-cling aluminum build plate, which makes it a challenge to safely remove prints.
The Creator Pro 2 also doesn’t have as high of a maximum extruder temperature as the other printers we’re reviewing here: it peaks at 240°C and 120°C for the bed. The result is less access to the exciting filaments.
Another downside is that it has a build volume of only 200 x 148 x 150 mm (smaller than the Ender 3) and no auto-leveling or filament sensor. It might be hard to justify these feature deficits, even with the enclosure and touchscreen.
Ultimately, we think the Creator Pro 2’s enclosed IDEX design can really shine with some upgrades to the nozzle and print bed. It just requires a bit more care than some other options!
Mid-Range pick
Flashforge Creator Pro 2
$549-999
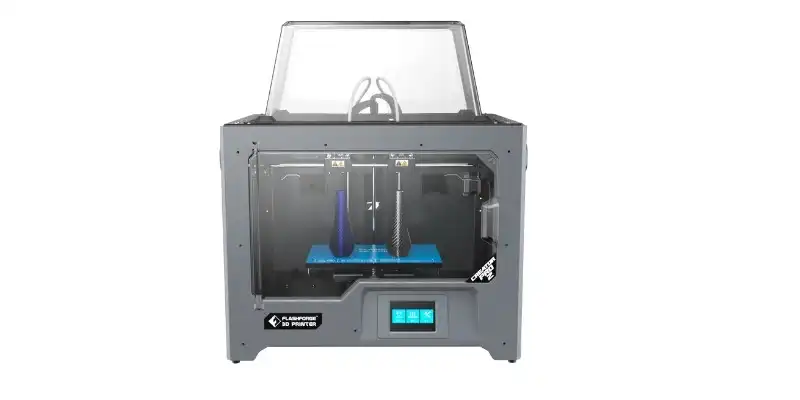
We earn a commission if you make a purchase, at no additional cost to you.
Tenlog Tl-D3 Pro
- Price: Check latest price Amazon here
- Build volume: 300 x 300 x 350 mm
- Filament compatibility: TPU, PVA, PLA, ABS, HIPS, PETG, Wood, most flexible filaments
- Layer height: 100 – 400 microns
- Printing accuracy: ± 0.1 mm
- Max extruder temp: 300°C
- Max bed temp: 110°C
- Connectivity: SD Card, USB

The Tenlog TL-D3 is the most expensive of these three printers, but not by much– and it has plenty to offer in return! Right off the bat, it can offer direct drive IDEX and a hefty build volume of 300 x 300 x 350 mm.
It also has a higher than usual maximum extruder temperature of 300°C and a max bed temperature of 110°C. This lets the TL-D3 Pro use a wonderful range of filaments including PVA, PLA, ABS, HIPS, PETG, Wood, TPU, and most other flexible filaments.
The Borosilicate glass build plate is a happy medium between the best options and the mediocre once. Glass plates have good adhesion, but don’t tend to be over the top like aluminum. They last a while, too!
Quality of life features on the TL-D3 Pro are a little hit or miss. It has a touch screen and filament sensor. On the flip side, it doesn’t have auto-leveling and certainly isn’t enclosed like the Creator Pro 2.
One of the best features of the TL-D3 isn’t related to the build volume, or its filament compatibility. Instead, the TL-D3 deserves praise for having linear rails on all three axes. These rails directly result in smooth, precise movements that are a benefit for any printer– but especially so for an IDEX printer.
This feature alone is enough to set the TL-D3 Pro apart from other dual extrusion printers. It’s safe to say that you should also think long and hard about passing up on the filament friendliness and feature richness that it offers.

We earn a commission if you make a purchase, at no additional cost to you.
05/25/2023 01:38 am GMT
Comparison Showdown
Build Volume
- Sovol SV04 – 300 x 300 x 400 mm
- Flashforge Creator Pro 2 – 200 x 148 x 150 mm
- Tenlog TI-D3 Pro – 300 x 300 x 350 mm

Although the Creator Pro 2 lags behind the others by a significant margin, the TI-D3 Pro and SV04 are actually very close in build volume. The greater z-axis on the SV04 may only be 50 mm, but it does have a lot of potential.
If you’re creating dual-color cosplay pieces or statuettes, prioritizing build volume isn’t a bad thing at all. That being said, the TI-D3 Pro could still be optimal because of other features.
The most important thing to keep in mind is that you won’t be satisfied with the Creator Pro 2 unless you only want to print very small objects. It will prove to be a disappointing investment if, down the line, you want more.
Enclosure
- Sovol SV04 – Not Enclosed
- Flashforge Creator Pro 2 – Enclosed
- Tenlog TI-D3 Pro – Not Enclosed

The small build volume might be excusable once you consider the Creator Pro 2 offers an enclosure. Enclosed designs are often saved for pricier printers, and they definitely make things easier.
There are two main benefits to an enclosure: they maintain an even, warm temperature around the print bed and they prevent airflow from entering the print area. These benefits help avoid problems like warping, but they also ensure stable outputs.
Even if you’re not making your 3D printing hobby into a full-on business, the consistency of an enclosed printer might be nice if you ever want to sell some of your pieces on Etsy.
Another very desirable side effect is that certain specialty filaments are easier to work with if you have an enclosure. In general, a stable environment means less troubleshooting and more fun prints.
Build Plate
- Sovol SV04 – Flexible magnetic plate
- Flashforge Creator Pro 2 – Aluminum
- Tenlog TI-D3 Pro – Borosilicate glass

Out of the three, the SV04 has the best build plate even though it’s the cheapest. A flexible magnetic plate has pretty much everything. It’s easy to remove prints, still has good adhesion, and will last a long time. Removable plates also tend to be easier to clean and perform maintenance on.
The TI-D3 Pro’s borosilicate glass is a decent second option. It’s long-lasting and has good adhesion, but you’ll likely still use a scraper to get some prints off.
Glass is definitely better than the Creator Pro 2’s aluminum, though. Frankly, seeing an aluminum build plate at this price point is a disappointment. Aluminum tends to be difficult to work with since many prints will adhere to it too strongly to safely remove.
Filament Compatibility
- Sovol SV04 – PLA, TPU, TPE, HIPS, ABS, PETG, Wood, PC, PA, PVA, ASA
- Flashforge Creator Pro 2 – ABS, PLA, PVA, HIPS
- Tenlog TI-D3 Pro – TPU, PVA, PLA, ABS, HIPS, PETG, Wood, most flexible filaments
The TI-D3 Pro can work with the widest range of filaments, but the SV04 is a close second. Sovol advertises the SV04 as working with many, many filaments. They aren’t wrong, but the TI-D3 Pro can use all of those filaments, too.
Tenlog just doesn’t list PC, PA, PVA, TPE, and ASA on their product page. In fact, the TI-D3 might actually have more potential because the extruder can withhold higher temperatures of 300°C compared to the SV04’s 260°C.
As reflected by the list of usable filaments, the Creator Pro 2 is the most restrictive. Although it has an enclosed design, the aluminum build plate and the 240°C max extruder doesn’t do it any favors.
We expect the Pro 2 to have a much better range if you put in a little bit of effort and cash into making basic upgrades. The enclosure means it has the potential to work with finicky filaments like nylon, so long as the other parts are up to par.
Auto Bed-Leveling
- Sovol SV04 – Yes
- Flashforge Creator Pro 2 – No
- Tenlog TI-D3 Pro – No
The cheapest printer, the SV04, is the only one to have auto bed-leveling. It uses a copy of good old BL Touch to help with leveling.
Although it might seem like a meaningful strike against the Creator Pro 2 and the TI-D3 Pro, bed-leveling is more of a nice-to-have and not a need-to-have. Beds will likely come automatically leveled, and especially in the case of glass, are usually quite even already.
Auto-leveling doesn’t ensure that you’ll have no work to do or no issues will arise, either. All in all, it’s doubtlessly important; But auto leveling is not the end of the line.
Price
- Sovol SV04 – $500
- Flashforge Creator Pro 2 – $550
- Tenlog TI-D3 Pro – $560
The SV04 is the cheapest printer out of the bunch, which certainly makes it a tempting offer. It doesn’t have any crucial upgrades and it works fine out of the box. For those reasons, it wins when it comes to cost alone.
The TI-D3 Pro has key upgrades that make the extra $60 very worthwhile, though. It still has a decent build plate and a big build volume, and the linear rails make it truly special.
Actually, the Creator Pro 2 also has a unique feature that makes it worth the extra money with its enclosed design. Between the linear rails and the enclosure, it’s difficult to price out the “cost savings” on the SV04. These printers offer different things, pure and simple.
If we had to say, the Creator Pro 2 is the worst deal if only because of the cheap aluminum build plate. Even without upgrading anything else, getting a new flexible Flashforge build plate will run you at least $30.
Sovol SV04 vs Flashforge Creator Pro 2 vs Tenlog TL-D3 Pro – The Bottom Line
When it comes to out of the box functionality, the Tenlog TL-D3 Pro pulls ahead. We suggest purchasing the TL-D3 if you want the best non-enclosed, discount IDEX printer.
We earn a commission if you make a purchase, at no additional cost to you.
05/25/2023 01:38 am GMT
Although the SV04 is a solid choice (and is really quite similar in many ways), it’s edged out just slightly because of the TL-D3’s linear rails and higher extruder temperature tolerance.
We earn a commission if you make a purchase, at no additional cost to you.
Of course, it’s still fine to purchase the SV04 if the cost savings mean that much to you. We feel it could be a great option for new hobbyists, since it has auto-leveling and works fine for out of the box printing. The flexible build plate makes things even easier.
For the sake of stable, consistent printing, the Creator Pro 2 deserves a mention. It’s the obvious choice if you want an enclosed printer, as the only real choice for enclosed IDEX printers in this price range.
Mid-Range pick
Flashforge Creator Pro 2
$549-999
We earn a commission if you make a purchase, at no additional cost to you.
Unfortunately, the small build volume, subpar build plate, and mediocre filament compatibility make it a hard sell outside of that. The Pro 2 is for people who are interested in upgrading and don’t care about build volume, but not for extreme low-budgets or total newbies.
]]>But as nice as it is to have these options, it’s definitely a chore to try and filter through them. We’ll be covering the main selling points of each printer, including the all-important build volume as well as cost, quality of life features, and filament compatibility.
|
|

|
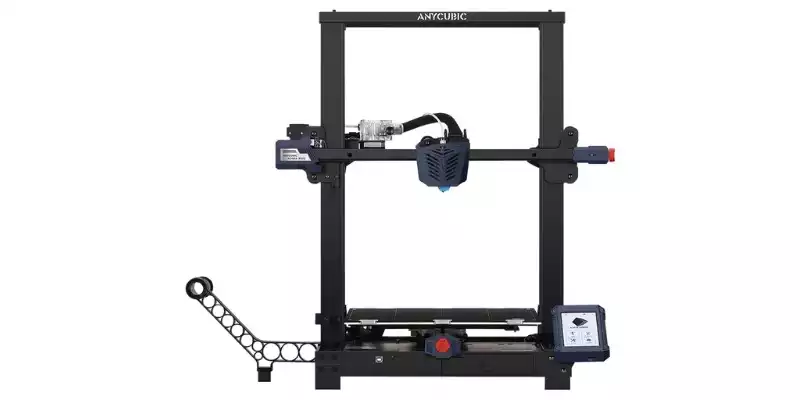
|
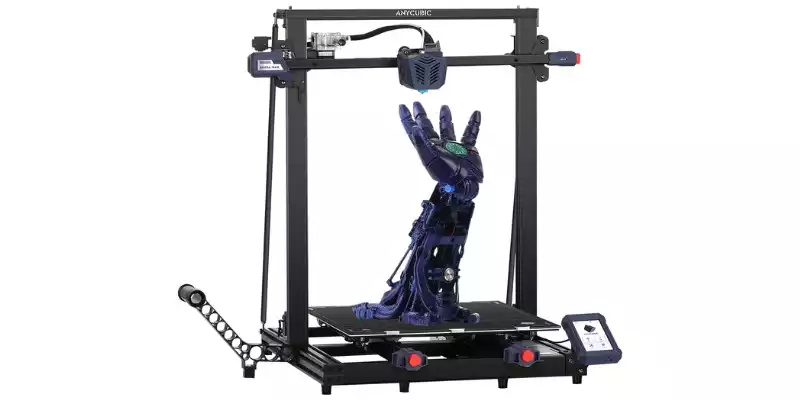
|
|
|
|
|
|
|
N/A
|
$580
|
$500
|
$570
|
|
Build Volume:
350 x 350 x 400 mm
|
Build Volume:
350 x 350 x 400 mm
|
Build Volume:
350 x 300 x 300 mm
|
Build Volume:
400 x 400 x 450 mm
|
|
Build Plate:
Tempered glass
|
Build Plate:
Tempered glass
|
Build Plate:
Carborundum glass
|
Build Plate:
Carborundum glass
|
|
Extruder Type:
Direct Drive
|
Extruder Type:
Bowden
|
Extruder Type:
Bowden
|
Extruder Type:
Bowden
|
|
Filament Compatibility:
PLA, PETG, ABS, TPU, and Wood
|
Filament Compatibility:
PLA, PETG, ABS, TPU, and Wood
|
Filament Compatibility:
PLA, PETG, ABS, TPU, and Wood
|
Filament Compatibility:
PLA, PETG, ABS, TPU, and Wood
|
|
Max extruder temp:
260°C
|
Max extruder temp:
260°C
|
Max extruder temp:
260°C
|
Max extruder temp:
260°C
|
|
Max bed temp:
100°C
|
Max bed temp:
100°C
|
Max bed temp:
100°C
|
Max bed temp:
90°C
|
|
Auto bed-leveling:
Yes
|
Auto bed-leveling:
Yes
|
Auto bed-leveling:
Yes
|
Auto bed-leveling:
Yes
|
|
Touchscreen:
No
|
Touchscreen:
Yes
|
Touchscreen:
Yes
|
Touchscreen:
Yes
|
|
Connectivity:
SD Card, USB
|
Connectivity:
SD Card, USB
|
Connectivity:
Micro SD
|
Connectivity:
Micro SD
|
|
|
N/A
Build Volume:
350 x 350 x 400 mm
Build Plate:
Tempered glass
Extruder Type:
Direct Drive
Filament Compatibility:
PLA, PETG, ABS, TPU, and Wood
Max extruder temp:
260°C
Max bed temp:
100°C
Auto bed-leveling:
Yes
Touchscreen:
No
Connectivity:
SD Card, USB
$580
Build Volume:
350 x 350 x 400 mm
Build Plate:
Tempered glass
Extruder Type:
Bowden
Filament Compatibility:
PLA, PETG, ABS, TPU, and Wood
Max extruder temp:
260°C
Max bed temp:
100°C
Auto bed-leveling:
Yes
Touchscreen:
Yes
Connectivity:
SD Card, USB
$500
Build Volume:
350 x 300 x 300 mm
Build Plate:
Carborundum glass
Extruder Type:
Bowden
Filament Compatibility:
PLA, PETG, ABS, TPU, and Wood
Max extruder temp:
260°C
Max bed temp:
100°C
Auto bed-leveling:
Yes
Touchscreen:
Yes
Connectivity:
Micro SD
$570
Build Volume:
400 x 400 x 450 mm
Build Plate:
Carborundum glass
Extruder Type:
Bowden
Filament Compatibility:
PLA, PETG, ABS, TPU, and Wood
Max extruder temp:
260°C
Max bed temp:
90°C
Auto bed-leveling:
Yes
Touchscreen:
Yes
Connectivity:
Micro SD
Plus, we’ll review what prints you can make on each printer based on the build volume and filaments you can access.
Let’s get started.
SV03 vs Ender 5 Plus vs Kobra Plus/Max: A Quick Summary
Sovol SV03
- Price: Check latest price at Amazon here
- Build volume: 350 x 350 x 400 mm
- Filament compatibility: PLA, PETG, ABS, TPU, and Wood
- Layer height: 100 – 400 microns
- Printing accuracy: ± 0.1 mm
- Max extruder temp: 260°C
- Max bed temp: 100°C
- Connectivity: SD Card, USB

Sovol 3D isn’t a ‘household name’ like Creality or Anycubic, but their budget FDM printers can compete just fine. The Sovol SV03 is no exception: for $400, you get a large build volume of 350 x 350 x 400 mm.
You’d usually expect this price and build volume to come with advanced features, but the SV03 is still equipped with a filament sensor and auto bed-leveling through BLTouch.
It lacks a touchscreen, sticking with the rotary knob typical of cheaper printers. Thankfully, Sovol doesn’t skimp on anything else, though. The TMC2208 motherboard keeps printing relatively quiet, and the SV03 has a belt tensioner for easy maintenance.
The SV03 has no special capacity for fancy filaments, but it can print PLA, PETG, ABS, TPU, and Wood with relative ease.
The maximum extruder temperature is 260°C, the direct drive extruder simplifies extruder-related issues, and the tempered glass build plate can withstand all of the aforementioned filaments. With upgrades to the nozzle, you’d likely be able to use even more filaments.
Overall, the SV03 is a top runner for a large (but budget) 3D printer. It offers a low price but keeps the most essential features.

We earn a commission if you make a purchase, at no additional cost to you.
Ender 5 Plus
- Price: Check latest price at Creality here / Amazon here
- Build volume: 350 x 350 x 400 mm
- Filament compatibility: PLA, PETG, ABS, TPU, and Wood
- Layer height: 100 – 400 microns
- Printing accuracy: ± 0.1 mm
- Max extruder temp: 260°C
- Max bed temp: 100°C
- Connectivity: SD Card, USB

When you’re looking for budget FDM printers, Creality is a good place to check first – even if you don’t buy a Creality printer, they often have their finger on the pulse of discount printers. The Ender 5 Plus, although more expensive than most Enders, lives up to that.
It’s actually priced higher than the other printers we’re covering here, and it has the quality to match. The 5 Plus has a touchscreen, auto-leveling through BLTouch (not CRTouch, interestingly), and a filament runout sensor.
Not to be confused with the Ender 5 Pro, the Plus’s motherboard is quite loud. You wouldn’t want to set up this printer in a living space. Even aside from that, the Ender 5 Plus is easiest to use when it has plenty of space to call its own: the footprint is 632 x 666 x 619 mm, and the frame includes the spool and power supply.
Out of the overall footprint, the actual build volume is 350 x 350 x 400 mm. This places it at the exact same size as the Sovol SV03, which is no surprise since they’re made to compete with each other.
It has a maximum extruder temperature of 260°C and a bed temperature of 100°C. These specs (and the lack of upgraded extruder parts) mean that the Plus 5 can handle filaments like PLA, PETG, ABS, TPU, and gentler woods.
Other prominent features include a sturdy dual-shaft motor, an immobile bed, and a tempered glass build plate. Overall, the Ender 5 Plus has great functionality and reasonable specs for the price. If you can afford it, you won’t be disappointed by the types of prints it can complete.
We earn a commission if you make a purchase, at no additional cost to you.
Anycubic Kobra Plus/Max
- Anycubic Kobra Plus Price: Check latest price at Anycubic here / Amazon here
- Anycubic Kobra Max Price: Check latest price at Anycubic here / Amazon here
- Build volume: 350 x 300 x 300 mm / 400 x 400 x 450 mm
- Filament compatibility: PLA, PETG, ABS, TPU, and Wood
- Layer height: 100 – 400 microns
- Printing accuracy: ± 0.1 mm
- Max extruder temp: 260°C / 260°C
- Max bed temp: 100°C / 90°C
- Connectivity: SD Card

Anycubic has really spoiled their fanbase with budget, high volume printers. Both the Kobra Plus and the Kobra Max belong in this comparison despite being a hundred or so more than the other printers we covered.
The Kobra Plus has a build volume of 350 x 300 x 300 mm, whereas the Kobra Max has an even more impressive build volume of 400 x 400 x 450 mm. Aside from that, they’re very similar printers.
They both use a carborundum glass build plate, which has many of the same pros as a regular tempered glass plate. It has good temperature resistance and adhesion– although we must admit it isn’t as convenient to remove prints as with a flexible magnetic plate.

Continuing with the shared features, the Kobra Plus and Max have automatic bed-leveling and filament runout sensors. Unlike the other two printers, they have a color 4.3” touch screen. There’s even a pullout tool drawer on the Kobra Plus.
These Kobra printers may cost a bit more, but they haven’t expanded the number of filaments they’re compatible with. You’ll have the most luck with PLA, PETG, ABS, TPU, and Wood.
Regardless, you can be certain that Anycubic printers are reliable, budget friendly, and beginner friendly. Either the Kobra Plus or the Kobra Max is a solid pick if you’re craving extra build volume without sacrificing too much.
We earn a commission if you make a purchase, at no additional cost to you.
We earn a commission if you make a purchase, at no additional cost to you.
Comparison Showdown
Build Volume
| 3D Printer | Build Volume |
|---|---|
| Sovol SV03 | 350 x 350 x 400 mm |
| Ender 5 Plus | 350 x 350 x 400 mm |
| Anycubic Kobra Plus | 350 x 300 x 300 mm |
| Anycubic Kobra Max | 400 x 400 x 450 mm |
The Kobra Max is the biggest printer, with a build volume of 400 x 400 x 450 mm. The SV03 is surprisingly close at 350 x 350 x 400 mm, despite being $170 cheaper. Sadly, the Kobra Plus is lacking in both length and vertical space compared to the SV03.

The Ender 5 Plus costs significantly more than the SV03, as the most expensive printer on the list. But when it comes to build volume, it settles for that middle range of 350 x 350 x 400 mm.

It’s difficult to put these measurements into perspective without considering what you actually want to print, so we’ll talk briefly about a few examples of large prints. We’ll also mention what you can do with smaller printers
Large landscape pieces like this fantasy castle are best served by the biggest printer possible. However, these types of pieces could also work with printers on the lower end of the spectrum like the Kobra Plus. You likely will be happy with the results from any of these printers.
Models and statuettes also come in a variety of different scales, but some scales will be completely inaccessible with the Kobra Plus because of the limited z-axis. For example, a 1:6 scale human model would be around 1 foot. It would easily fit in the SV03, Ender 5 Plus, and the Kobra Max.
Cosplay pieces are one of the main draws of a larger printer. Cosplay armor and even a two-part shield can be printed on the Kobra Max. You could technically get away with doing it on the SV03 or Ender 5 Plus, too– but it would be a tight fit. You’d be very restricted in what types of cosplay pieces you could print on a Kobra Plus.
Masks are a great idea for a cosplay piece that can work with a smaller build volume. The average length of a face is around 200 mm, which means all of the printers could make smaller face masks. The Kobra Plus would be cutting it close.
Noise Estimates
| 3D Printer | Board |
|---|---|
| Sovol SV03 | Creality V2.2.1 Silent Board |
| Ender 5 Plus | Creality V2.2 Non-silent Board |
| Anycubic Kobra Plus | Trigorilla (S010070) |
| Anycubic Kobra Max | Trigorilla (S010075) |
Accurate noise levels depend on a variety of factors, including (but not limited to) the location of the printer, the controller board, the fan, and so on. We’ll be largely basing our estimates for how noisy you can expect the printer to be on the motherboard and word of mouth.
To start with, the Sovol SV03 uses a Creality motherboard designed to be quieter. It’s certainly not the quietest it can be, but it’s generally going to be the quietest out of these printers.
The Ender 5 Plus uses a different Creality motherboard – this time, it’s non-silent. We found this to be somewhat disappointing, since the much cheaper Ender 5 Pro is actually equipped with a silent motherboard. Why not the 5 Plus?
Both the Kobra Max and the Kobra Plus are relatively quiet, around the same point as the Ender 5 Plus. The Kobra Max’s Trigorilla S010075 tends to be slightly quieter.
Extruder Type
| 3D Printer | Extruder Type |
|---|---|
| Sovol SV03 | Direct Drive |
| Ender 5 Plus | Bowden |
| Anycubic Kobra Plus | Bowden |
| Anycubic Kobra Max | Bowden |

The SV03 is unique in this lineup for having a direct drive extruder. This type of extruder has been considered an upgrade in the past, but it does have some drawbacks when compared to Bowden extruders.
A Bowden extruder is mounted on the frame of the printer and then connected to the printhead via tubing. Direct drive extruders combine everything and pack it onto the printhead, which often prevents extrusion-related issues and makes it easier to work with finicky filaments like TPU.
That being said, Bowden extruders keep the printhead lighter, which can result in more accurate and faster prints. Direct drive extruders are still quick and accurate, though. The difference between the two is largely up to personal preference.
We usually recommend a direct drive extruder for the sake of reliability and simplicity. This is especially relevant if you’re new to 3D printing or you hate the troubleshooting process.
It’s possible to upgrade to a direct drive system. The hardware will cost around $40, but it’s not too difficult to set up with a guide.
Build Plate
| 3D Printer | Build Plate |
|---|---|
| Sovol SV03 | Tempered glass |
| Ender 5 Plus | Tempered glass |
| Anycubic Kobra Plus | Carborundum glass |
| Anycubic Kobra Max | Carborundum glass |

Let’s get this out of the way: as far as we can tell, the SV03/Ender 5 Plus’s tempered glass and the Kobra Plus/Max’s Carborundum glass perform about the same. They both have good temperature resistance and adhesion, and glass won’t wear down too quickly.
As far as build plates go, all of these printers are tied. It will be pretty easy to find upgrades regardless of which you choose, too.
Touch Screen
| 3D Printer | Touch Screen |
|---|---|
| Sovol SV03 | No |
| Ender 5 Plus | Yes |
| Anycubic Kobra Plus | Yes |
| Anycubic Kobra Max | Yes |
Only the Sovol SV03 doesn’t have a touch screen.
It could be enough to tip the scales away from the SV03 if you want your printer to feel more premium, although it doesn’t have a meaningful impact on functionality.
It’s also important to note that the SV03 is significantly cheaper than all of these other printers – the lack of a touch screen is no surprise.
Assembly
| 3D Printer | Assembly |
|---|---|
| Sovol SV03 | 5 to 30 minutes |
| Ender 5 Plus | 30 to 40 minutes |
| Anycubic Kobra Plus | 30 minutes |
| Anycubic Kobra Max | 30 minutes |
The assembly times of all of these printers are quite similar, and you can always go faster if you’ve done it before. Anycubic generally ships its printers (including the Kobra Plus and Max) mostly assembled. You only need to plug in some things and tighten screws, for the most part.
Although Creality is similar, the Ender 5 Plus is broken up into slightly more pieces which could increase the assembly time.
As for the SV03, it’s generally going to take around 30 minutes to put it together from the box. You can also buy it pre-assembled from some sites, but it’s easiest to just spend the short amount of time putting it together.
Price
| 3D Printer | Price |
|---|---|
| Sovol SV03 | $400 |
| Ender 5 Plus | $580 |
| Anycubic Kobra Plus | $500 |
| Anycubic Kobra Max | $570 |
Although the Ender 5 Plus’s $580 price tag is intimidating and pushes the boundaries of a budget printer, we included it here because it’s one of the printers people look to first for budget high-volume. Frankly, it’s not your best bet if your priority is the build volume.
The Kobra Max has the same cost-adding features like a filament runout sensor and auto bed-leveling. It’s $10 cheaper for significantly more space with more or less the same specs, and that’s hard to beat.
But we understand cost is (unfortunately) the deciding factor in many situations. The Sovol SV03 is a genuinely good option if you’re chasing a discount. Not only is it at least $100 cheaper than the next best on this list, but it keeps all of the most important features.
There’s not much of a cost analysis to do here when considering the SV03, since it’s so much cheaper and even has cost benefits. For example, anyone who wants a direct drive extruder will be happy that it comes “for free” as the default.
SV03 vs Ender 5 Plus vs Kobra Plus/Max – The Bottom Line
Everything considered, the SV03 is the most worthwhile large-volume discount printer. It’s great value, while still retaining helpful features.
We earn a commission if you make a purchase, at no additional cost to you.
Unfortunately, the Ender 5 Plus isn’t quite worth the price difference. The stable printing system (dual-axis motor and immovable bed) isn’t that much of an improvement over the SV03, nor is the addition of a touchscreen.
When it’s $180 more expensive than the SV03, we would expect some large differences. But the SV03 simply has more cost value than the Ender 5 Plus when all is said and done.
The Kobra Plus and the Kobra Max both have their place as more expensive options for even larger build volumes. We suggest going straight for the Kobra Max if you can afford it, since you get a noticeable build volume increase for $70 more.
We earn a commission if you make a purchase, at no additional cost to you.
There are few differences between the Kobra Plus and Max aside from the build volume, so that should be the deciding factor.
We earn a commission if you make a purchase, at no additional cost to you.
Other similar 3D printer comparisons:
]]>Overall verdict: if you’re on a budget, then I recommend you pick up the Mini+, as long as you don’t need to print large helmets or prototypes. For all other uses, I still recommedn the i3 MK3S+, as it’s just generally more of a sturdy all-rounder, and such great value still at the price.
|
Budget Pick
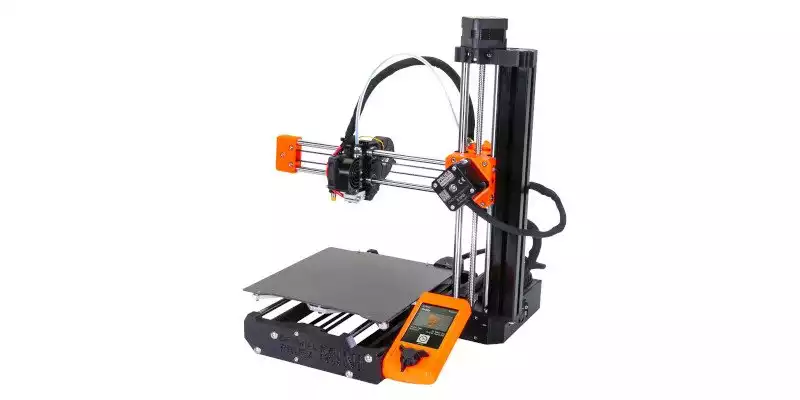
|
Premium Pick
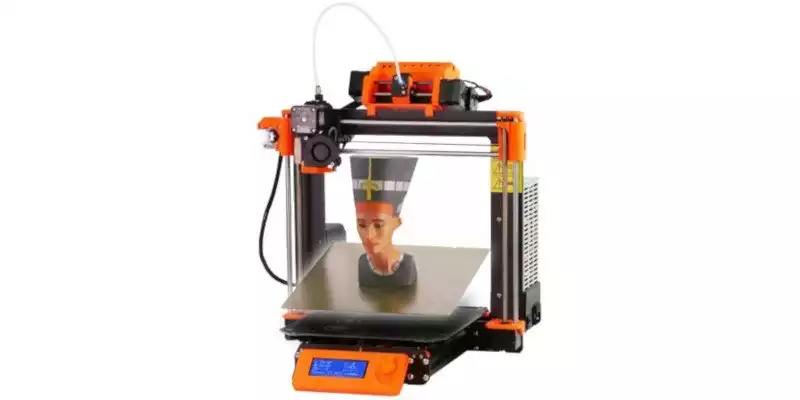
|
|
|
|
|
$399
|
$999
|
|
Build Volume:
180 x 180 x 180 mm
|
Build Volume:
210 x 250 x 210 mm
|
|
Layer Height:
50 - 250 microns
|
Layer Height:
50 - 350 microns
|
|
Extruder Type:
Bowden extruder
|
Extruder Type:
Direct Drive extruder
|
|
Max extruder temp:
280°C
|
Max extruder temp:
300°C
|
|
Max bed temp:
100°C
|
Max bed temp:
120°C
|
|
Filament Compatibility:
PLA, PETG, ABS, ASA, PC, PP, TPU
|
Filament Compatibility:
PLA, PETG, ABS, ASA, PC, PP TPU, nylons, flexibles, polycarbonate, carbon fibers
|
|
|
Budget Pick
$399
Build Volume:
180 x 180 x 180 mm
Layer Height:
50 - 250 microns
Extruder Type:
Bowden extruder
Max extruder temp:
280°C
Max bed temp:
100°C
Filament Compatibility:
PLA, PETG, ABS, ASA, PC, PP, TPU
Premium Pick
$999
Build Volume:
210 x 250 x 210 mm
Layer Height:
50 - 350 microns
Extruder Type:
Direct Drive extruder
Max extruder temp:
300°C
Max bed temp:
120°C
Filament Compatibility:
PLA, PETG, ABS, ASA, PC, PP TPU, nylons, flexibles, polycarbonate, carbon fibers
I’ll go over all of the major similarities and differences (there are plenty of both) for these two printers.
To make things easier, we’ll talk about key features like filament compatibility, price, upgradeability, reliability, and build volume – plus how that will restrict you.
Let’s get started.
Prusa Mini+ vs Prusa i3 MK3S+: A Quick Summary
Prusa Mini+
- Price: Check latest price at Prusa here
- Printing technology: FDM
- Build volume: 180 x 180 x 180 mm
- Filament compatibility: PLA, PETG, ABS, ASA, PC, PP, TPU
- Layer height: 50 – 250 microns
- Printing accuracy: ± 0.1 mm
- Max extruder temp: 280°C
- Max bed temp: 100°C
- Connectivity: USB, SD Card

As an upgrade to the original Prusa Mini, the Mini+ serves most hobbyists quite well. It has a build volume of 180 x 180 x 180 mm. Most mid-range and budget printers, which are often Prusa clones, use a build volume of closer to 220 x 220 x 250 mm.
You have to be okay with the miniature build volume to be interested in the Mini+. But beyond that, the max extruder temp of 280°C and bed temp of 100°C will give you plenty of options for filaments.
Picky, high-temp filaments like carbon fibers or nylons are beyond the Mini+’s capabilities. Aside from that, you have access to all the basics like PLA, PETG, ABS, ASA, PP, and low-temperature PC filaments. You can also work with TPU if you want to play with a flexible filament.
One thing you should keep in mind is that the Mini+ uses a Bowden extruder. In this extruder type, the actual extruder is mounted on the printer’s frame and is connected to the hot-end with a PTFE tube. The Mini+ has a metal nozzle and hot end, which is why it can reach 280°C without breaking down.
Unfortunately, PTFE tubes are all vulnerable to clogging caused by shrinking after consistent exposure to high heats. There were dozens of reports of the Mini+ PTFE tube shrinking, especially after the initial release– but you’re likely to get a nice, long lifespan of a couple years if you’re only using PLA.
The Bowden setup has some implications about extruder-related printer hiccups, extruder maintenance, and even how easy it is to use certain filaments. We’ll talk about this more in-depth in later sections.
With minimal setup or tinkering and consistent performance, the Prusa Mini+ is a good option for a wide range of 3D printing enthusiasts – including professors, print farmers, and independent, small hobbyists. But it’s definitely not the best option if you want to print large designs or use specialty filaments.
Budget Pick
Original Prusa MINI+ Semi-assembled 3D Printer
$399
All the reliability of the Prusa MK3S+, but in a cheaper and smaller pacakge.
We earn a commission if you make a purchase, at no additional cost to you.
Prusa i3 MK3S+
- Price: Check latest price at Prusa here / Amazon here
- Printing technology: FDM
- Build volume: 210 x 250 x 210 mm
- Filament compatibility: PLA, PETG, ABS, ASA, PC, PP TPU, nylons, flexibles, polycarbonate, carbon fibers
- Layer height: 50 – 350 microns
- Printing accuracy: ± 0.1 mm
- Max extruder temp: 300°C
- Max bed temp: 120°C
- Connectivity: USB, SD Card

For a higher price, Prusa’s i3 series trumps the features of the Mini series. The i3 MK3S+ is no exception when compared to the Mini+.
To start with, it has a significantly larger build volume of 210 x 250 x 210 mm. This is still a bit smaller than printers like the Ender 3 S1 Pro (which reaches 220 x 220 x 270 mm), but the MK3S+ does give you a decent amount of room to play with. You can read more about Ender 3 comparisons in our Prusa i3 MK3S+ vs Ender 3 3D printer comparison.
One of the best features of this printer is the wide range of filaments that you can use with it. You’re rarely going to be limited by max temperatures, since the MK3S+ can reach an extruder temp of 300°C and a bed temp of 120°C.
This gives you access to all of the typical filaments (PLA, PETG, ABS, ASA, PC, PP TPU) and specialty filaments like nylons, carbon fibers, and other flexible filaments. It’s also plenty reliable, as you can expect from a Prusa printer.
Although the MK3S+ is just shy of the prices of truly high-end printers, it can still make you feel like you’re getting a high-end product. It’s equipped with ease-of-use features like auto bed leveling, a filament runout sensor, and has a revamped direct drive extruder that allows for easier maintenance.
All in all, the Prusa i3 MK3S+ is an ideal printer for those who want to minimize tinkering and maximize reliability with a wide range of filaments. If you can stomach the higher price, it will be able to print significantly more than the Mini– both in filament types and size of prints.
Original Prusa i3 MK3S+ kit
The best 3D printer kit of all time. If you have $1,000, this is some of the best value you can get.
We earn a commission if you make a purchase, at no additional cost to you.
The Similarities
They’re from two distinct printer lines, but in a lot of ways, the i3 MK3S+ is like an upgraded version of the Mini+. Many features and specs see the MK3S+ pull to the front as the clear winner.
Still, it’s not a flat upgrade in every category. The real question is whether or not you actually need the upgrades that do exist, or if the Mini+ is serviceable for you with a better price.
As such, we’ve listed the basic similarities between the MK3S+ and the Mini+ so that you can see which features hold true for both printers:
- Filament runout sensor
- Automatic bed-leveling (SuperPinda Probe inductive proximity sensor)
- Compatible with at least PLA, PETG, ABS, ASA, PC, PP, and TPU
- Easily compatible with the free and open-source PrusaSlicer
- Rotary knob controlled screen
- 0.4mm width nozzle
- Magnetic heatbed and removable PEI spring steel sheets, with options of textured, smooth, or satin extra sheets
The Differences
We’ll be going into detail further below, but let’s start off with a simple overview of all the differences between these two printers.
| Prusa Mini+ | Prusa i3 MK3S+ | |
|---|---|---|
| Build Volume | 180 x 180 x 180 mm | 210 x 250 x 210 mm |
| Layer Height | 50 – 250 microns | 50 – 350 microns |
| Extruder Type | Bowden extruder | Direct Drive extruder |
| Max Extruder Temp | 280°C | 300°C |
| Max Bed Temp | 100°C | 120°C |
| Filament Compatibility | PLA, PETG, ABS, ASA, PC, PP, TPU | PLA, PETG, ABS, ASA, PC, PP TPU, nylons, flexibles, polycarbonate, carbon fibers |
| Price (Kit/Assembled) | $429/$459 | $799/$1,099 |
Build Volume
| 3D Printer | Build Volume |
|---|---|
| Prusa Mini+ | 180 x 180 x 180 mm |
| Prusa i3 MK3S+ | 210 x 250 x 210 mm |
With a significantly larger build volume of 210 x 250 x 210 mm, the i3 MK3S+ is the only real option for larger prints. As the name implies, the Mini+ is stuck with a small, compact form– for better or for worse.
When it comes to build volume, it’s definitely for worse since it only has 180 x 180 x 180 mm to work with. Even cheaper printers (like some of the members of the Ender 3 series, the Anycubic Kobra, and the Elegoo Neptune 3) usually have at least 220 x 220 x 270 mm.
The Mini+ is simply a no-go if you ever want to print larger projects. You can’t reasonably upgrade it to have a larger build volume, and by default, its build volume is meant for small to mid-sized projects.

Layer Height
| Prusa printer | Layer Height |
|---|---|
| Prusa Mini+ | 50 to 250 microns |
| Prusa i3 MK3S+ | 50 to 350 microns |
The i3 MK3S+ has a slightly wider range when it comes to layer height. It caps out as 350 microns as opposed to the Mini+’s 250 micron maximum. Still, we feel that it’s unlikely this difference is going to be meaningful for the quality of your prints.
Ultimately, you’ll likely have access to the layer height you need to succeed regardless of which printer you choose in this scenario. It’s not a limiting factor or a major improvement.
Extruder Type

A big difference between the Mini series and the i3 series is the type of extruder they use. In the former, you’ll be working with a Bowden extruder. The latter series uses direct drive extruders.
There are many who consider the direct drive extruder to be a purely better alternative to the Bowden extruder, but it does have some downsides. For example, direct drive extruders tend to be more difficult to maintain since it’s harder to access all of the parts.
One of the benefits of the i3 Mk3S+ over prior i3 models, though, is that it uses an improved direct drive extruder form that’s intended to be easier to perform maintenance on or upgrade.
Another point in favor of a Bowden extruder is that the printhead (which doesn’t directly hold the extruder) is lighter. It can move quickly and might be quieter– although how much depends on a variety of factors like the project, the printer itself, and so on.
Overall, we’d still say that the direct drive is an improvement in this situation. A direct drive extruder often sidesteps extrusion-related problems, which makes troubleshooting significantly easier.
If you’re looking to start up a print farm, the last thing you want is to have to do more troubleshooting or tinkering on your collection of printers. We also have a more comprehensive guide on the difference between these two types of extruders.
Max Extruder and Bed Temps
| 3D Printer | Print Bed Temp | Extruder Max Temp |
|---|---|---|
| Prusa Mini+ | 100°C | 280°C |
| Prusa i3 MK3S+ | 120°C | 300°C |
The difference isn’t huge, but it’s a meaningful one. Between the MK3S+ and the Mini+, the MK3S+ has higher temperature tolerance across the board.
A max extruder temperature of 280°C on the Prusa Mini+ gives it access to a variety of basic and easier to use filaments. The print bed is a little restrictive, at 100°C.
But neither of those max temperatures allow for the same kind of flexibility as the MK3S+ when it comes to which filaments you’ll be able to use. As a higher quality printer, it has access to a maximum extruder temperature of 300°C and a print bed temperature of 120°C.
Filament Compatibility
You might think that you’re fine with using the Mini+ so long as you don’t want to use highly specialized filaments like carbon fiber or nylon. Unfortunately, the Mini+’s features (or lack thereof) can result in struggling with easier filaments, too.
The direct drive extruder of the i3 MK3S+ is usually a better bet for flexible filaments like TPU. Plus, being able to heat filaments like PP and PC up to higher temperatures can resolve some potential issues you’ll run into while printing.
All in all, it’s safe to say that the MK3S+ has a drastically larger pool of filaments to work with. The Mini+ is just not built for working with specialized filaments.
If you’re interested in operating a print farm, the i3 MK3S+’s range of filaments will give you more options for product designs. On the other hand, though, the Mini+ could be perfectly functional if you know your products will never use fancier filaments.
Upgradeability
It feels like the cheaper Mini+ is ripe for upgrades, seeing as it falls behind in most feature and spec comparisons. But it mostly benefits from an upgrade to the hot end in the extruder to make it more resilient, and not much else.
Without some serious effort, it would be difficult to outfit the Mini+ with an extruder that can handle special filaments. You also can’t really upgrade the build volume, which is the biggest downside of the printer.
Upgrades that are available to the i3 series, like the Multi-Material Upgrade 2.0, don’t work for the Mini series because of the different extruder type.
To help the Mini+ along with filaments like ASA or PP that really benefit from high temperatures and a warmer printing environment, you can use the official Prusa enclosure.
It was originally built to fit the i3 MK3S+, but in a pinch it could easily work for the Mini+. You do also have the option of using an enclosure specifically for the Mini+, like those that are offered by Tukkari.
There are actually a wide variety of Prusa enclosures out there beyond the ones we mention here, which we’ve written about in our DIY prusa enclosures article.
All things considered, the two printers are quite similar in terms of how upgradeable they are. The MK3S+ has slightly more options, but also has less need of an upgrade in general. Plus, you’re not as likely to have room in the budget for upgrades if you opt for the pricier MK3S+.
Price
| 3D Printer | Price (Kit / Assembled) |
|---|---|
| Prusa Mini+ | $429/$459 |
| Prusa i3 MK3S+ | $799/$1,099 |
Despite the many advantages of the i3 MK3S+, the price difference might be enough to tip the scales in favor of the Mini+. This is especially true if you need to purchase a larger number of printers, or you’re new to the 3D printing scene and would prefer a budget option.
Even the semi-assembled version of the Mini+ only costs $459. That’s around half the price of just the non-assembled kit version of the Prusa i3 MK3S+. With a $400-$500 difference between them (depending on the version you purchase), the price contrast is nothing to scoff at.
With the Mini+, you could purchase two for every single MK3S+. The fully assembled version of the MK3S+, which costs $1,099, does come with a discount on future printer and filament purchases of 10%.
In fact, the kit version also comes with a discount. It’s smaller than the assembled version at 5%. This bonus really helps even out the costs a little over time, but it would definitely take a while to ‘make back’ your money through filament discounts.
Prusa Mini+ vs Prusa i3 MK3S+– The Bottom Line
The Prusa i3 MK3S+ is the superior printer when purely comparing specs. It’s more reliable thanks to the direct drive extruder, has a wider range of filaments, and has a larger build volume.
As an alternative for smaller budgets and newer hobbyists, the Mini+ still has a place in the market. It won’t give you too much trouble, and if you ever want to build a print farm in the future, the Mini+ will work just fine.
Essentially, the i3 MK3S+ is the printer for you if you want the strictly better features it offers. The Mini+ is more than good enough if you aren’t planning on using specialty filaments, making large prints, and don’t mind the occasional tinkering.
Both printers are reliable and hardworking. So long as you’re okay with their limits, they won’t let you down. They’re two of the best Prusa 3D printers around, and whichever you choose, you’ve made an excellent choice.
Beyond comparing the Prusa i3 MK3S+ vs the Prusa Mini+, you may also be interested in a comparison between the Prusa Mini vs Ender 3 printers.
]]>I recommend the Anycubic Kobra for beginners looking for an affordable 3D printer that is compact, easy to use, and will produce good-quality prints right out-of-the-box.
The Vyper, on the other hand, is a premium option with a larger build volume and faster print speeds, making it a good choice for experienced users who want to print more ambitious projects.
With hands-on experience testing both the Anycubic Kobra and Vyper, I’ll help you work out which is best for you, comparing their features and specifications to zero in on what sets them apart.
Is the Anycubic Vyper’s boosted build volume worth the extra spend, or will you be more than content with the compact Anycubic Kobra? Let’s find out.
Anycubic Kobra vs Vyper: A Quick 3D Printer Comparison
BUDGET PICK
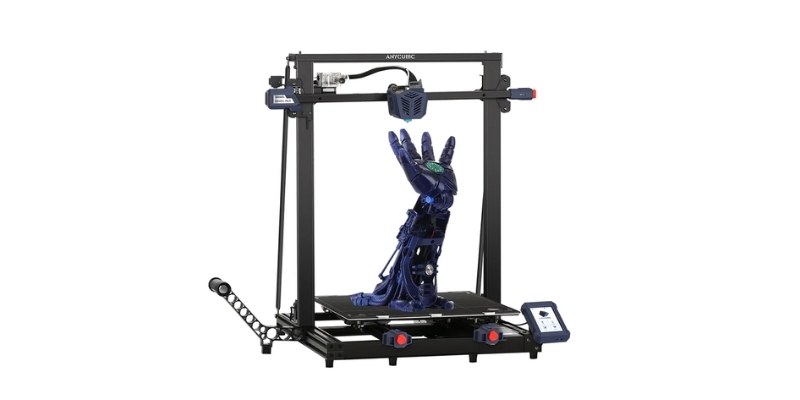
Anycubic Kobra
Print Technology: FDM
Build volume: 220 x 220 x 250 mm
Filament compatibility: PLA, ABS, PETG, TPU
Layer height: 50-300 microns
Printing accuracy: ± 0.1 mm
Max nozzle temp: 260°C
Max bed temp: 110°C
Connectivity: USB, Micro SD Card
Available at:
PREMIUM PICK
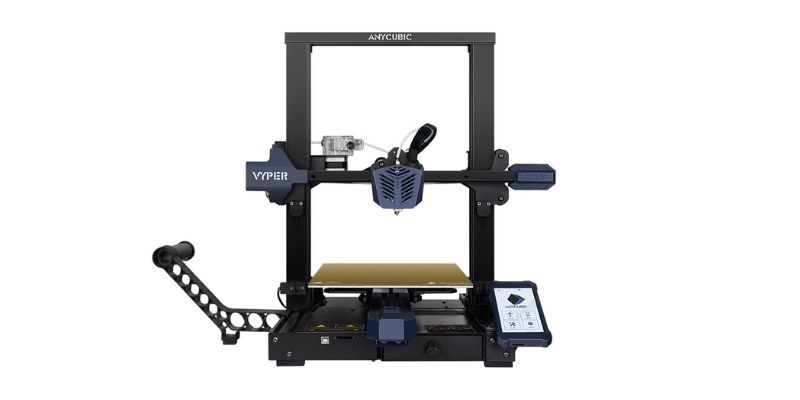
Anycubic Vyper
Print Technology: FDM
Build volume: 245 x 245 x 260 mm
Filament compatibility: PLA, ABS, PETG, TPU
Layer height: 50-300 microns
Printing accuracy: ± 0.1 mm
Max nozzle temp: 260°C
Max bed temp: 110°C
Connectivity: USB, Micro SD Card
Available at:
3DSourced is reader-supported. When you buy through links on our site, we may earn an affiliate commission. Learn more
Anycubic Kobra
Pros
Hassle-free experience.
Impressive quality prints.
One of the best budget 3D printers around.
Cons
Finicky software.
Lots of cut costs are present.
The Anycubic Kobra launched in 2022 to rave reviews, including our own, redefining what we should come to expect from race-to-the-bottom entry-level 3D printers and making an emphatic claim to the Ender 3’s budget king crown.
With hassle-free automatic mesh bed leveling, sensorless homing, a convenient PEI-coated magnetic bed, and a direct drive extruder setup, the Anycubic Kobra doesn’t just tick off many quality-of-life boxes but produces impressive quality prints and, with a little shepherding in the right direction, is a genuine pleasure to use.
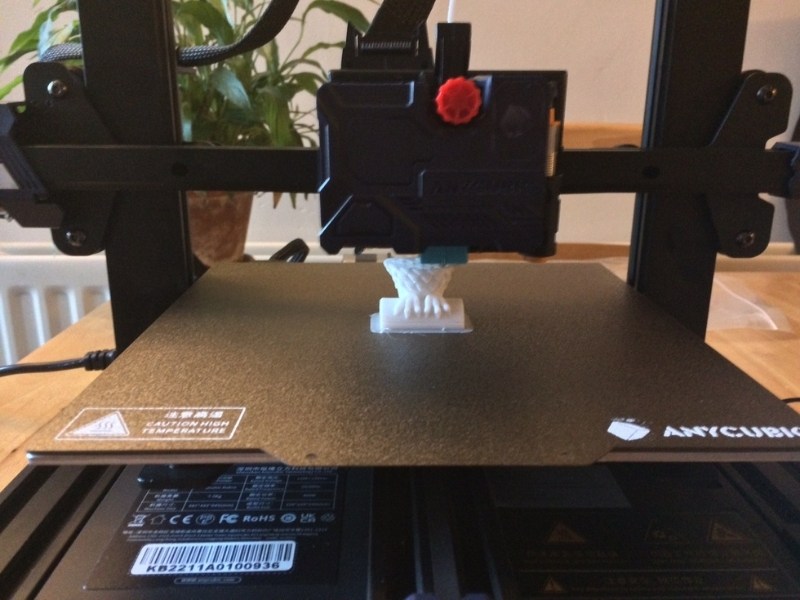
Compromises to cut costs are present but appear in places that don’t affect the print quality or experience too much, namely a plastic heavy print head casing.
Finicky software wrangling and the absence of tuned slicer profiles detract from the worry-free printing promised by the best Anycubic 3D printers. Still, the Kobra delivers enough top-flight features for the price that we’ll excuse these.
Anycubic Vyper
Pros
Removes much of the initial setup and tedious leg work.
Excellent value for money.
Cons
Bit more expensive than the Anycubic Kobra.
A tad longer in the tooth than the newly-launched Kobra, the Anycubic Vyper hit the market to similar critical fanfare, defining itself as offering a digestible and intimidating introduction to the marvelous world of 3D printing to newcomers. Here at 3DSourced, we were impressed with everything the Vyper offers.
It removes much of the initial setup and tedious leg work with automatic mesh bed leveling, the same ultra-adhesive PEI-coated magnetic bed as the Kobra, a dual-gear extruder, and a Volcano-style hot end. In action, this means no first-layer woes, easy setup, and excellent value for the money.
It also has an above-average 260 x 245 x 245 mm build volume to tackle larger projects and print-in-place parts.
Much like the Kobra, the Anycubic Vyper relies on tuning to perform at its best, but this also makes it an exciting proposition for seasoned makers looking for a versatile budget workhorse to supplement an existing fleet of printers.
Anycubic Vyper vs Kobra: At a Glance
Best for value: For pure value at a price that rivals, and sometimes improves, many of the best low-cost 3D printers, the Anycubic Kobra is ideal for beginners. It’s compact, easy to use, and pumps out good quality prints out-of-the-box. The Kobra should follow along as your skills develop, coming to life as you learn to tame and tune its minor downsides.
Premium option: The Anycubic Vyper emerges as the best option for those who will use the extra build volume and the increased print speeds offered by its Bowden extruder setup. Whether these features are worth the additional $60 is debatable, especially if you’re a first-timer who’ll be more than content with what the lower-cost Kobra offers.
Anycubic Kobra vs Anycubic Vyper: 3D Printer Comparison
Build Volume
| Anycubic Kobra | Anycubic Vyper |
|---|---|
| 220 x 220 x 250 mm | 245 x 245 x 260 mm |
The Anycubic Kobra offers a 220 x 220 x 250 mm build volume, while the Anycubic Vyper pushes to 245 x 245 x 260 mm, exceeding what we’d expect in this price range.
A large build volume equates to more print options: more efficient batch printing and larger parts, for example.
The Anycubic Kobra’s build volume is bang on average when compared to 3D printers in its price range. Those dimensions should allow you to print a vast cross-section of popular hobbyist projects from your favorite video game characters and display pieces through to functional and household parts.
If the Vyper’s extra millimeters seem surplus to requirement and you’re on a budget, the Anycubic Kobra emerges as the better option.
However, if the Kobra’s average build volume is likely to limit your printing projects, but you don’t need the kind of space found on a large format printer like the Ender 5 Plus, the Anycubic Vyper offers a well-priced compromise.
Which is best: Anycubic Vyper.
Print Bed
Both the Anycubic Kobra and Vyper feature a PEI-coated removable magnetic spring steel build platform.
It consists of a 3M magnetic sticker, a spring steel sheet, and a coated top layer. It’s scratch-resistant and can be washed to remove any filament, oil, or other dirt with soap and water. The flexibility of the print bed allows you to flex and pop off finished prints with little effort.
The top coating is coarsely textured to improve first-layer adhesion, removing the need for extra adhesives like glue or tape. The textured surface leaves a grainy imprint on the underside of prints, spoiling first-layer details, but this applies to both printers, so it’s unavoidable whichever you buy.
There’s also the option to replace the existing surface with a glass plate or a less textured flexible plate.
Which is best: draw.
Bed Leveling
Although the Anycubic Kobra and Vyper offer convenient automatic bed leveling – still rare in this price range – the former uses a more refined version of Anycubic’s first-attempt, rudimentary ABL setup found on the Vyper.
While leveling the bed on both printers is a breeze, and both use a point mesh leveling routine to map out inconsistencies on the bed and compensate for them, we found the Kobra slightly surpasses its older stablemate.
The Kobra’s LeviQ inductive probe is somewhat more refined and accurate than the Vyper’s pressure strain gauge system – 24 mesh points rather than the Vyper’s 16.
The leveling results are roughly equivalent, so we’re nitpicking here. But, considering the Kobra costs less, it’s an advantage that makes us lean in the newer printer’s favor.
Which is best: draw/Kobra.
Extruder
Aside from build volume, the type of extruder setup is where the Anycubic Kobra and Vyper differ the most from one another.
The Kobra features a direct drive extruder – the filament feeds directly in the hot end assembly, pushed and pulled by a straightforward toothed drive gear extruder integrated into the print head.
Direct extruders add additional mass to the print head, but a shorter filament path allows for better retraction performance, extrusion consistency, and support for trickier flexibles. The extra weight the direct systems carry around can affect speed and travel accuracy due to increased wobble and vibrations, but the Kobra’s plastic-heavy casing design keeps things light.
In our experience, it mitigates the typical downside of a direct extruder well. It’s one of the better direct drive extruder implementations we’ve come across for an under $300 printer.
The Anycubic Vyper employs a Bowden system. A dual-geared extruder sits separate from the print head (usually mounted to the frame) and pushes the filament through an extended cut of tubing toward the hot end.
The chief benefit is a lighter print head, allowing for faster print speeds and smoother movements, but at a cost to retraction accuracy. Bowden systems also tend to increase the likelihood of flexible filaments like TPU jamming or snapping in the tube.
There’s no clear winner here as both systems have pros and cons. If you plan on dabbling into squishy flexibles, you’ll likely have an easier time with the Kobra than the Vyper.
Which is best: depends on what you plan to use the printer for.
Material Compatibility
The Anycubic Kobra and Anycubic Vyper boast identical material compatibility – PLA, ABS, PETG, TPU – enabled by matching top max 260°C nozzle temperature and max 110°C heated bed temperature.
Without an enclosure, ABS will be tricky to print on both machines. You can purchase one directly from Anycubic or build one yourself.
PLA is where both printers shine, though with the proper tuning, both confidently churn out good quality flexible and PETG prints. On equal footing, then.
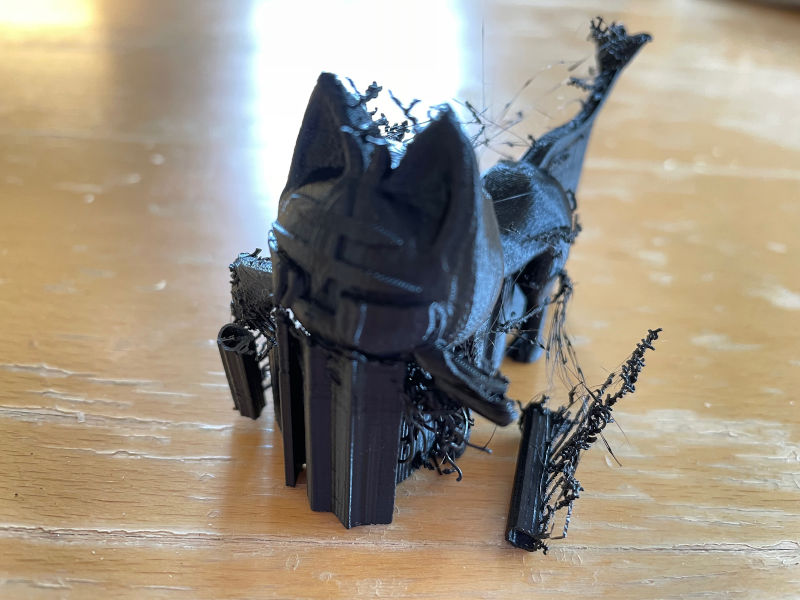
Ease of Use and Assembly
Anycubic provides some of the industry’s most concise and informative assembly and quick-start instructions, and this is no different with the Kobra and Vyper.
Both ship with a color booklet and a USB drive with even more resources to ease the build and setup process. The transformation from boxed parts to a print-ready machine is a cinch and shouldn’t take more than 30 minutes, even if either the Kobra or Vyper is your first printer.
Both machines feature the same responsive 4.3″ touch screen and slightly pared-down but easy-to-navigate interface. They also sport USB and SD Card connectivity, though the Kobra shrinks the latter down to the Mini variant.
Overall, the Anycubic Kobra and Anycubic Vyper are cut from the same signature Anycubic cloth – a frictionless, enjoyable experience that removes the more tedious aspects of 3D printing. In that sense, there’s little to set them apart.
Though the printers benefit from some nurturing and settings tuning, both of Anycubic’s inexpensive printers try and largely succeed at making 3D printing as hassle-free as possible.
Price
Price is a major factor in most purchasing decisions, especially in low-cost printers. After all, we’re looking for those standout machines that strike that elusive balance between price, features, and performance.
Not much separates the Anycubic Kobra and Anycubic Vyper: a slim $60.
In the context of a $300 printer, $60 looms as quite a substantial amount. So, the question is whether the Vyper’s build volume boost and nippier dual-gear Bowden extruder provide enough value for you to shell out the extra coin.
If that’s a resounding no, save some money and go for the Kobra. Worthy features, all-around usability, and impressive printing capabilities make it a strong buy and the most-value packed budget printer on the market today.
Anycubic Kobra vs Anycubic Vyper – The Winner
With so little setting the two printers apart, there’s no clear-cut winner in our Anycubic Kobra vs Anycubic Vyper head-to-head. It really depends on what you’re personally looking for.
For first-timers on a budget, the Vyper doesn’t offer much more than the Kobra that will prove useful for everyday hobby projects. The slightly smaller build volume will be fine for you.
For power users wanting that extra build volume and the benefits of the Bowden extruder, the Vyper may prove a wiser investment.
Whichever printer you settle on, be assured that both tap into what we’ve come to expect from Anycubic’s excellent FDM range: a sleek, low-cost, reliable printer that’s a lot of fun to use.
BUDGET PICK
Anycubic Kobra
Available at:
PREMIUM PICK
Anycubic Vyper
Available at:
Related articles:
]]>